


 1 Comment
 Printing
 07.07.25
 11.12.23
Discover and Master the Art of 3D Pen Drawings - A Step-by-Step Guide for 2D and 3D Objects and Sculptures
In this comprehensive guide, you can easily learn why and how to use a 3D Pen for a variety of 2D and 3D Art and Craft projects
As you might already know, the 3D printing pen is one of the newest and most searched-for tools in the vast universe of Arts and crafts enthusiasts. And trust us, there are lots of reasons why! In this 3D Pen tutorial, we will guide you through everything you need to know about what a 3D Pen is, what filaments to use (what ABS and PLA are), and how to create 2D drawings and 3D sculptures, doodles, artistic 3D crafts, and even everyday tips with it!
So, let’s learn the basics of working with a 3D Pen and the needed supplies, so we can jump into the even more interesting part - crafting 3D shapes and sculptures!
What is a 3D Pen and How to Prepare it for Usage?
The 3D pen is a relevantly new invention - the very first 3D pen was created in 2012. However, now, in 2023, this marvelous tool is used by artists, craftsmen, and handymen alike, and here’s why:
The 3D Printing Pen is a revolutionary combination of drawing with regular pens and the 3D printer. It allows us to create three-dimensional objects, magically drawing even in thin air easily!
In essence, the 3D Pen heats the chosen plastic filament we put inside it through the nozzle at the end, and forces it out through its front tip. The key point here is that once the heated plastic goes out of the pen, it starts to harden. As we can use the pen by choosing how to move it while the filament extrusion happens, the best 3D Pen quality is that it allows us to draw in 3D whatever sculpture or shape we desire!
However, if you’re new to this practical concept, to deeply understand how this tool works and start creating your 3D masterpieces, you’ll first have to inspect and prepare the 3D Pen before you use it.
What are the different parts of the 3D Pen Kit and How to Prepare it for Drawings into 3D Objects - A Beginner’s Guide
Keep in mind, that to guide you through its parts and steps, we’ll show you pictures of our 3D Pen Set with 12 colors of PLA filament x 3 meters - 3D Pen-2 "Draw Your Dream". Whatever kind of 3D Pen you choose to use, always go through its instructions, before usage!
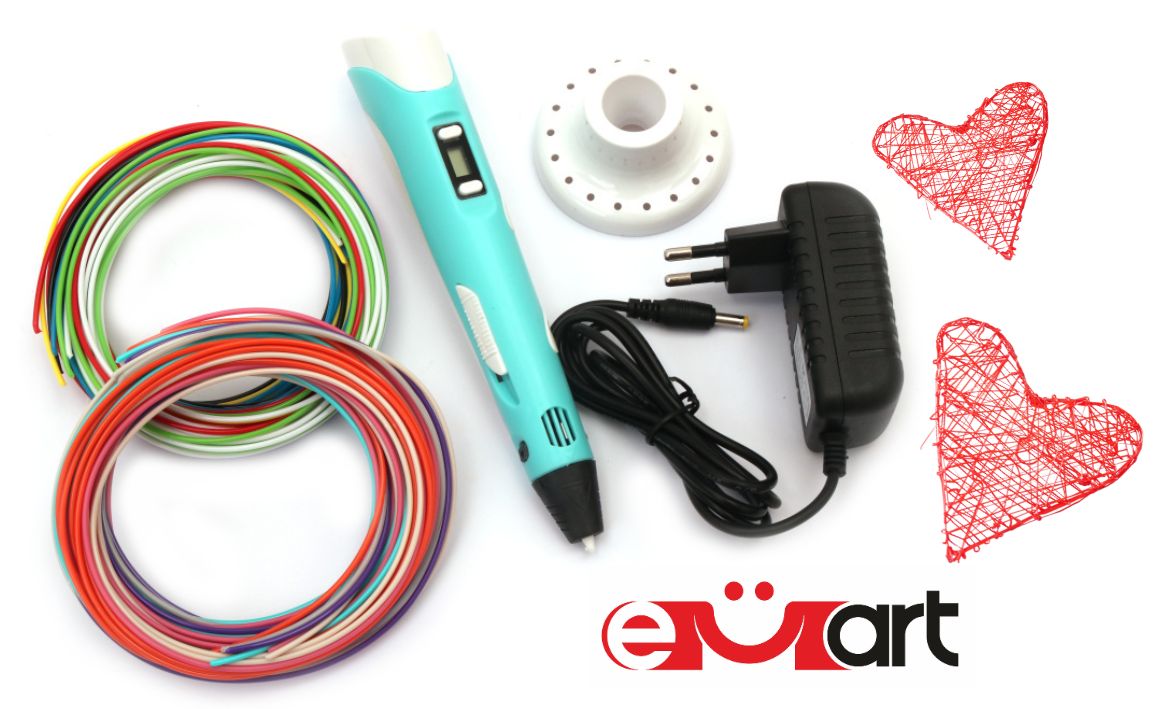
First, let’s check out the additional materials and supplies in this kit that are needed for the pen’s proper usage:
- 1 Power Adapter: It needs to be connected to the socked and the 3D Drawing Pen at all times while working with it.
- 1 Pen Holder: As we mentioned earlier, while you’re using the pen, it heats the plastic inside to be able to extrude it as thin and shapable until cooled. For that reason, every time you need to leave the already turned-on 3D Pen even for a minute, using the safe holder whenever you want to is an easier and safer option than anything else.
- 1 3D Pen-2 Operation Instruction: It provides essential information on how to operate the pen safely and effectively. The instructions will guide you on important aspects such as temperature settings, filament insertion, maintenance, and troubleshooting.
- 12 PLA filaments x 3 meters each in different colors: PLA is a biodegradable thermoplastic made from renewable resources such as cornstarch or sugarcane. It has a lower melting point compared to ABS plastic, making it easier to print with and great for beginners. PLA is known for its environmental friendliness and is commonly used in 3D printing for creating 3D prototypes, decorative items, and educational projects. It produces less warping and has a slight sweet odor when melted.
After you have become more familiar with these additional materials, let’s now go through the main buttons and holes on a 3D pen. This will help beginners to understand the basic controls and features of the device, and how to prepare it for their first tries:
1. Power Input Hole:
You can find this hole in the upper end of the pen.
To turn on the 3D Pen, you first need to plug the AC adapter into the electrical outlet, and the other end (DC) into the power input hole of the 3D Drawing Pen.
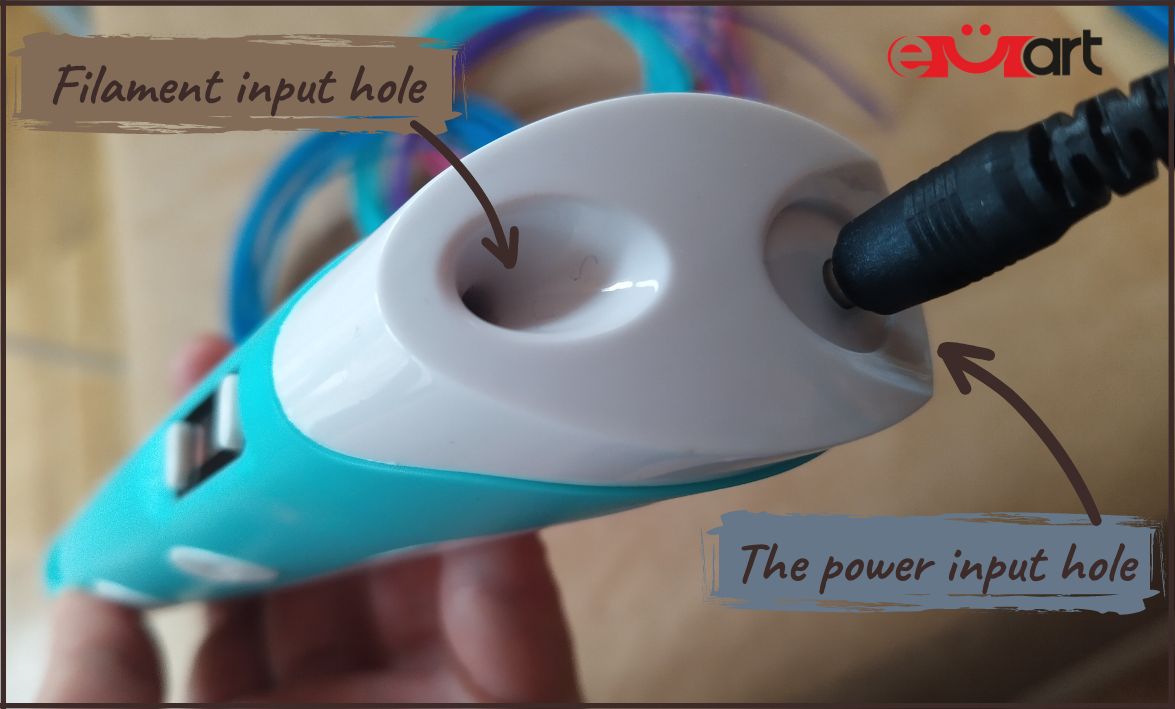
2. Filament Input Hole:
This is where you insert the filament into the pen. This particular 3D Pen, it is located at the top of the pen. Make sure to follow the instructions provided to load the plastic thread correctly.
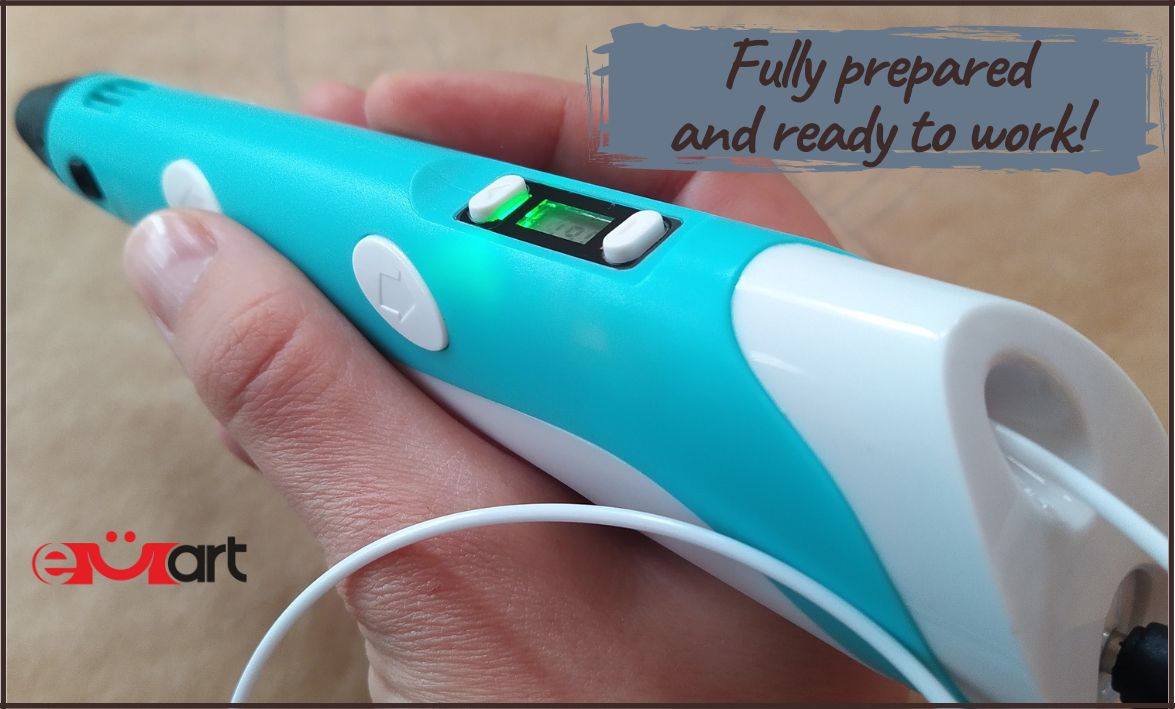
3. LCD Screen
The LCD screen at first displays the names of the two types of plastic fiber you can choose from for this particular pen – “PLA” or “ABS”.
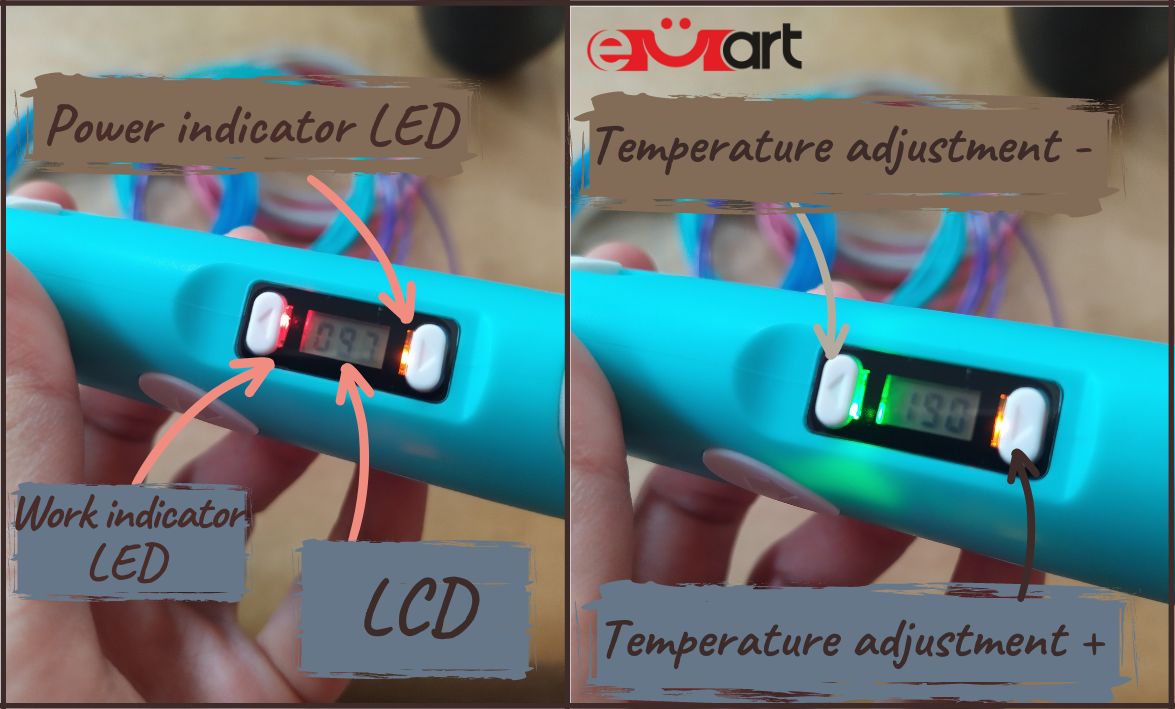
Once you’ve chosen the material you want to use, the selection on the LCD should be with the same settings.
4. Temperature Control Buttons:
Temperature control is an important feature in 3D pens. This 3D pen has two buttons that allow you to adjust the temperature of the pen’s nozzle according to the type of plastic you are using. As you already know, different filaments require different melting temperatures, so it’s crucial to set the temperature correctly for optimal results.
In the picture above, you can see that once the right temperature for the chosen filament is fully heated according to the chosen material, and the pen is safe to use, the LED on the left lights green.
5. Filament Loading and Unloading Buttons:
This 3D pen has separate buttons or mechanisms to load and unload the abs or pla filament when you need to start drawing, change colors, or remove it. The loading button is used every time you want to refill the pen with a new filament and start extracting it through the tip of the nozzle.
To load the chosen material into your 3D pen, insert it into its input hole, click the “filament load button” and keep pressing it until there is material coming out of the top of the nozzle.
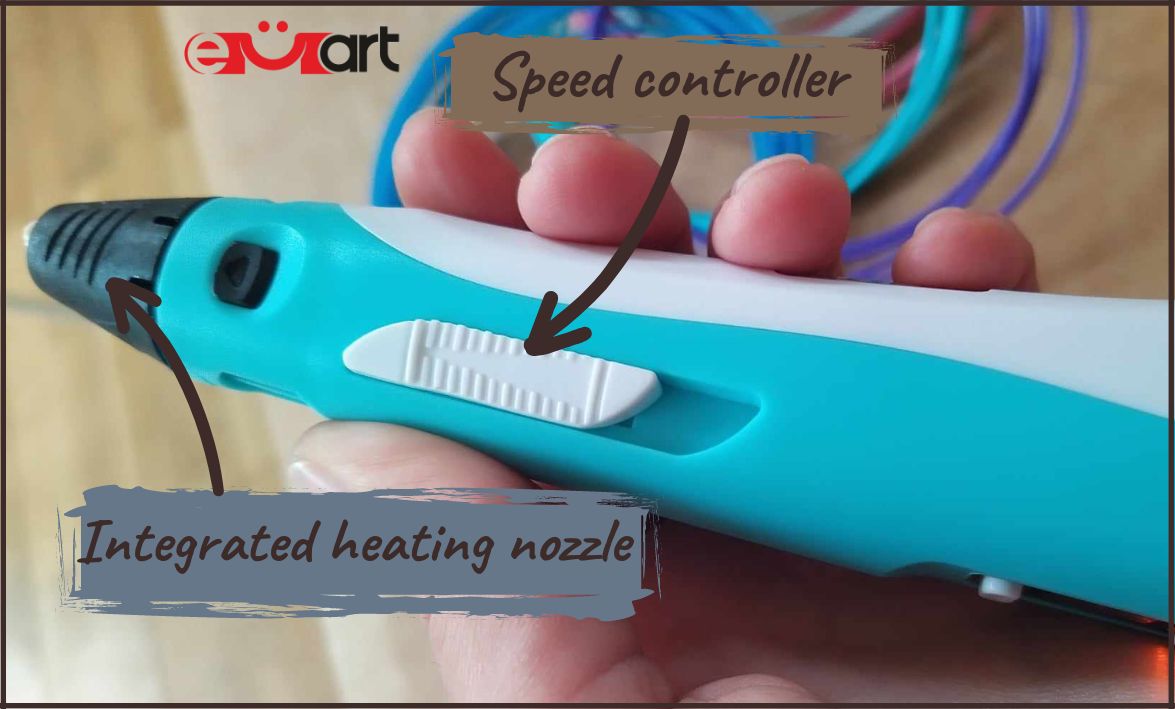
How does the heating nozzle work inside the pen?
If you are curious how exactly this process happens through the pen from a technical point of view, here is a simple explanation:
When the 3D printing pen is already turned on and set up with the necessary parameters, by pressing the filament feed button, it begins to extrude the plastic filament to the heating nozzle. Once the material is heated and liquefied enough, it begins to emerge from the tip of the nozzle as a thin and easy-to-model filament, completely ready for the 3D creative projects that matter!
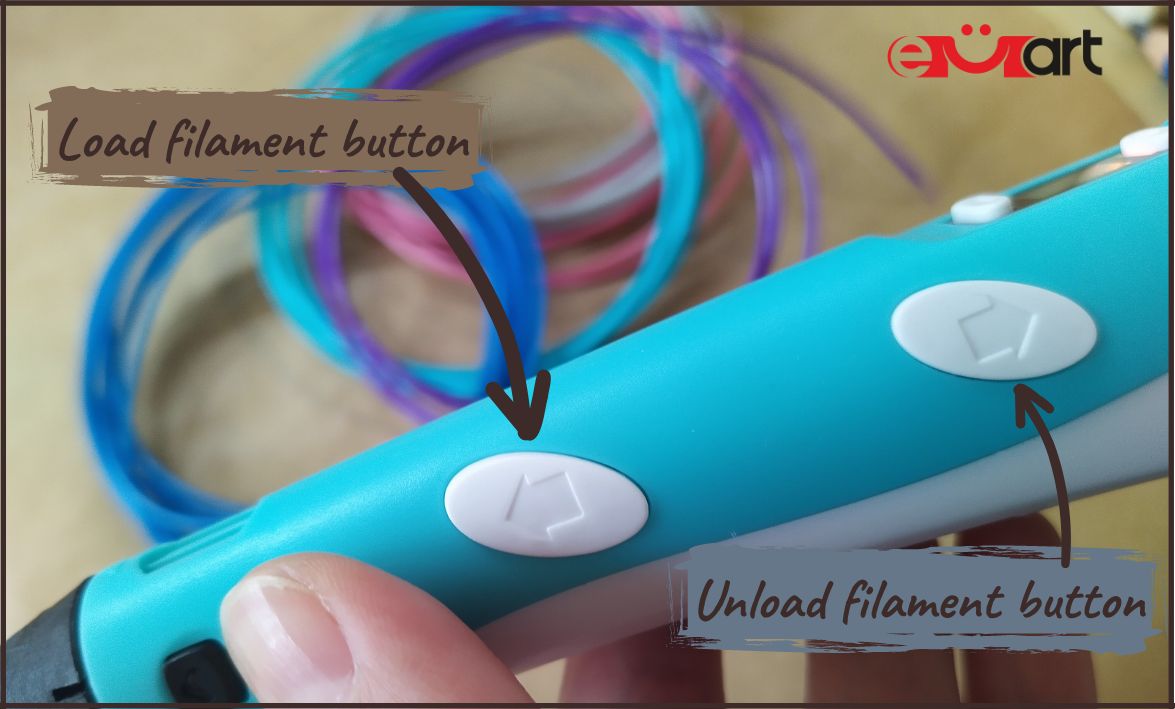
The unloading button, located closer to the loading hole, is used when we want to take out the used material from the pen. The way to use it is similar; just keep pressing the unloading button until the used filament comes out from its input hole.
6. Speed Control Button:
Many 3D pens, this one included, have a speed control feature that allows you to adjust the extrusion speed of the filament. This button lets you toggle between different speed settings, allowing for greater control over your creations.
Once the power is on, the material loaded, and the temperature set, you can start crafting with the 3D pen freely!
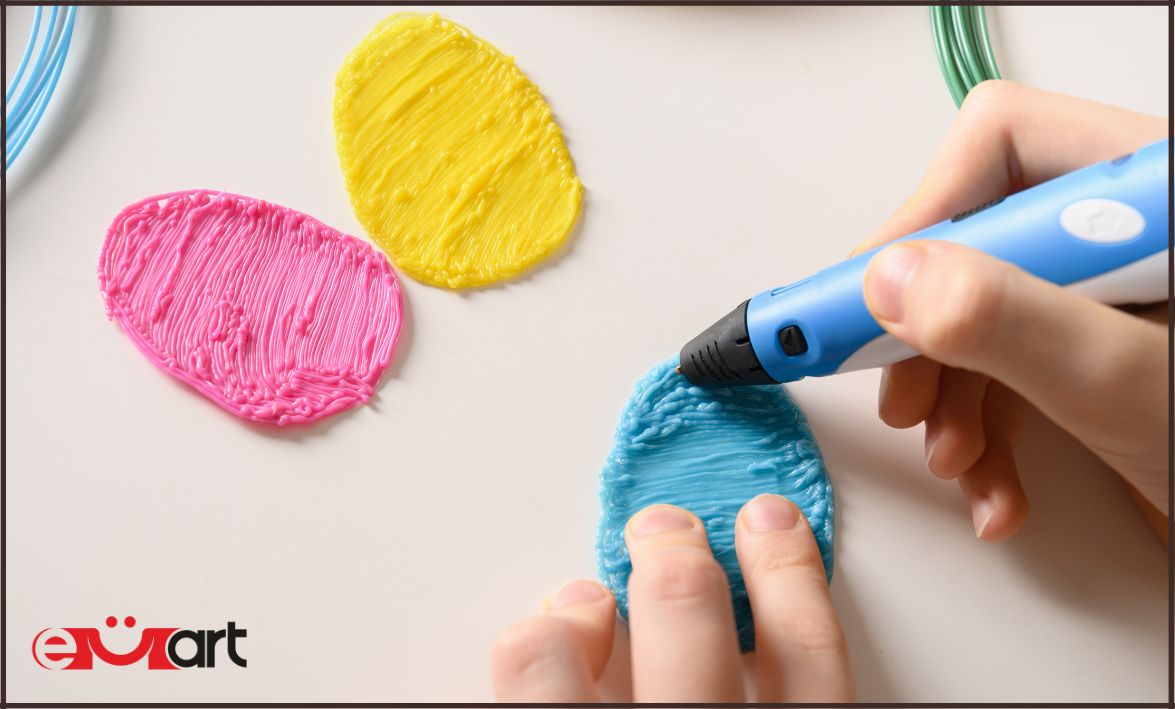
How to use a 3D Pen for 2D and 3D Art and Craft projects
The 3D printing pen can be used in many ways, but if you are a beginner, we suggest starting with simpler 2D figures or drawing 2D parts of your first three-dimensional objects. This way, you can train your hand-eye coordination and get comfortable with the pen’s controls and movements.
Tip: For your first try with the 3D pen, using stencils can be a helpful tool. Stencils provide pre-drawn outlines or shapes that you can trace with the pen, allowing you to create more accurate and precise designs.
When you are ready to move on to creating 3D objects, you can again start by sketching the 2D parts. This will serve as the foundation for your final creation. Take your time and carefully build each layer, allowing the plastic thread to cool and harden before adding the next one. You can experiment with different colors and textures to add depth and visual interest to your designs.
Of course, if you prefer to start by drawing freehand 3D objects, you can! Here you can see our blogger’s first attempts to create 3D decorative cups, using the 3D Pen-2:
D: As I am a beginner myself, but I couldn’t wait to check out the 3D possibilities of this magical pen, I chose to use a simple cup as a base to try to create a floral decorative object. Here you can see my first part of it:
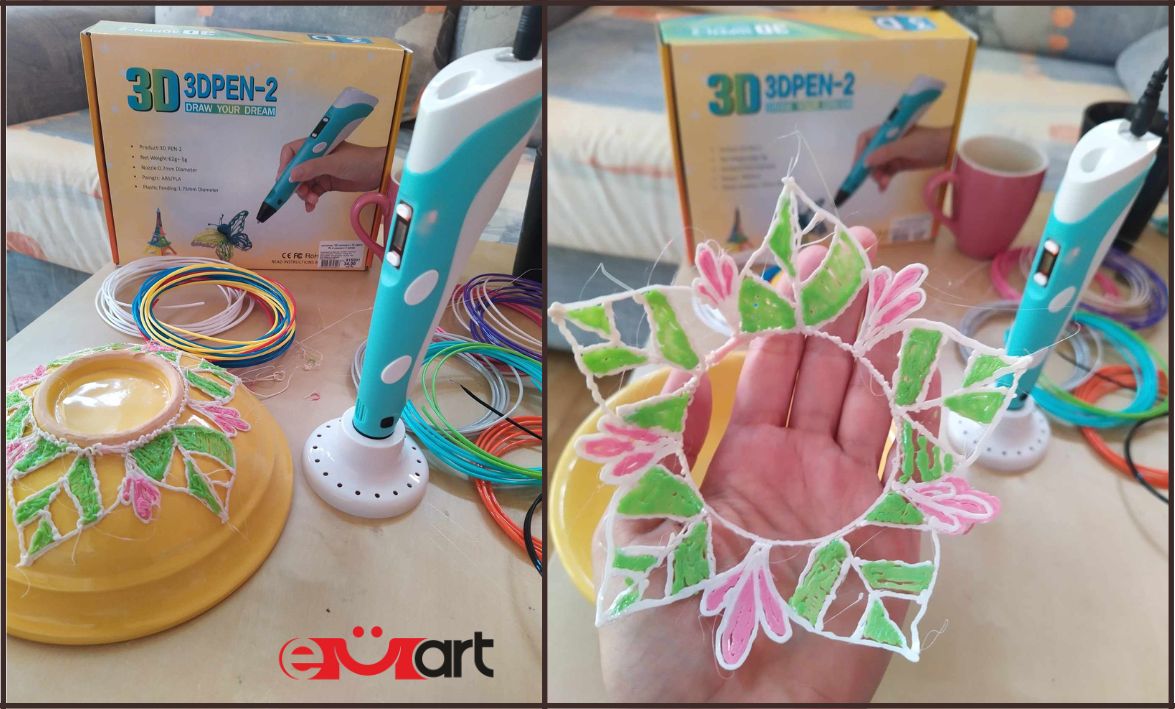
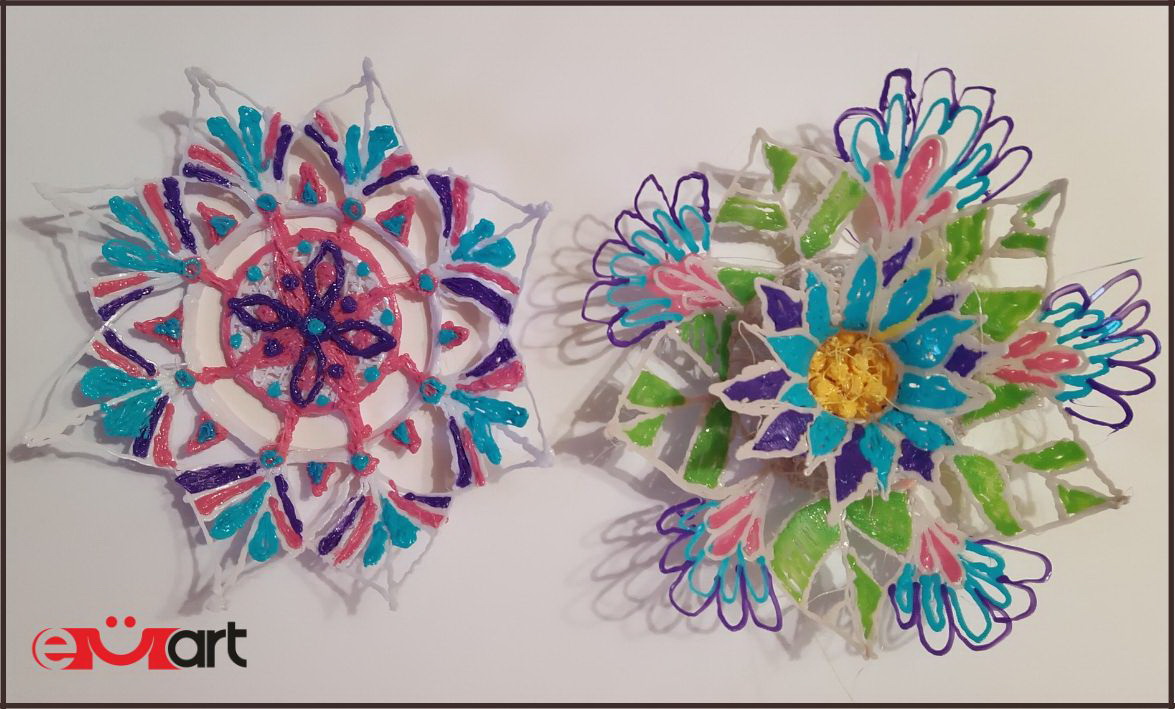
D: After that, I used a plastic funnel from my kitchen as a base to create the flower in the middle. I connected the two components freehand, and added more floral colors between the printed leaves, as a finishing touch:

D: And of course, as a Mandala Art lover, my second choice was to attempt crafting a creative personal Mandala using the 3D pen. Here you can see my results as a beginner:
Tip: If you also find Mandala Art to be a magically meditative and calming hobby, check out our special article dedicated to this spectacular and artistic practice. Discover the secrets of drawing mandalas and unlock your creativity here: How to Draw a Mandala
Don’t be afraid to make mistakes! The beauty of 3D pen drawings is that you can easily correct or modify your work as you go!
3D Pen Ideas for Beginners
As a beginner, you can try crafting 2D coasters, personalized keychains, decorative wall art, custom phone cases, personalized luggage tags, shaped bases for painting or drawing, customized laptop decals, decorative magnets, nameplates or door signs, paperweights, and decorative photo frames using a 3D pen.
But of course, it’s real potential is in your ability to easily craft 3D sculptures and objects, such as:
- Miniature animals
- Decorative vases
- Customized key holders
- Miniature vehicles
- Earrings or jewelry pendants
- Decorative figurines
- Sculptures of famous landmarks
- Customized phone stands
- Functional utensil holders
- Decorative lampshades
These suggestions are just a fraction of what you can achieve with a 3D pen in your hands! Let your creativity flow and you might even surprise yourself with the incredible results you can create.
Feel free to share your personal accomplishments, ideas, or inquiries in the comments section at the end of the article! By doing so, you’ll inspire others to embark boldly on their own artistic and uniquely creative journey using the innovative 3D modeling pen!
| Daya (Daya) | Daya |
 I am a huge enthusiast of creating new handmade beauties, whether it is with beads, paper and pen, canvas and acrylic, or yarn. Every form of art or intricate crafting brings additional inspiration! If you are curious about what else we can make and craft with art and craft materials, stay tuned for updates in the blog and, of course, feel free to share your ideas!
| All articles on Daya |
Rate the article 5.00/5 from 3 grades. |
|
| You have already voted for the article | |
Recommended articles
 LOOM BANDS THE NEW GLOBAL TREND
 THE PERFECT KEYCHAIN CHOICE FOR A MAN
 THE MIRACLE OF AGATE AND THE ENERGY IT BRINGS YOU
 WOODEN ELEMENTS A TIMELESS TREND FOR YOUR HOME
Labels/Tags
 1 Comments

| 1 |

| 0 |

| 464 |

|

| 1 |

|
 Subscribe ♥


SEARCH

|

|
Categories
 New
New


Recent Posts
IN THE WORLD OF QUILLING ART
THE MAGIC OF CREATIVE KITS
A HANDMADE BRACELET IS THE PERFECT GIFT FOR A FRIEND
WHAT SHOULD WE KNOW ABOUT JASPER PENDANTS?
3 TOP IDEAS FOR TEMPORARY WALL DECOR AT AN AFFORDABLE PRICE
WOODEN ELEMENTS A TIMELESS TREND FOR YOUR HOME
AMAZING WEDDING DAY CARDS
Recent comments
Dawn Sullivan за IN THE WORLD OF QUILLING ART
Laura за THE ULTIMATE GUIDE TO CLEANSING AND CHARGING GARNET
JER за Discover and Master the Art of 3D Pen Drawings - A Step-by-Step Guide for 2D and 3D Objects and Sculptures
november birthstone за Discover the Power of Your Birthstones by Month, Zodiac Sign and Day of the Week
