


 0 Commentа
 Printing
 05.11.25
 09.11.20
HOW TO MAKE YOUR OWN BEAUTIFUL CHRISTMAS TREE?
The brightest Christian holiday – Christmas – is just around the corner!
We at EM ART would like to share with you how to create your own beautiful Christmas decoration.
Thanks to the wide range of materials suitable for Christmas decoration, we promise that you’ll be able to decorate your home in style, simply by following a few easy steps.
In a series of upcoming blog articles, we will present to you original DIY ideas on the theme of Christmas decoration.
The advantages of making your own decorations:
- Handmade decorations are always unique because they carry the love and creativity of their maker.
- You’ll turn your free time into a true hobby magic.
- You’ll strengthen the bond with your children if you make the decorations together.
Today we’ll show you how to make a small Christmas tree by yourself — a symbol of the spirit of Christmas.
What does the Christmas tree symbolize?
- The top of the tree points upwards toward the sky and symbolizes the direction of human thoughts – toward the infinite heights.
- Its evergreen color is a symbol of the rebirth of life and represents the end of cold and winter.
- It is believed that with the birth of Jesus Christ, He brought a part of the beauty of the heavenly kingdom to Earth. From this belief comes the tradition of decorating the tree with Christmas balls and garlands, as a symbol of a paradise tree laden with fruit.
- The Christmas star placed on top of the tree symbolizes the Star of Bethlehem, which on the day of Christ’s birth guided the Three Wise Men to the place of His nativity.
Now that we’ve learned some of the main symbols of the Christmas tree, let’s roll up our sleeves and move on to the following simple steps:
Materials needed:
- Glue
- 1 styrofoam cone (I used a 180 mm one, but you can choose a different size)
- Glitter
- 6 sheets of white felt
- Pine cones
- Stamens
- Compass
- Scissors
- Hot glue gun
- Silicone glue sticks
Let’s get started!
- Using a compass, draw circles with a diameter of 5 cm on the felt and cut them out with scissors.
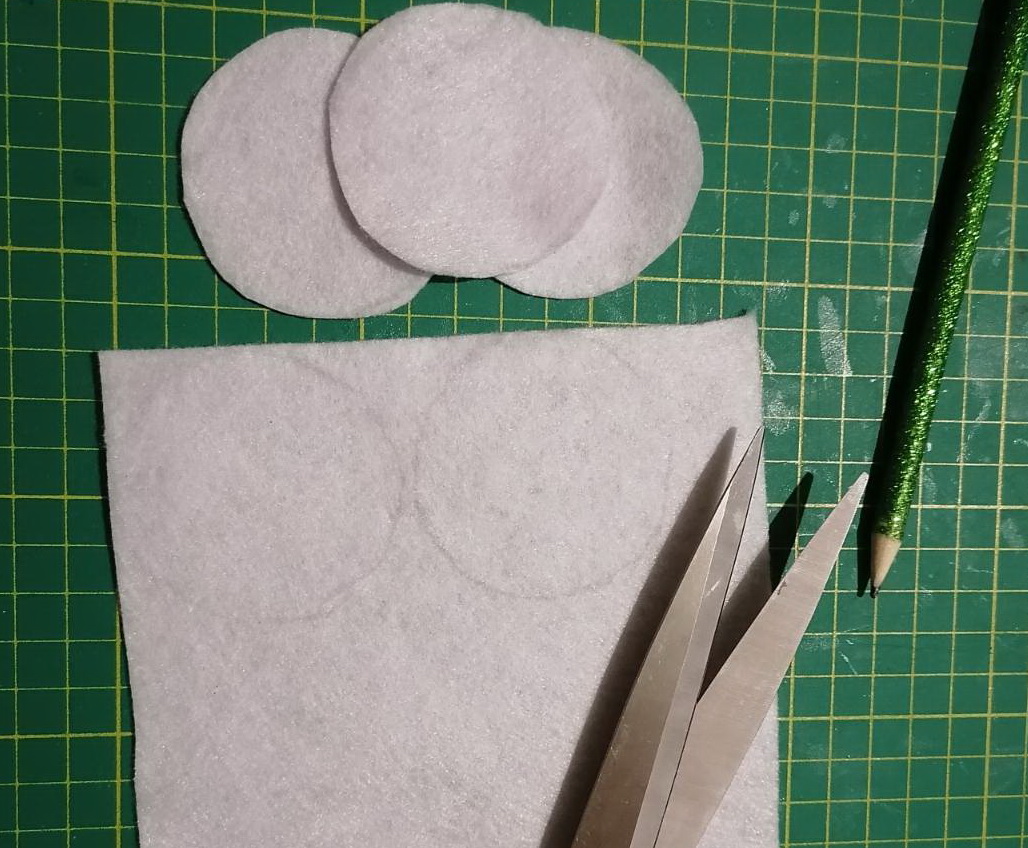
2. Cut the circles in half to get semicircles. You’ll need 105 circles, which will give you a total of 210 halves.
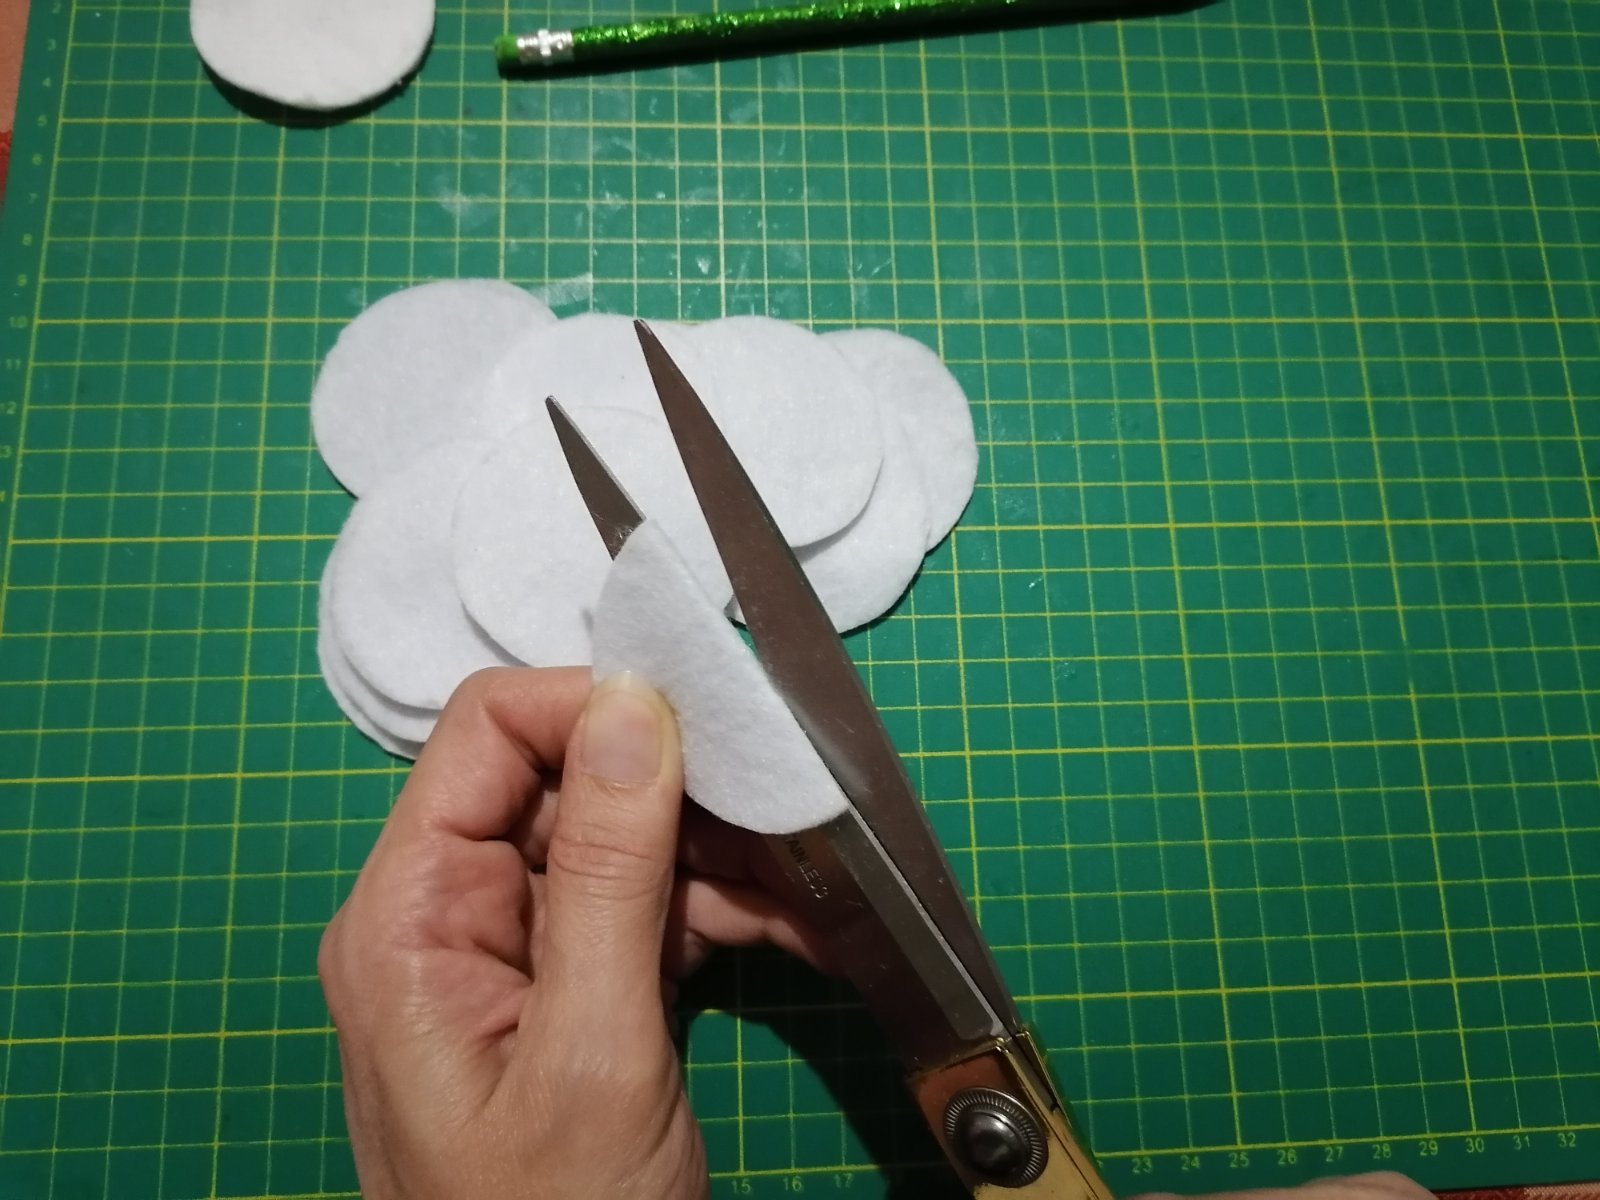
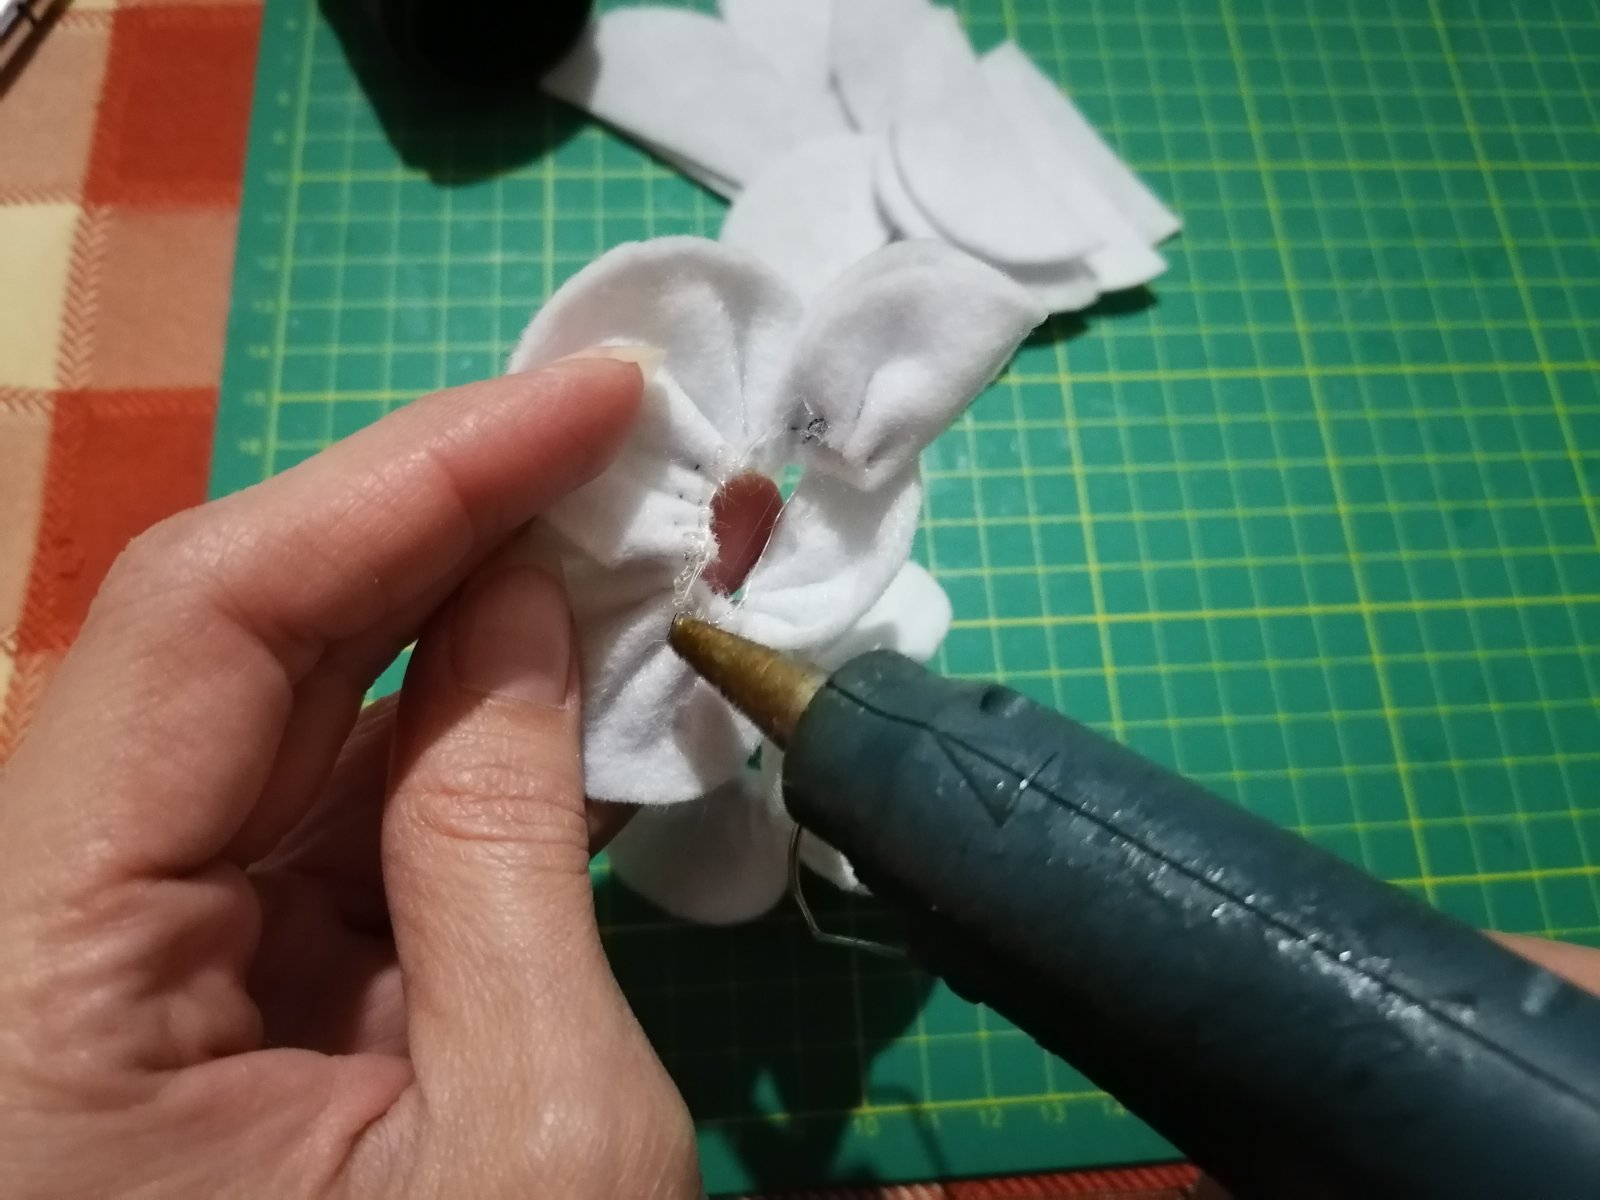
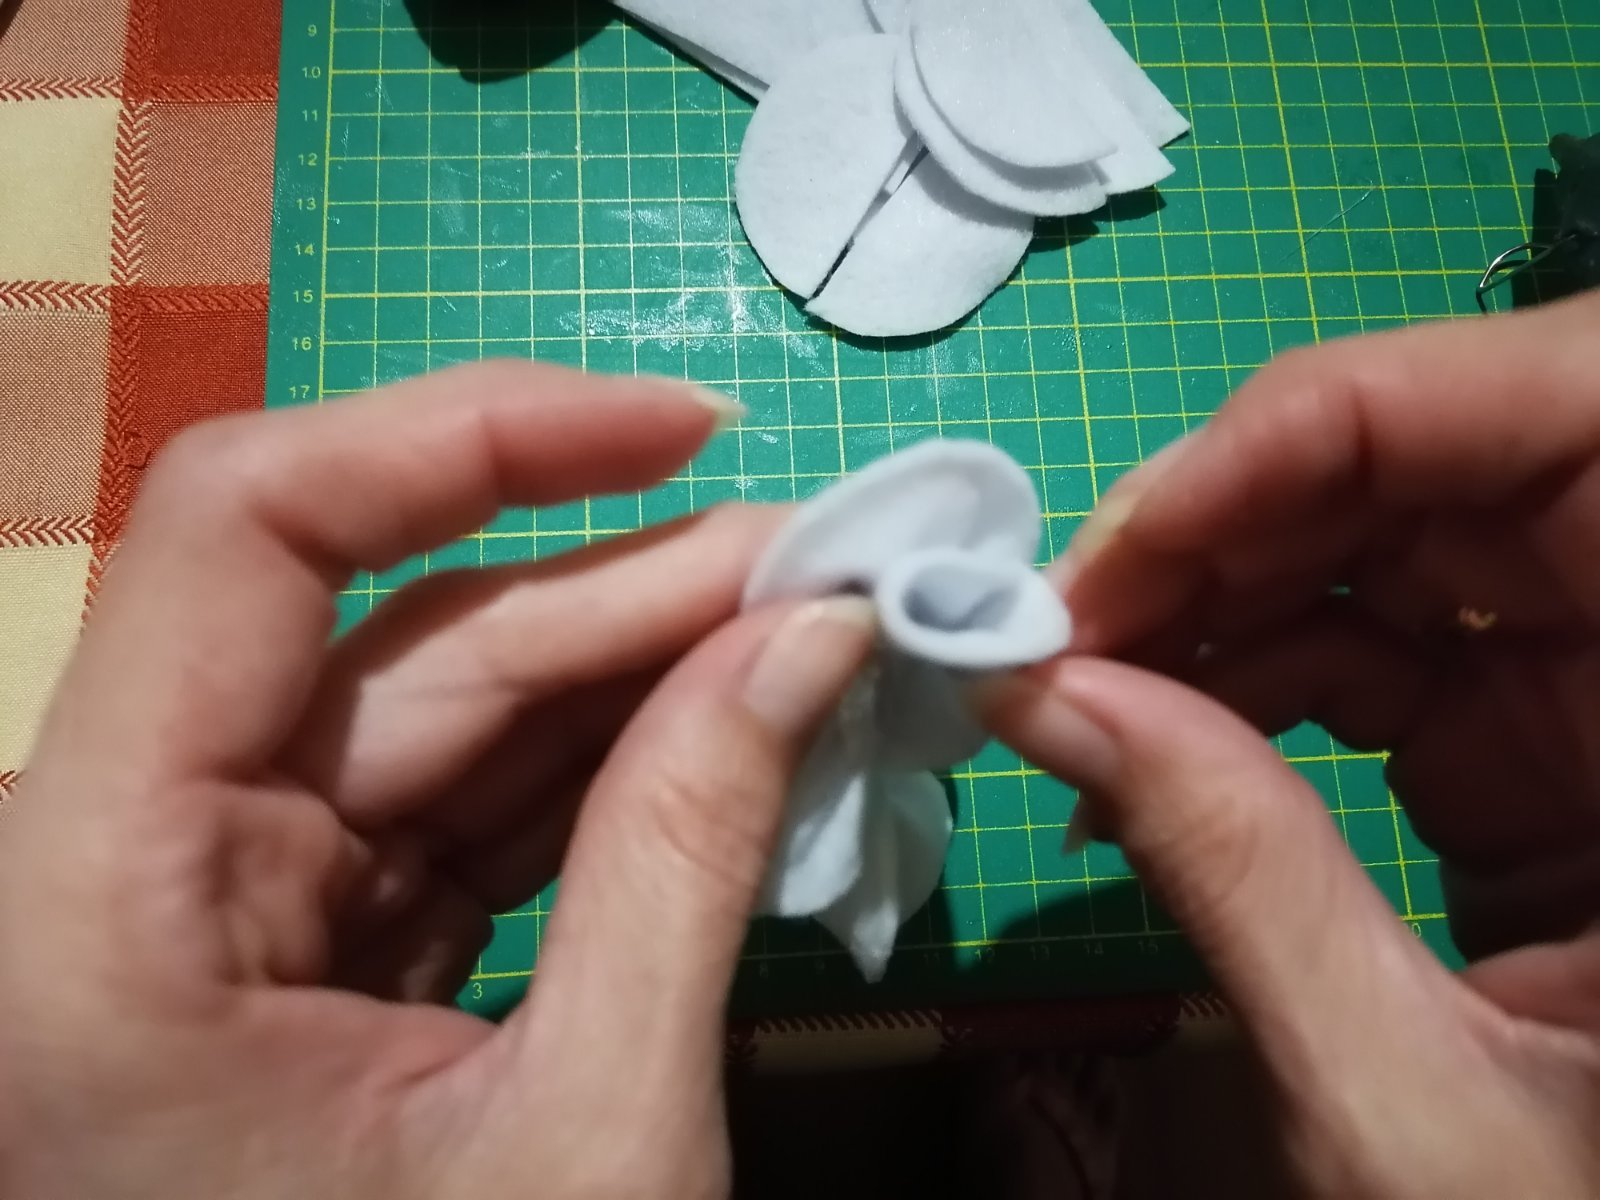
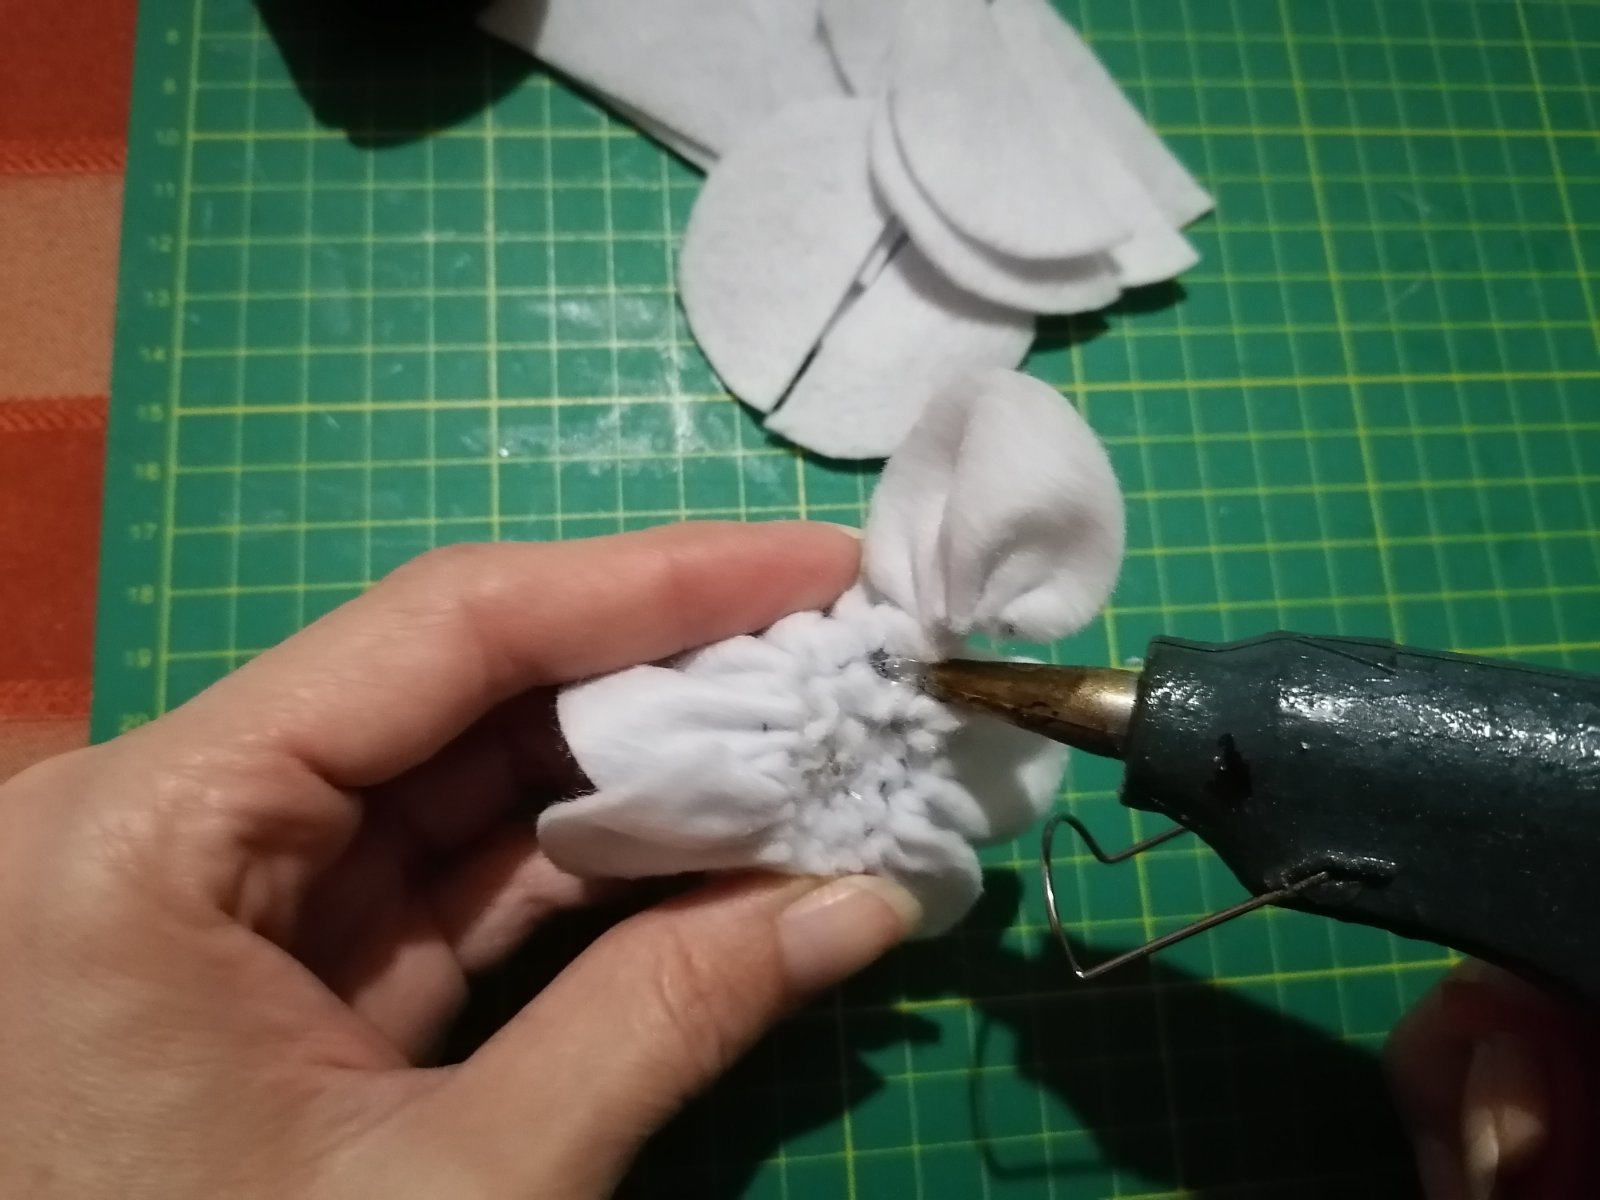
3. To make one flower, you’ll need 10 halves. Sew them together as shown in the pictures.
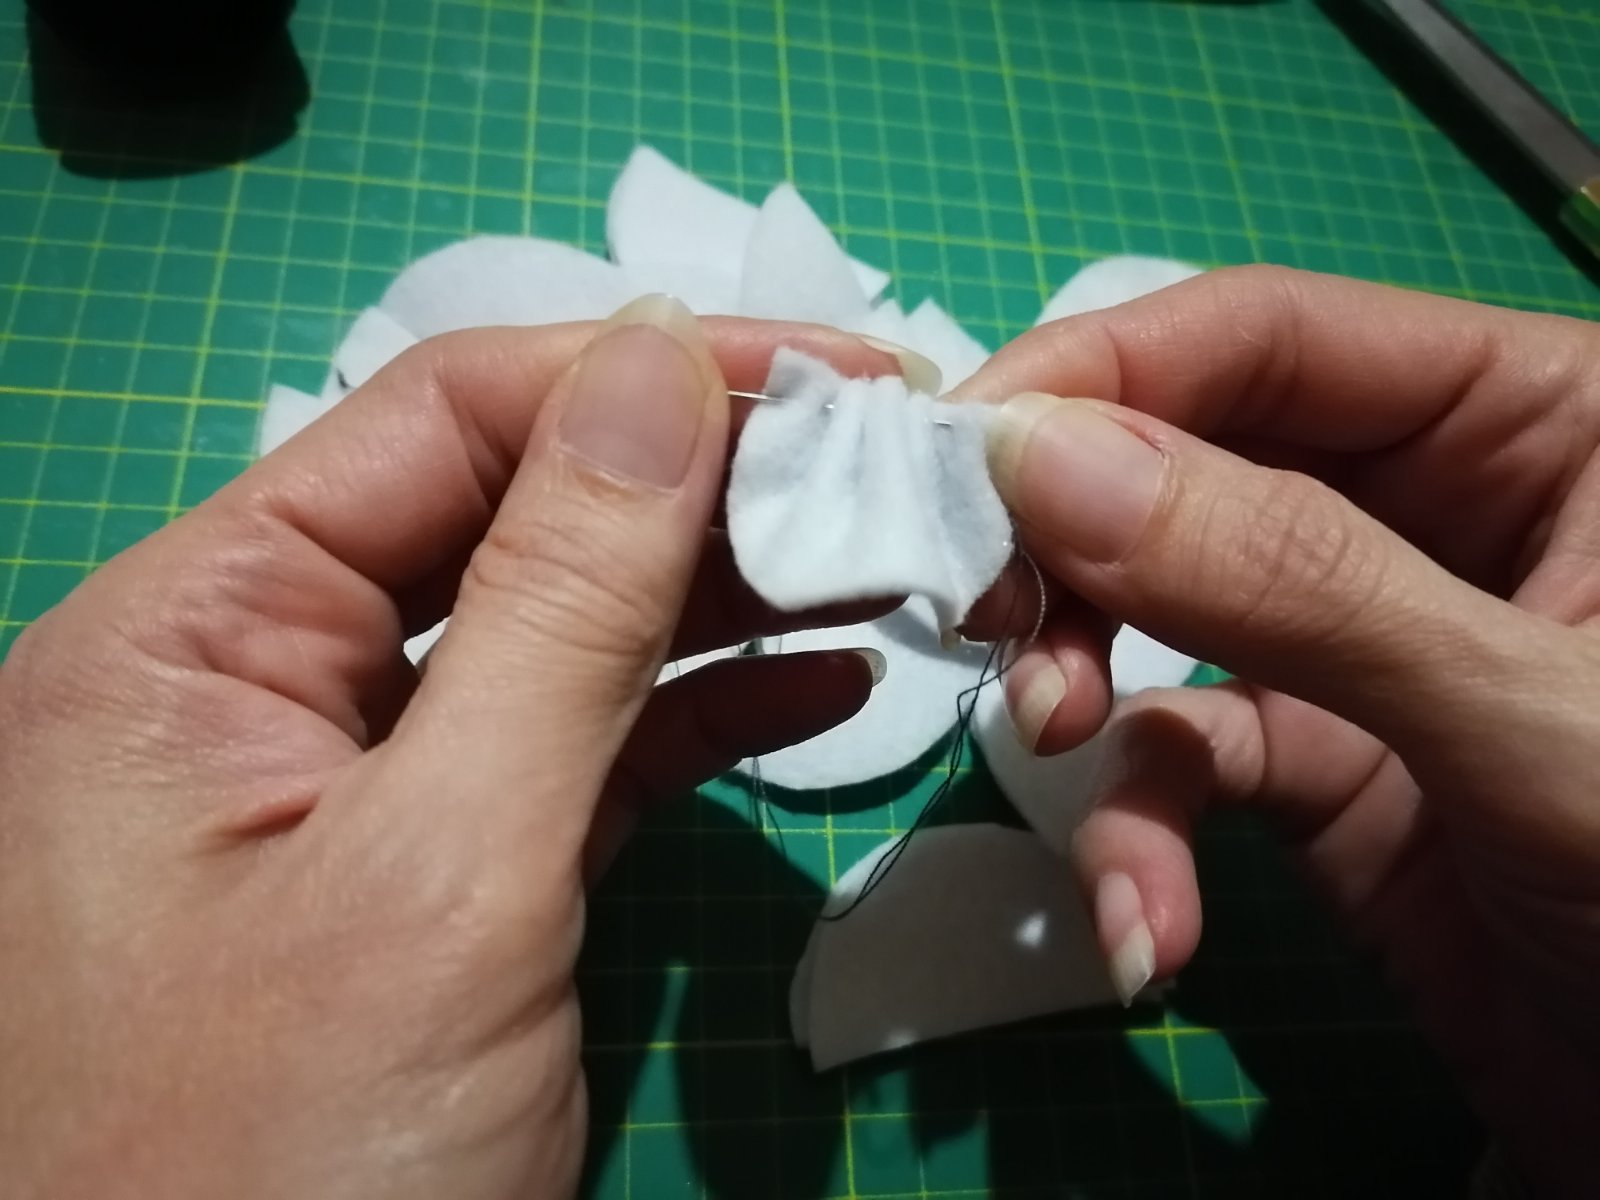
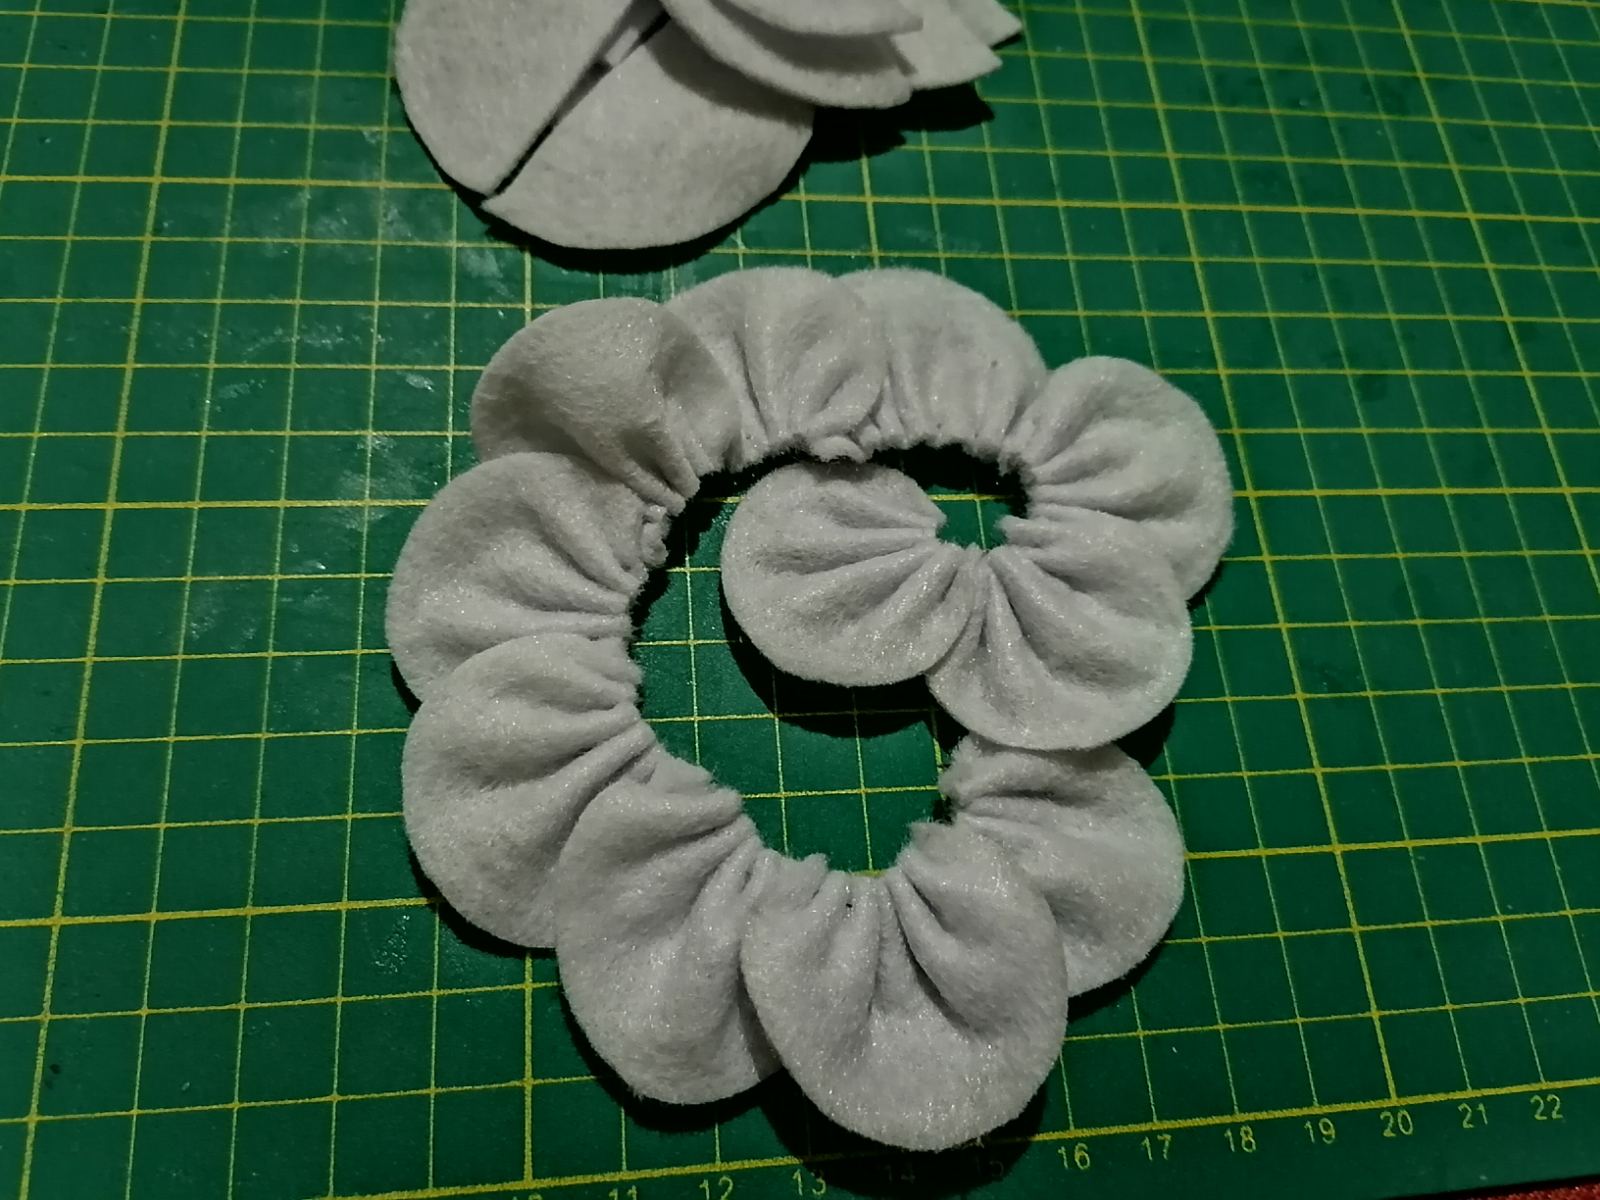
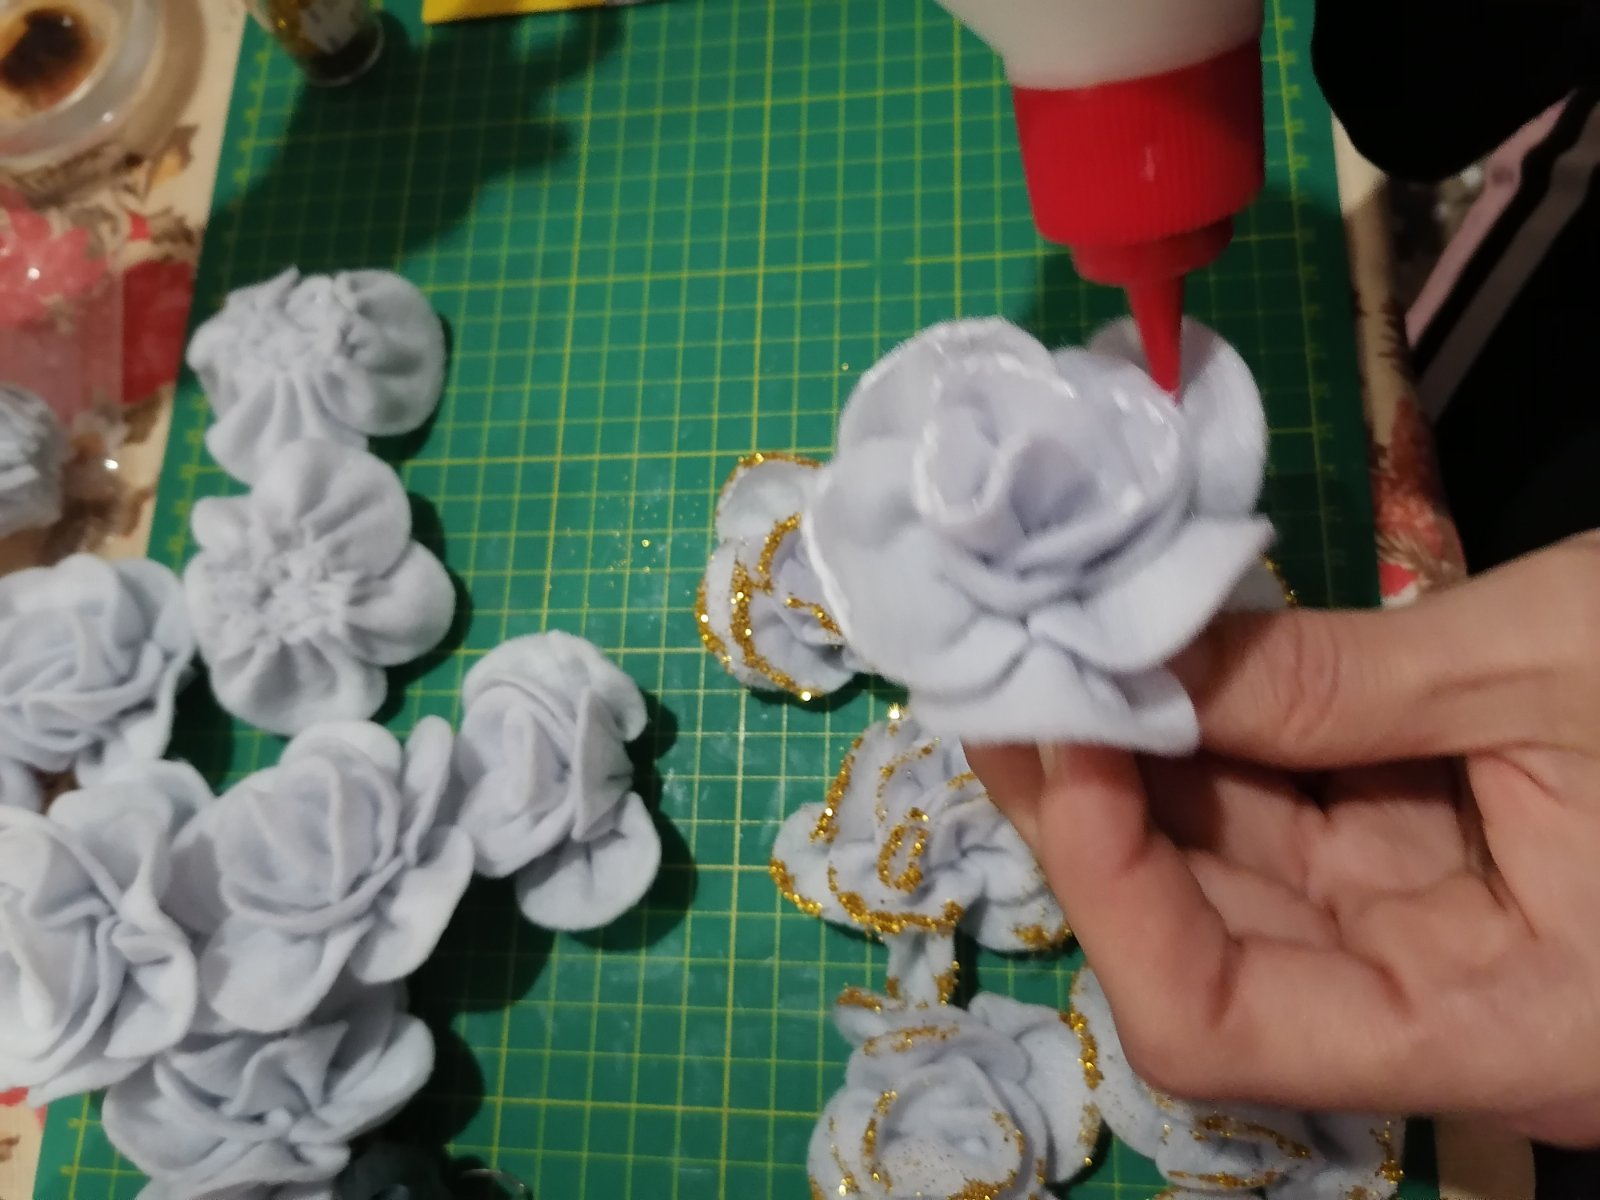
4. After sewing 10 halves in this way, use the hot glue gun to shape the rose.
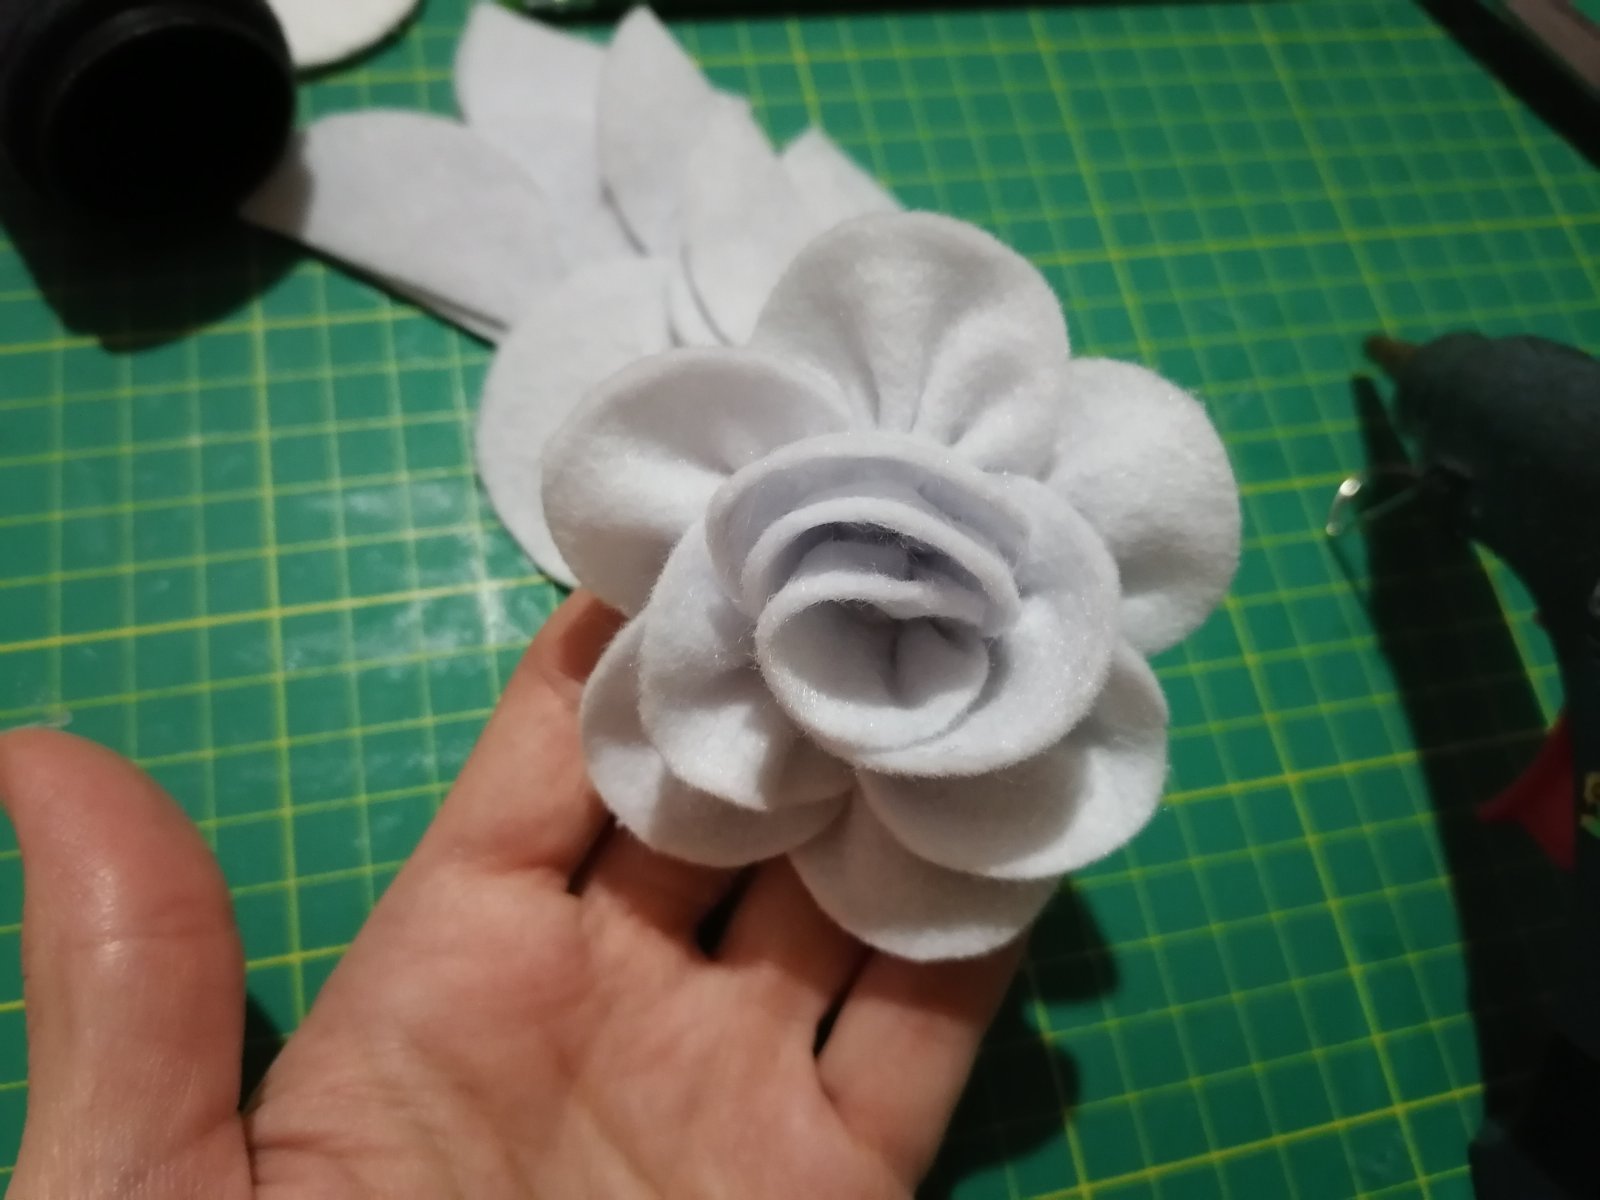
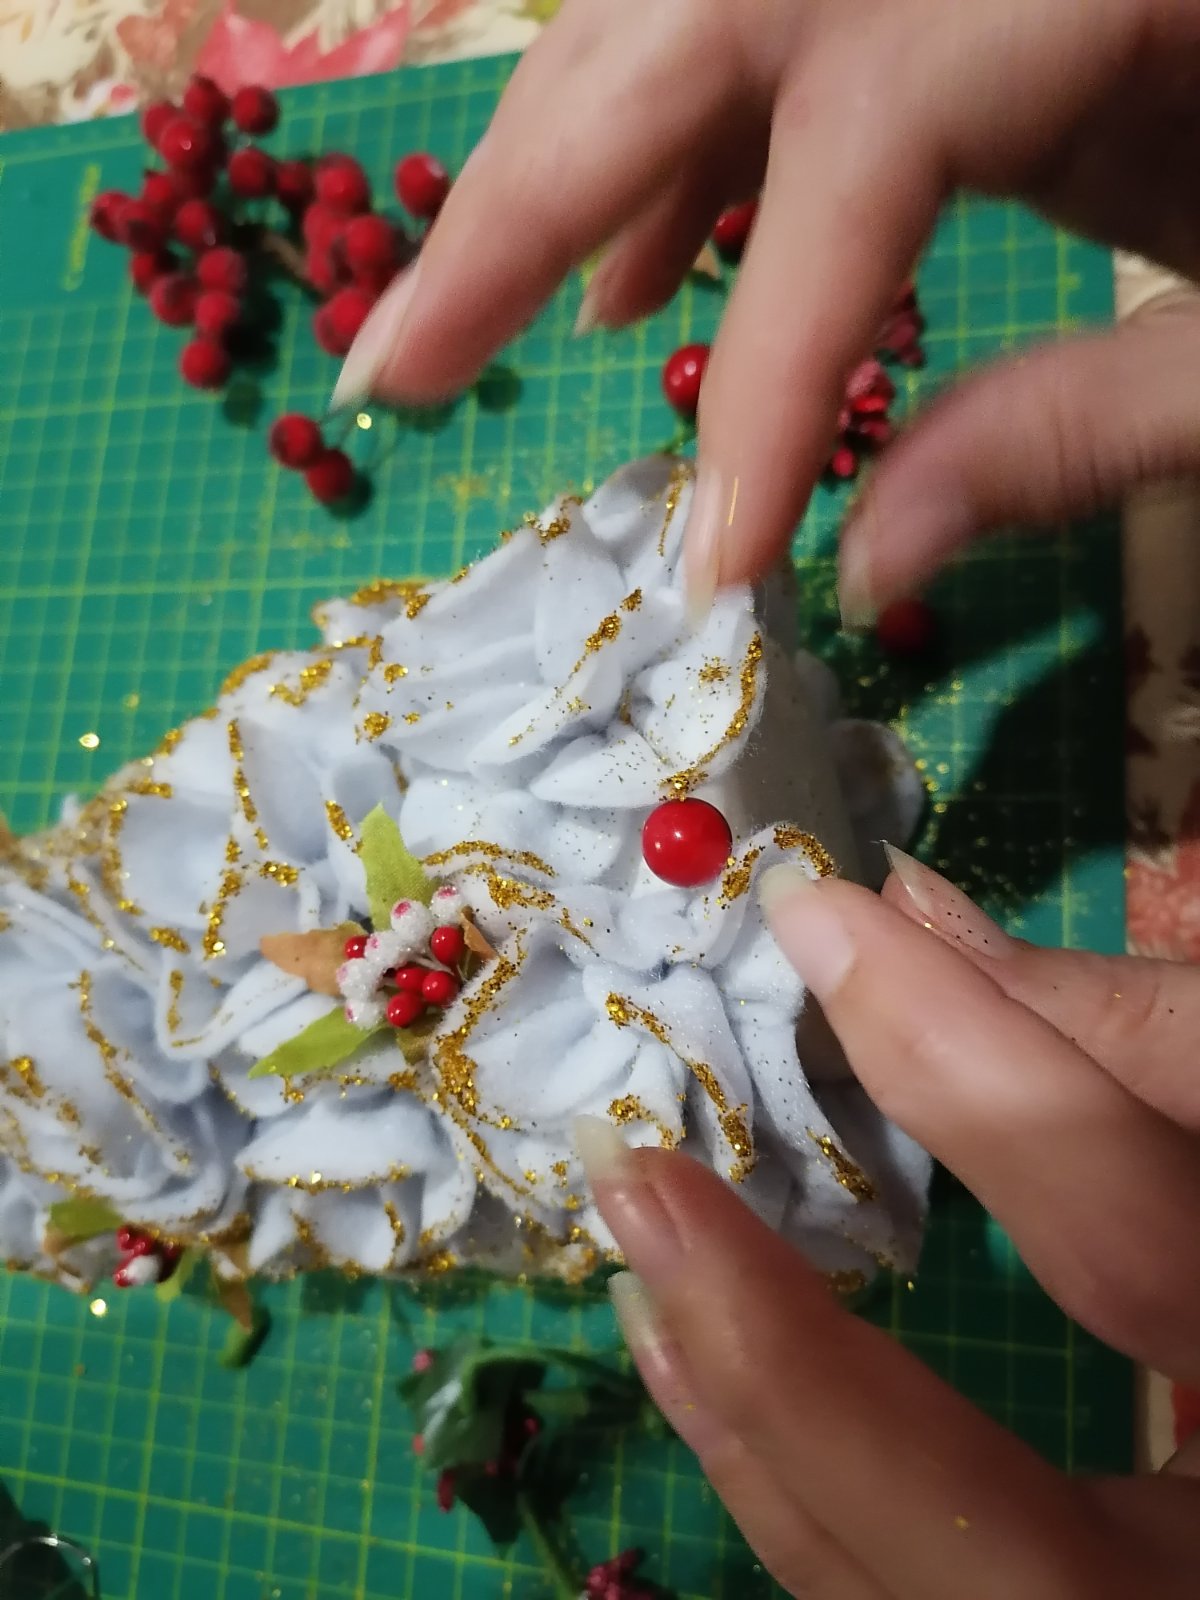
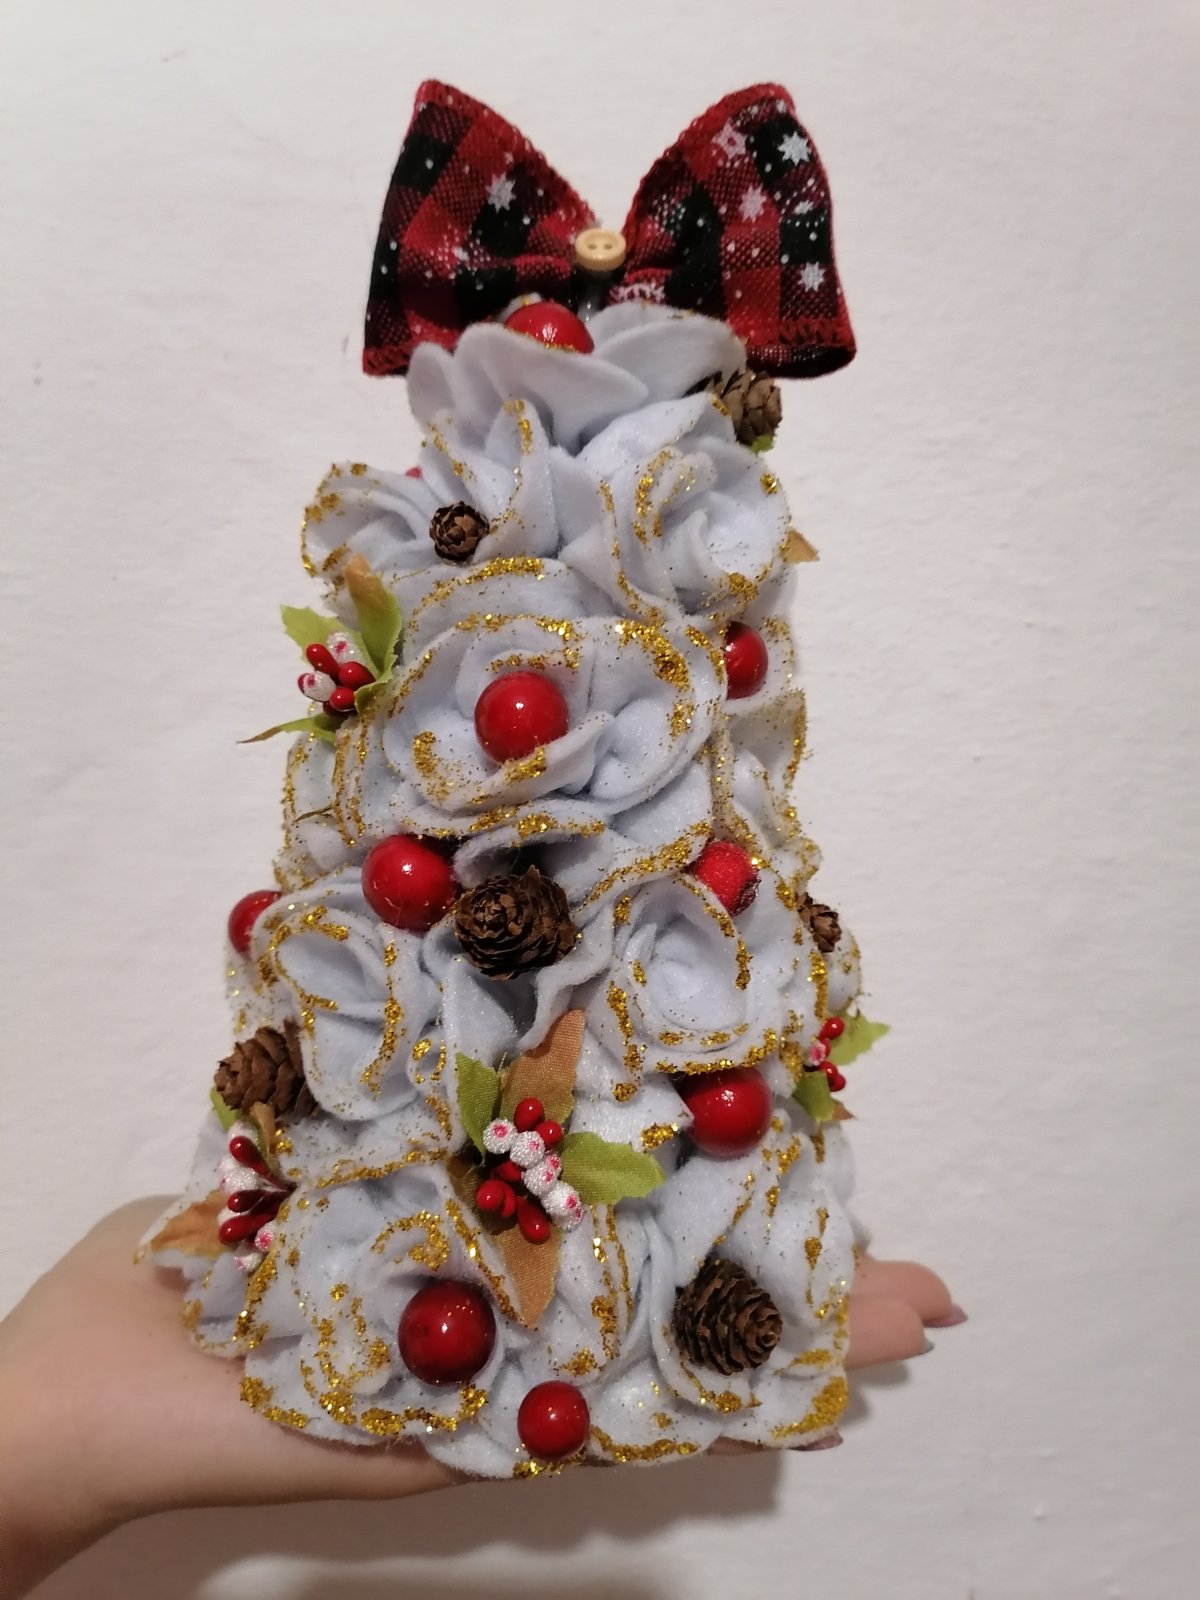
Here is the beautiful little rose!
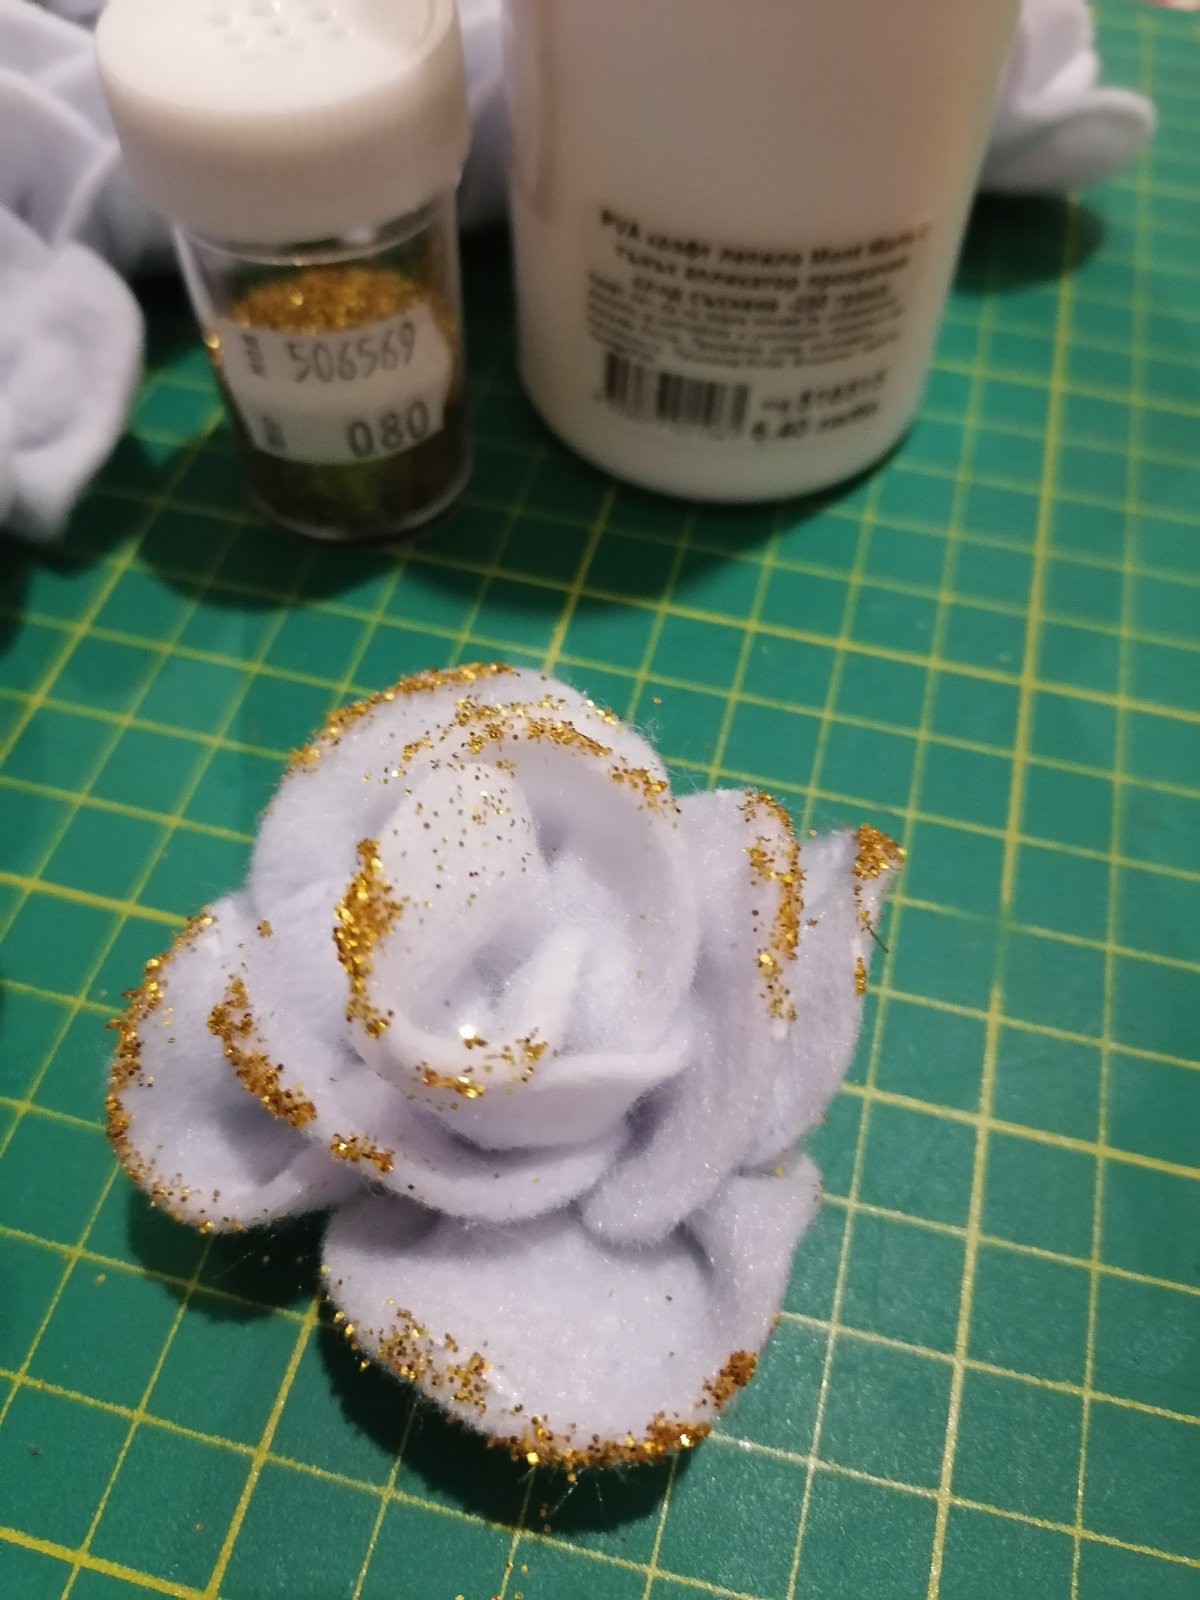
5. Once all 21 flowers are ready, lightly apply glue to the tips and sprinkle with glitter.
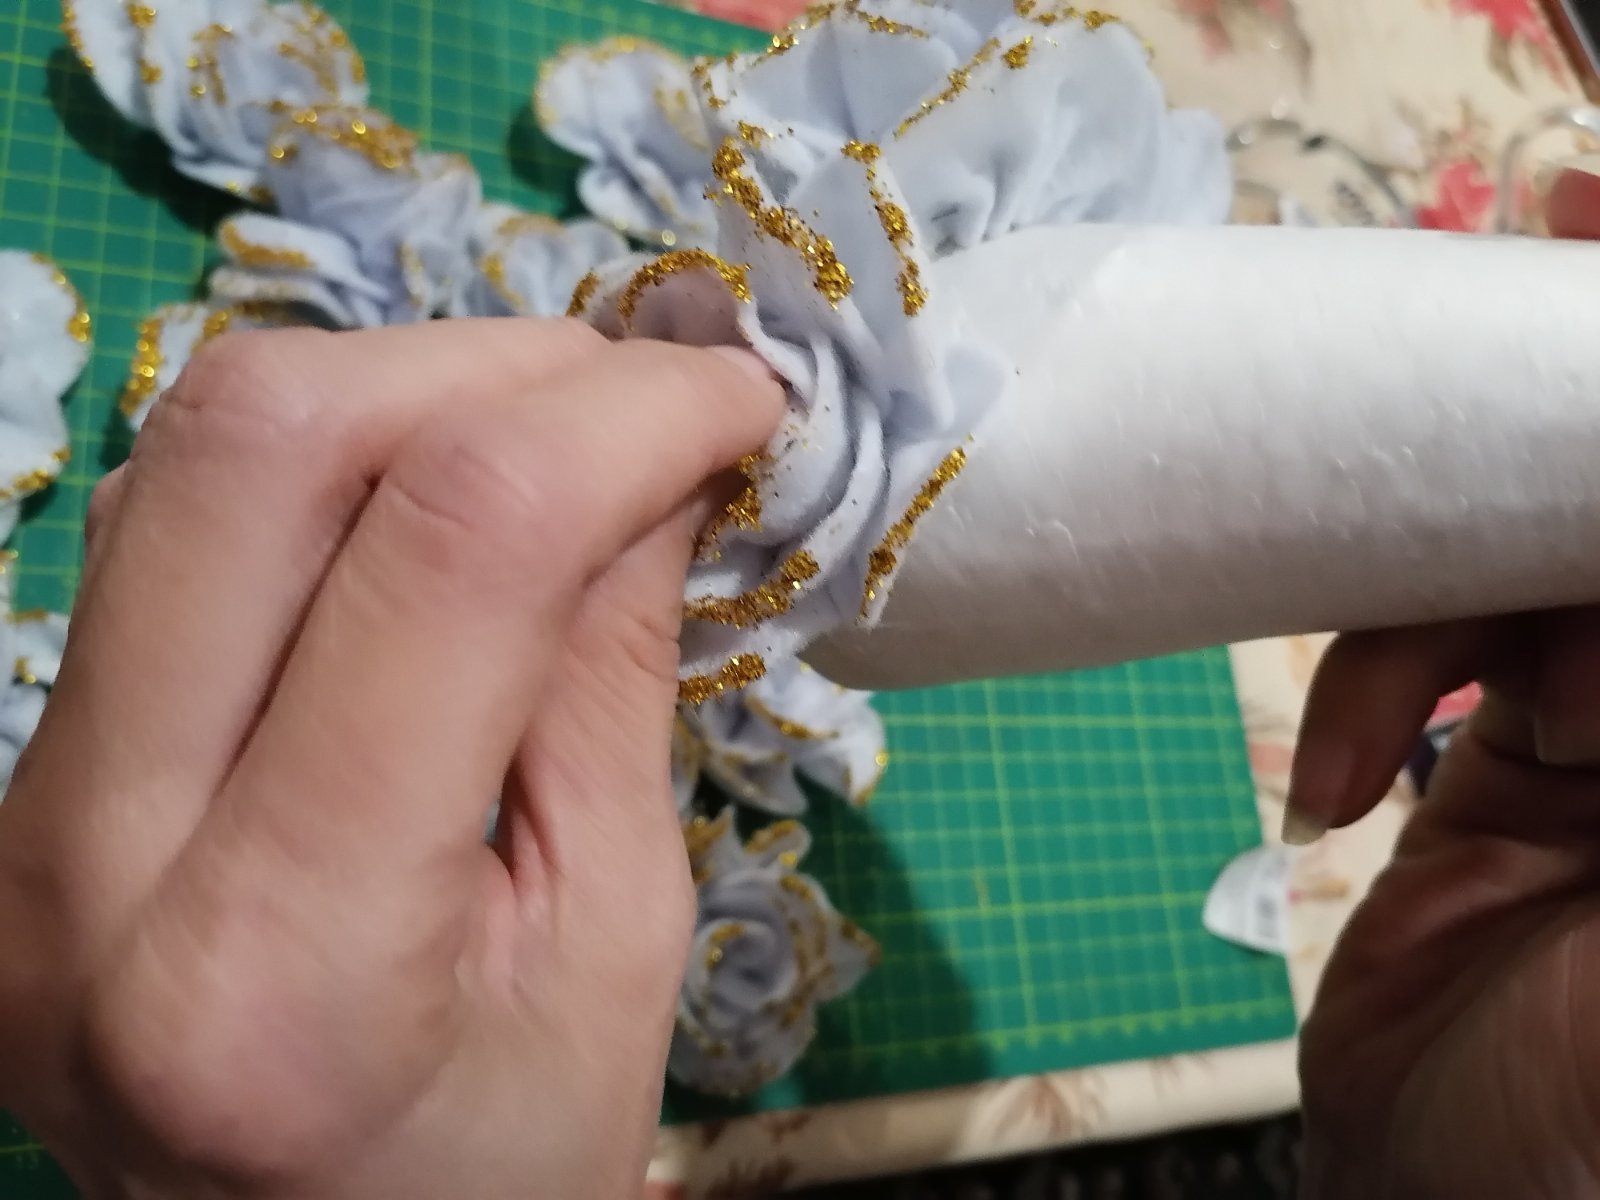
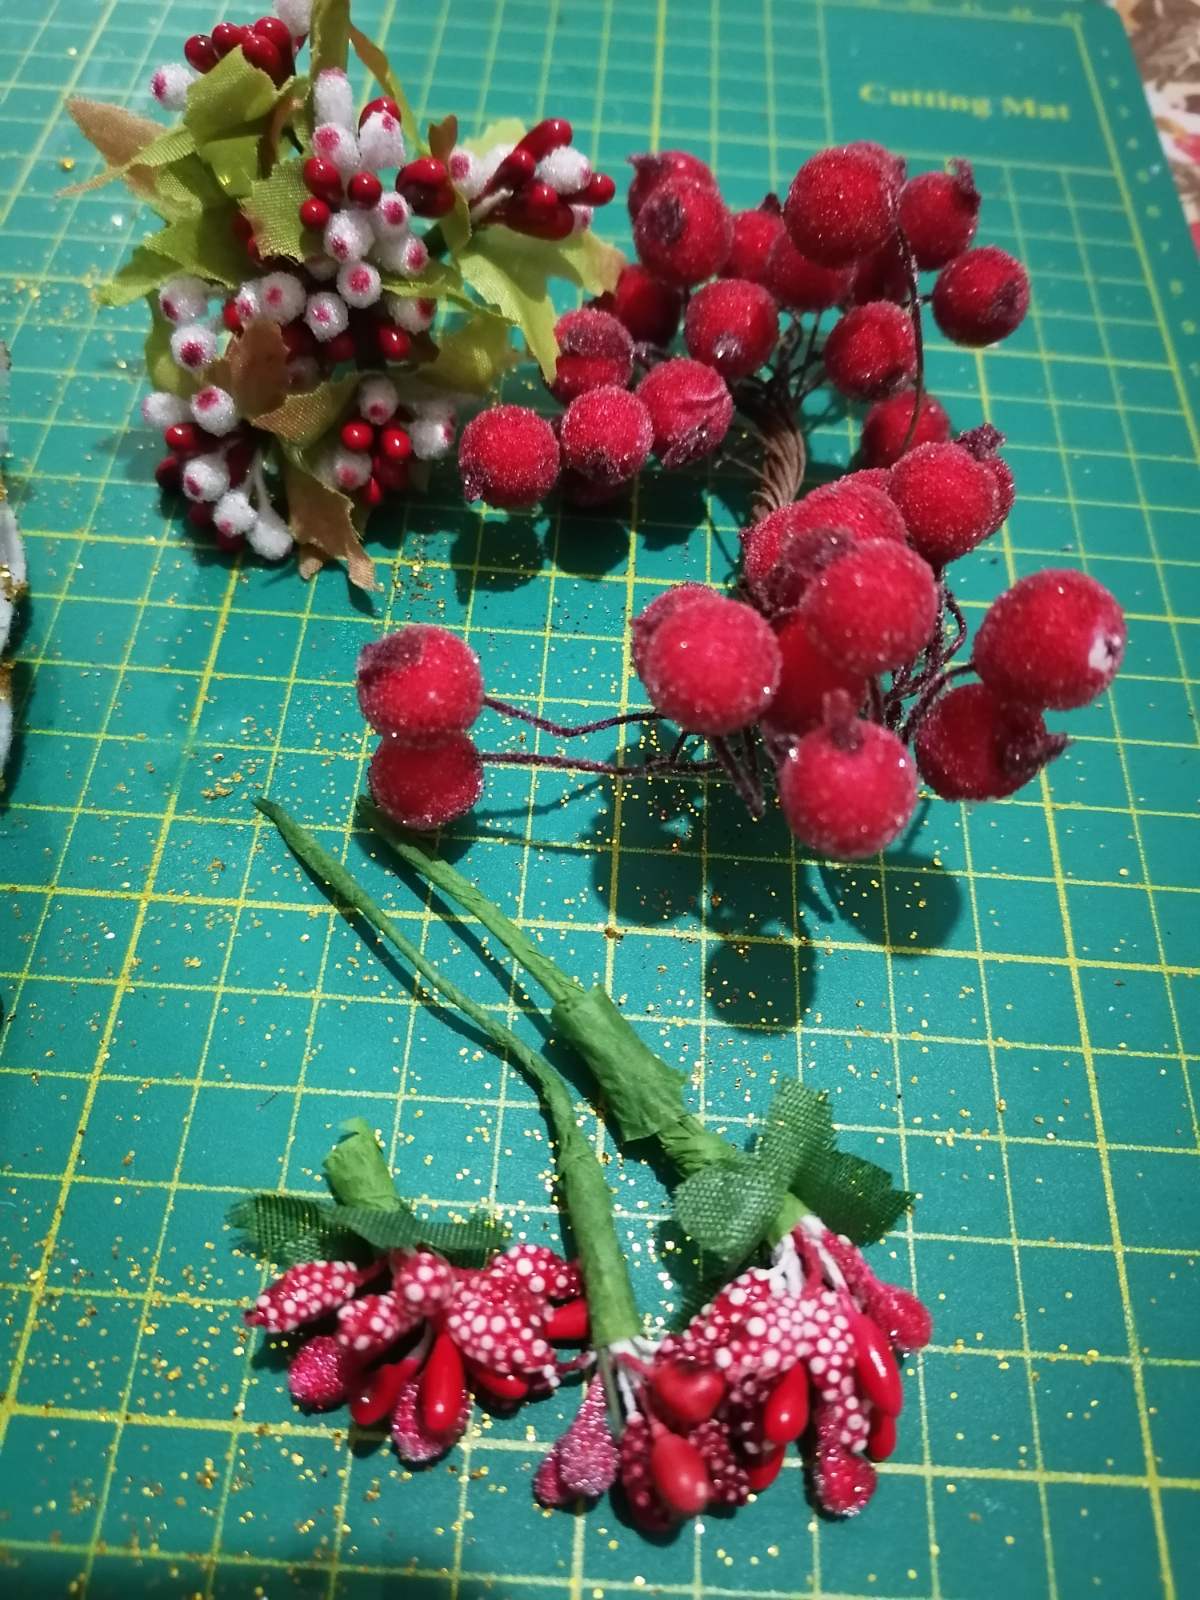
6. Glue the finished golden flowers onto the cone and decorate with pine cones, stamens, and any other materials you like.
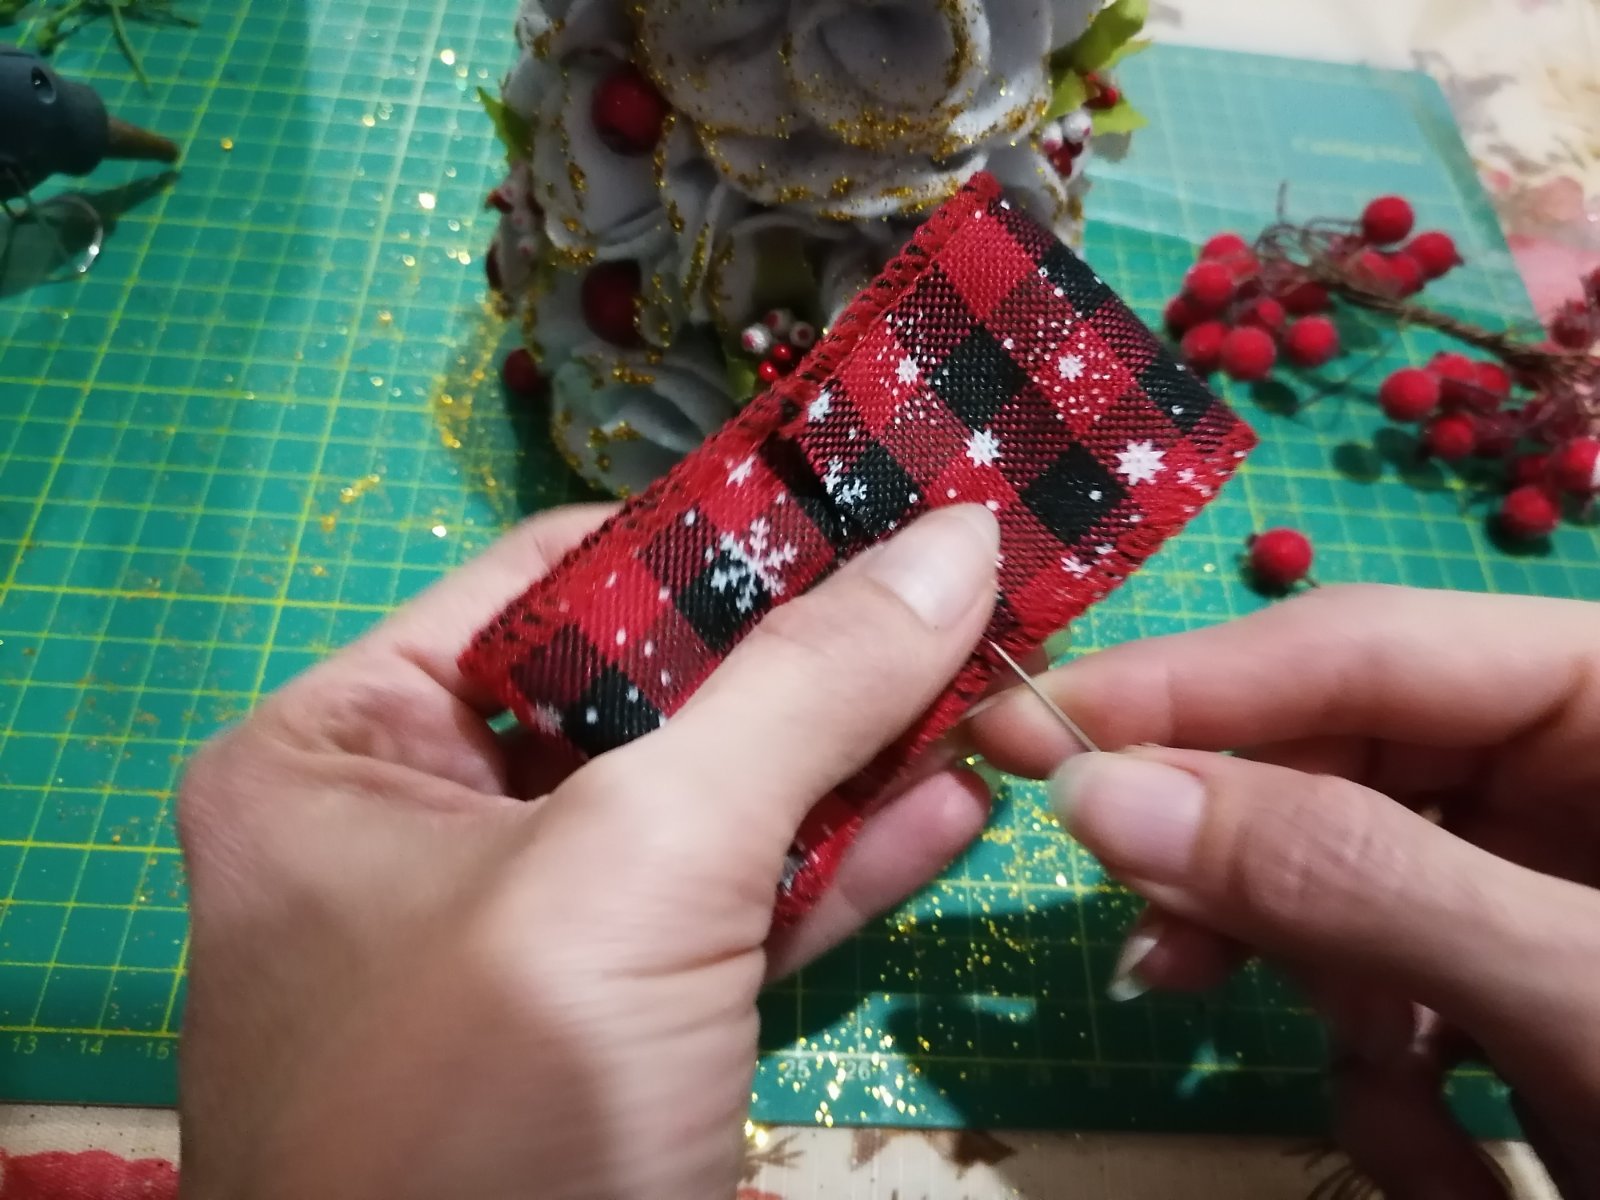
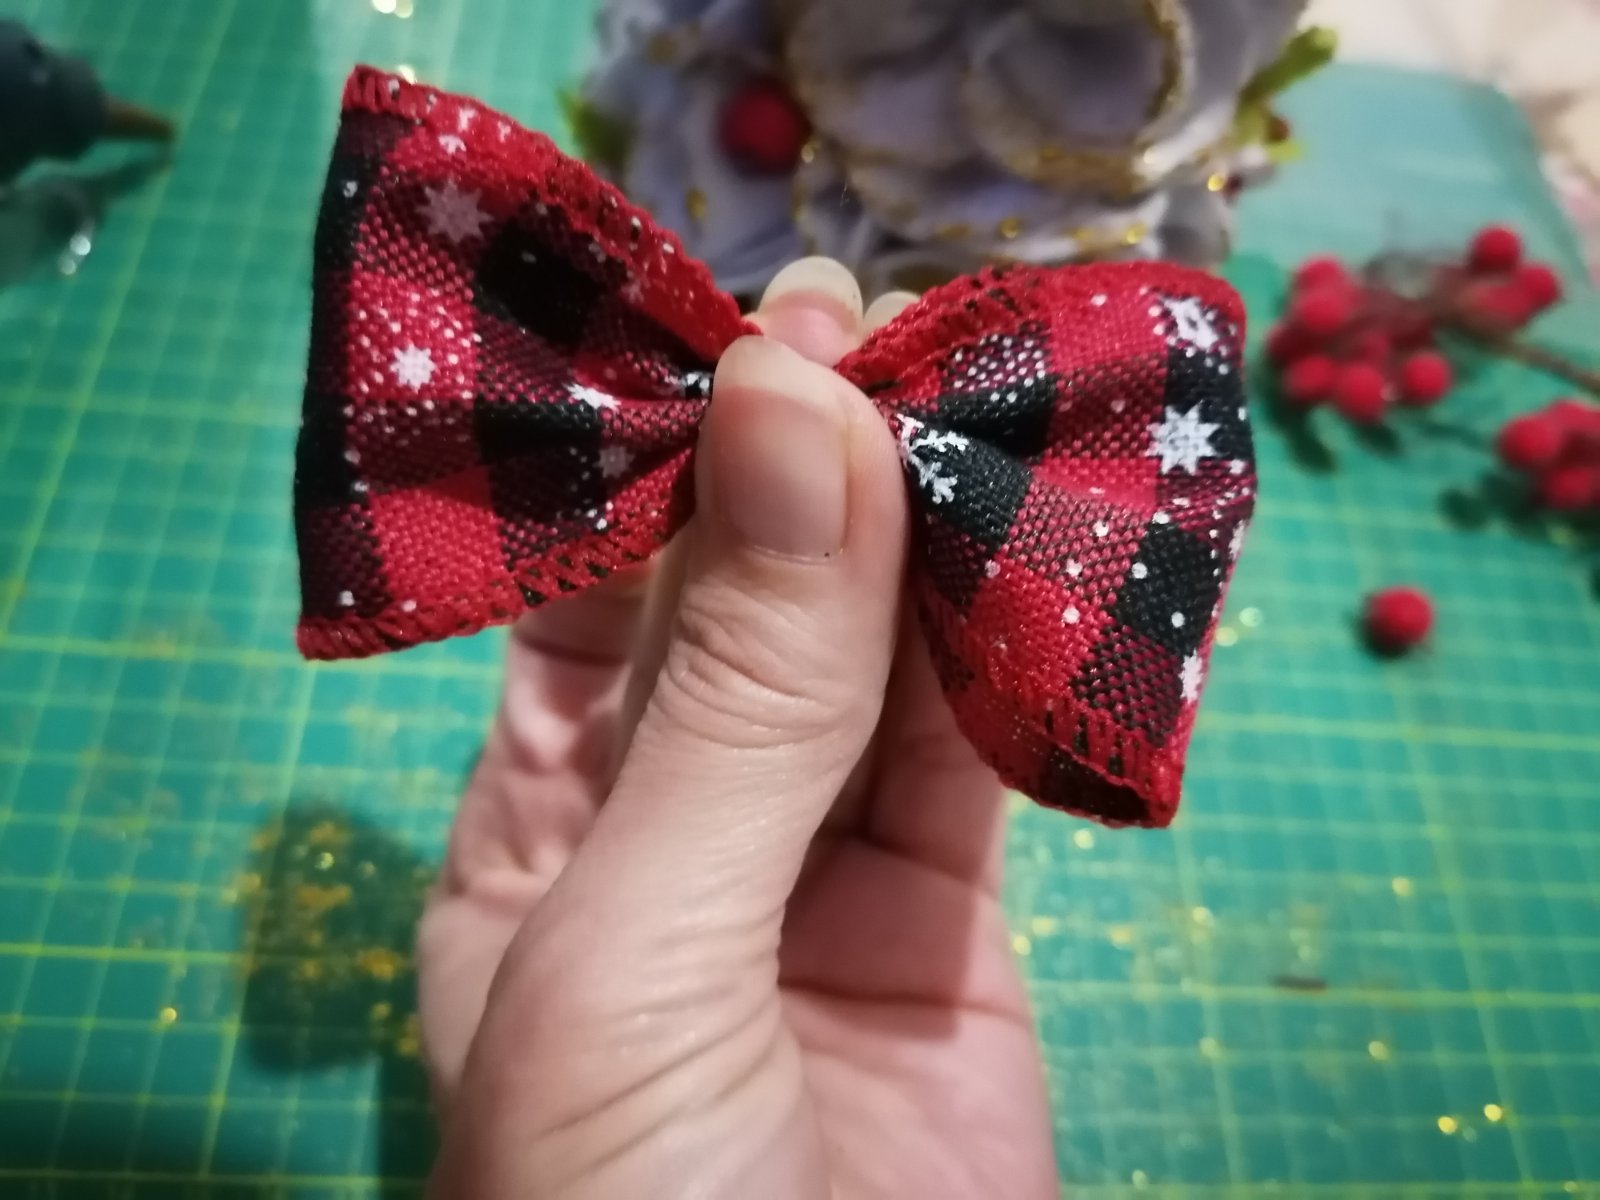
7. Once your tree is beautifully decorated, it’s time for the finishing touch — a lovely ribbon to place on the top of the tree (optionally, you can use a Christmas star instead).
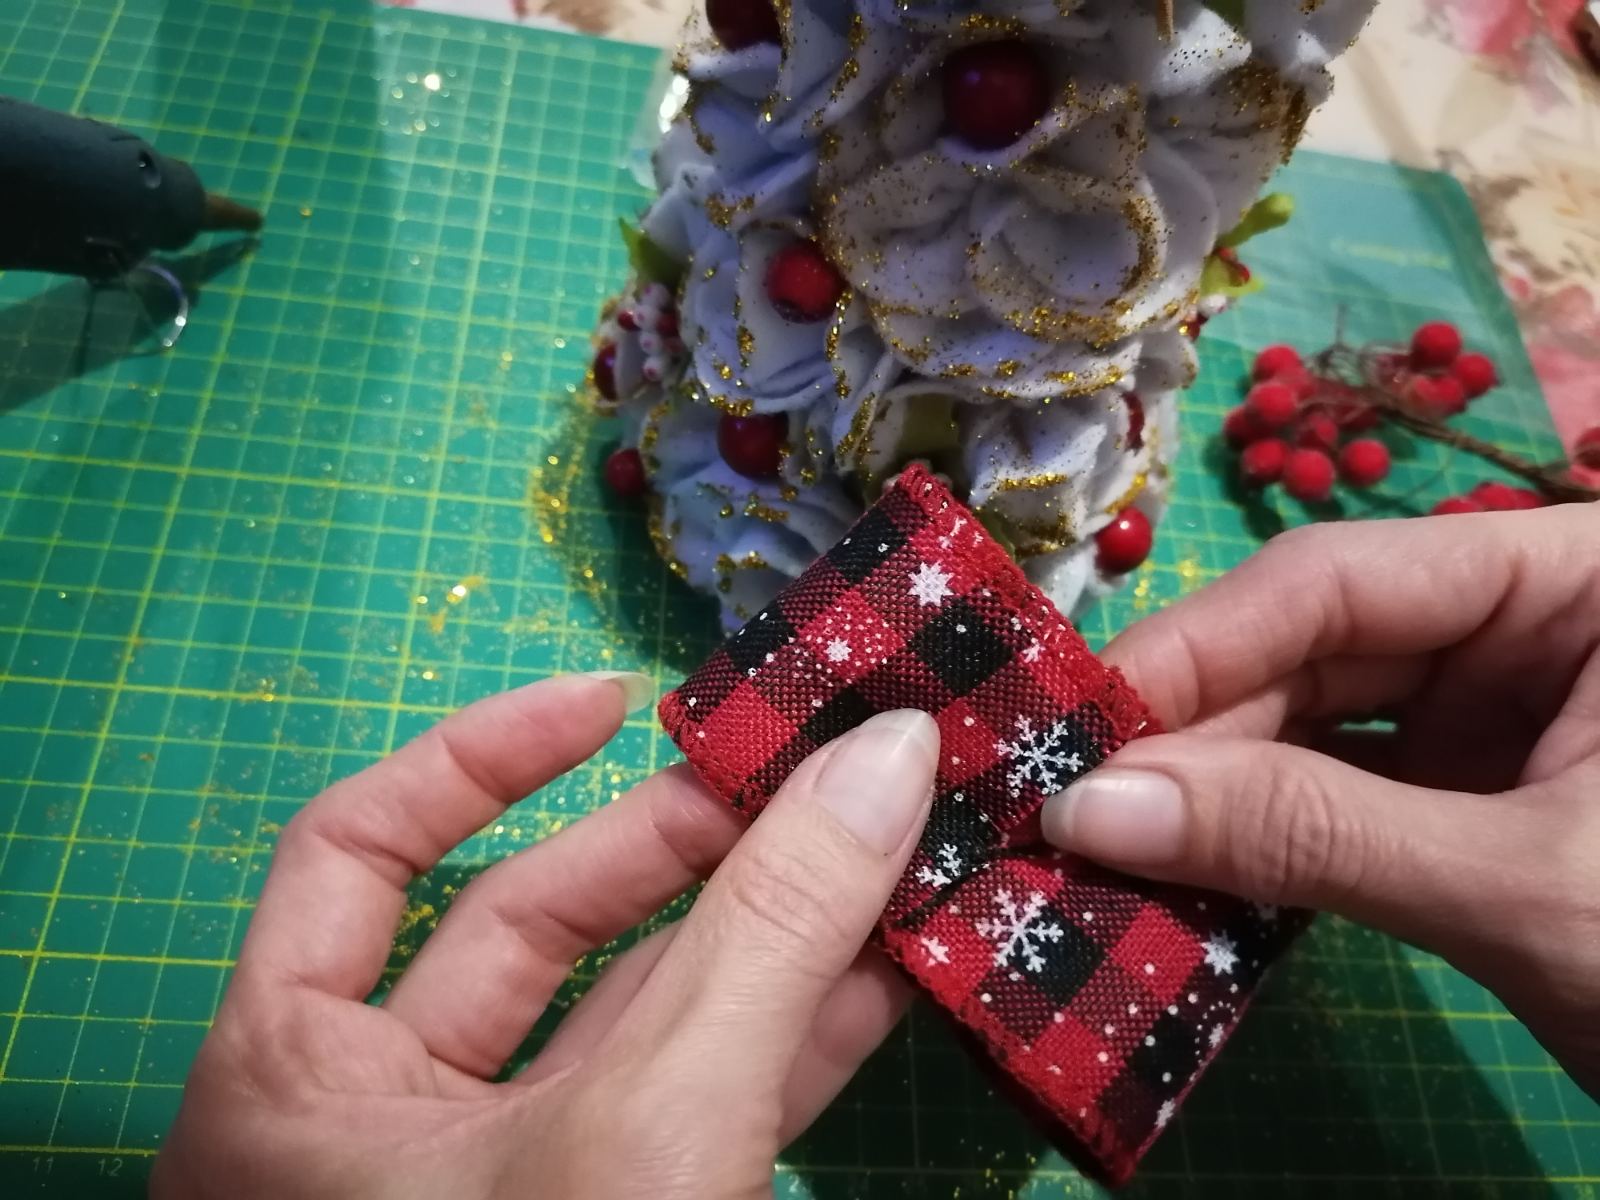
And here it is — the beautiful Christmas Tree!
| Daya (Daya) | Daya |
 I am a huge enthusiast of creating new handmade beauties, whether it is with beads, paper and pen, canvas and acrylic, or yarn. Every form of art or intricate crafting brings additional inspiration! If you are curious about what else we can make and craft with art and craft materials, stay tuned for updates in the blog and, of course, feel free to share your ideas!
| All articles on Daya |
Rate the article 5.00/5 from 7 grades. |
|
| You have already voted for the article | |
Recommended articles
 HANDMADE MARTENITSA FOR HOME AND OFFICE
 What Is Hot Glue Used For? Ideas and Inspiration!
 HOW TO MAKE A MODERN HANDMADE SEVEN-STRAND BRACELET?
 THE PERFECT SCISSORS ARE THE KEY TO AMAZING PROJECTS
 0 Comments

| 0 |

| 0 |

| 0 |

|

| 0 |

|
 Subscribe ♥
SEARCH

|

|
Categories
 New
New


Recent Posts
IN THE WORLD OF QUILLING ART
THE MAGIC OF CREATIVE KITS
A HANDMADE BRACELET IS THE PERFECT GIFT FOR A FRIEND
WHAT SHOULD WE KNOW ABOUT JASPER PENDANTS?
3 TOP IDEAS FOR TEMPORARY WALL DECOR AT AN AFFORDABLE PRICE
WOODEN ELEMENTS A TIMELESS TREND FOR YOUR HOME
AMAZING WEDDING DAY CARDS
Recent comments
Dawn Sullivan за IN THE WORLD OF QUILLING ART
Laura за THE ULTIMATE GUIDE TO CLEANSING AND CHARGING GARNET
JER за Discover and Master the Art of 3D Pen Drawings - A Step-by-Step Guide for 2D and 3D Objects and Sculptures
november birthstone за Discover the Power of Your Birthstones by Month, Zodiac Sign and Day of the Week
