


 1 Comment
 Printing
 08.11.25
 09.09.21
IN THE WORLD OF QUILLING ART
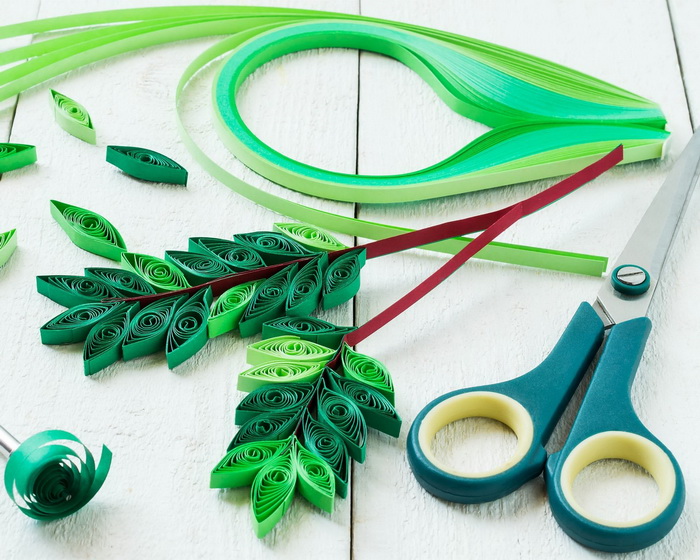
Paper quilling is a beloved craft, but it’s by no means new. This paper art form has existed since the invention of paper itself. Paper quilling is the art of cutting paper into long, thin strips, rolling and pinching them into various shapes, and then gluing the shapes together to form decorative art.
Paper quilling projects can be used to decorate cards, boxes, gift bags, picture frames, or even turned into 3D standalone works of art.
Your imagination is the only limit. The decorative pieces can be simple or intricate, but one thing is certain — paper quilling can be mastered in just a few hours.
Quilling is the perfect craft project for beginners. It’s easy for a novice crafter to achieve great results, and another bonus is that this hobby costs almost nothing to start.
The origin of this art form is unknown. Some people believe that quilling began in China after the invention of paper, while others think the craft originated in the 13th century.
Nuns used to imitate the iron decorations used in home décor. They rolled strips of gilded paper cut from books. These paper filigree designs were then used to decorate books and religious items.
Paper quilling regained its popularity in the 18th century as a “proper” pastime for women of the aristocracy. The art of quilling spread from Europe to America and was favored by American colonists as a decorative method. Quilling has regained popularity today and has been elevated to an art form.
Tools Needed for Paper Quilling
Beginner quilling can be done simply using paper strips, a toothpick, a knitting needle, or a similar object and a bit of glue. Once you get hooked on quilling, you can invest in proper quilling tools to make your work much easier.
Paper quilling strips: Ready-made paper, created specifically for quilling, can be purchased online or in physical EM ART stores. The advantage of using pre-cut paper is that your strips will always be the same width, and, of course, you’ll save time when working with this type of paper.
Slotted tool: This tool has a comfortable handle with a slotted metal tip at the top to insert your paper strips and roll them into circular shapes. It makes it easier to control and roll the paper strips.
Tweezers: Tweezers are handy for holding your shaped coils while applying glue.
Needle tool: This is a handle with a needle at one end, useful for applying glue to the edges of your paper strips.
Circle sizing ruler: This convenient tool is a ruler with holes of various sizes in the center. Place your rolled paper coil in a hole to measure it precisely.
Use pre-cut quilling strips for your first projects. Your initial attempts will yield better results if you use machine-cut precision paper. Once you’re familiar with basic paper quilling techniques, you can cut your own strips and explore your creativity by experimenting with more advanced methods.
Start with smaller projects first. It’s easy to feel overwhelmed when tackling a craft project that’s too complex or too large.
Small projects encourage a sense of accomplishment and can be the building blocks that help you master your skills step by step. Once you’ve learned the basics, you can take on more intricate designs with ease.
It’s important to choose your quilling tools carefully. You don’t need to buy expensive tools at first — a toothpick or bamboo skewer can roll paper strips just fine. But if you get serious about paper quilling, you should invest in a slotted quilling tool and a needle tool.
You can insert the paper strip into the top slot of the slotted tool, giving you more control while rolling. The needle tool is a sturdy, pointed tool with a long wooden handle.
It helps you keep a steady hand while rolling paper strips into various shapes. Both tools are very helpful when working on large or complex paper quilling projects.
Here’s what you’ll need to get started:
- Quilling paper
- Quilling needle tool
- Pair of scissors
- Glue
- Circle sizing ruler
- Glitter (to make it more beautiful!)
- Quilling comb (you can use any regular hair comb)
So now you’re ready to begin!!!
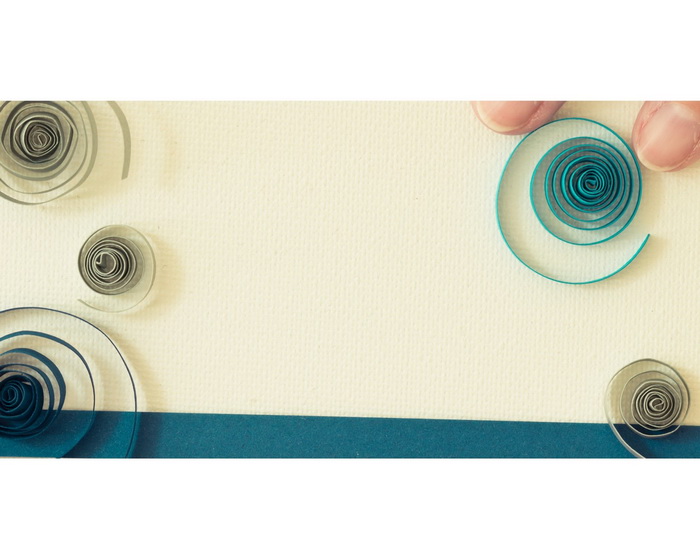
Let’s start by making a coil. First, take a strip of quilling paper and the quilling needle tool. Insert the paper into the needle slot, then begin rolling.
Next, make a tight coil and place it on the circle ruler to loosen slightly. You now have a loose coil. Apply a little glue to the end, and your coil is ready — you can now shape it any way you like.
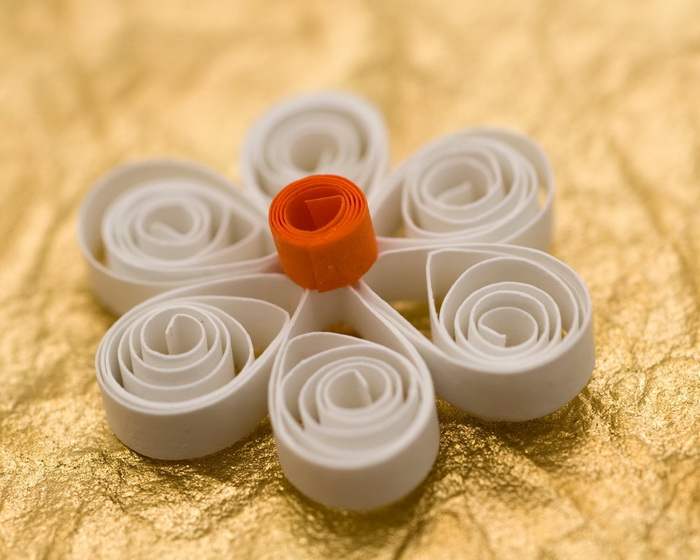
Using only a quilling comb tool, you can create many designs without the needle tool. Let’s start with the comb tool.
Take a strip of quilling paper and make a small loop at one end, securing it with glue. Then place it on the comb and create loops. Once you’ve made about five loops on each side, apply glue to the end and remove it from the comb.
Fold it in half as shown in the picture and form a teardrop shape, securing it with glue. Make two more teardrops like this. Take another strip of paper, make a tight circle, and assemble them together — your beautiful flower is ready! Add a touch of glitter for a sparkling finish.
What Can You Make with the Quilling Technique?
Quilled Necklaces and Earrings
Besides using quilling for cards, you can also make fantastic quilled jewelry. Start by cutting a shape out of cardstock, then wrap a quilling strip several times around the outside edge.
Create a variety of small, loose coils in different colors to fit the shape, then add 3D gloss on top to seal it.
Let Your Imagination Soar with Quilled Birds
Use shapes to build figures on your cards, such as birds or other wildlife. A striking flamingo can be made from a series of loose coils and teardrops in different sizes, along with quilling strips folded lengthwise for the neck and legs.
How to Create Your Own Quilling Letters
Once you’ve mastered a few quilling shapes, why not combine them to create framed decorative designs? From abstract patterns to intricate animals and whimsical designs, let your imagination run wild.
Draw your chosen letter and carefully glue the edges of the quilling strips around it. Surround the letter with your choice of shapes to create a colorful decoration.
| Daya (Daya) | Daya |
 I am a huge enthusiast of creating new handmade beauties, whether it is with beads, paper and pen, canvas and acrylic, or yarn. Every form of art or intricate crafting brings additional inspiration! If you are curious about what else we can make and craft with art and craft materials, stay tuned for updates in the blog and, of course, feel free to share your ideas!
| All articles on Daya |
Rate the article 5.00/5 from 1 grades. |
|
| You have already voted for the article | |
Recommended articles
 THE TIARA IS A FASHION TREND THAT SUITS EVERY AGE
 THE JOURNEY OF AQUAMARINE THROUGH THE AGES
 ADHESIVES FOR ALL YOUR CREATIVE PROJECTS
 THE BEAUTY OF ANTIQUE JEWELRY
 1 Comments

| 1 |

| 0 |

| 0 |

|

| 1 |

|
 Subscribe ♥

 Dawn Sullivan

| 0 |

|
Answer | 27 January 2026 02 56 |

|
SEARCH

|

|
Categories
 New
New


Recent Posts
IN THE WORLD OF QUILLING ART
THE MAGIC OF CREATIVE KITS
A HANDMADE BRACELET IS THE PERFECT GIFT FOR A FRIEND
WHAT SHOULD WE KNOW ABOUT JASPER PENDANTS?
3 TOP IDEAS FOR TEMPORARY WALL DECOR AT AN AFFORDABLE PRICE
WOODEN ELEMENTS A TIMELESS TREND FOR YOUR HOME
AMAZING WEDDING DAY CARDS
Recent comments
Dawn Sullivan за IN THE WORLD OF QUILLING ART
Laura за THE ULTIMATE GUIDE TO CLEANSING AND CHARGING GARNET
JER за Discover and Master the Art of 3D Pen Drawings - A Step-by-Step Guide for 2D and 3D Objects and Sculptures
november birthstone за Discover the Power of Your Birthstones by Month, Zodiac Sign and Day of the Week
