


 0 Commentа
 Printing
 03.11.23
 10.09.18
A Simple Tutorial with Steps for Creating Jewelry Set using Plastic Net Cord
Learn how to make a stunning set of Necklace, Bracelet & Earrings using Plastic Net Cords!
Welcome to this step-by-step tutorial on creating your very own DIY jewelry set! In this tutorial, you will learn how to make a marvelous necklace, bracelet, and earrings using Plastic Net Cords.
With these mesh tube thread cords, just a few simple materials and some basic crafting techniques, you can make unique and beautiful jewelry sets easily!
Whether you’re a beginner or an experienced DIY enthusiast, this tutorial will guide you through the process, making it easy and enjoyable. So gather your supplies and let’s get started on this exciting jewelry-making journey!
First things first: Gathering the Needed Supplies
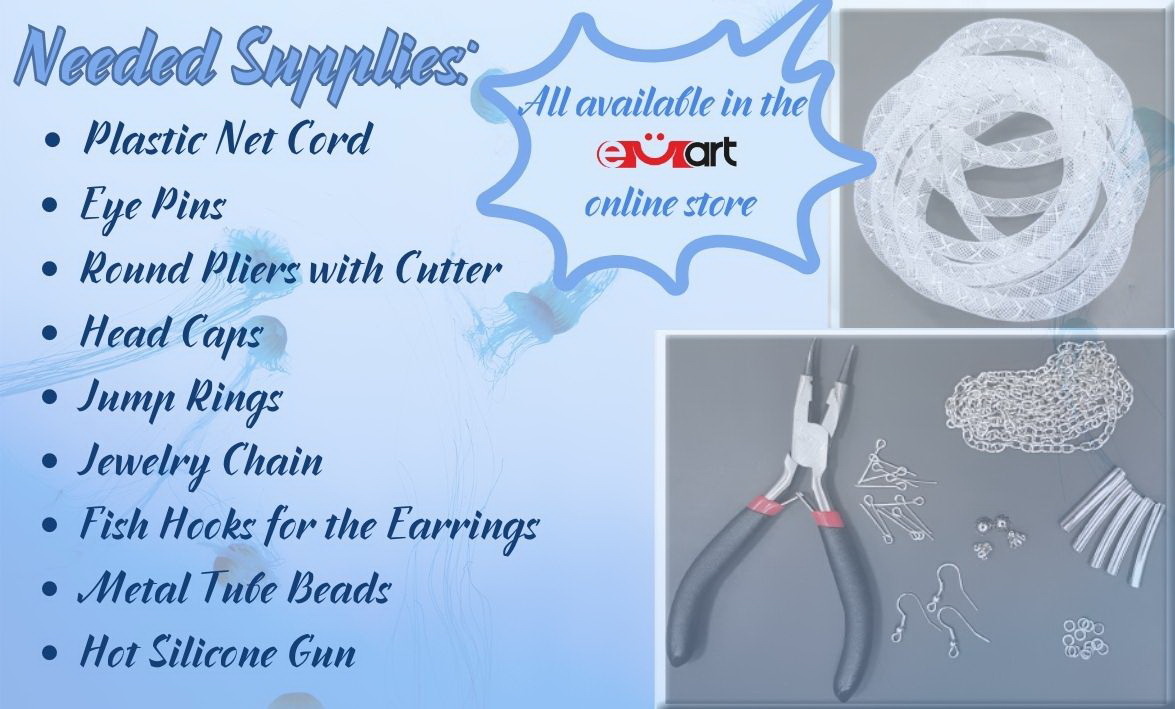
Here you can find everything you’d need to DIY these charming DIY jewels:
- Plastic Net Cord (of you can find other Mash Tube Thread Cords )
- Eye Pins – type of connecting elements
- Pliers with Round Long Nose Cutter
- Head Caps for Jewelry Making
- Jump Rings
- 1 meter Jewelry Chain
- Fish Hooks for the Earrings
- Metal Tube Beads
- Hot Silicone Melt Glue Gun
How to create our Jewelry Set using mesh tube thread cords - A step by step tutorial
With all the necessary supplies at hand, we are excited to guide you through the process of crafting your very own jewelry set, using plastic het cord! Whether you’re a beginner or an experienced DIY enthusiast, this step-by-step tutorial will help you create stunning pieces that you’ll be proud to wear or gift. So let’s get started!
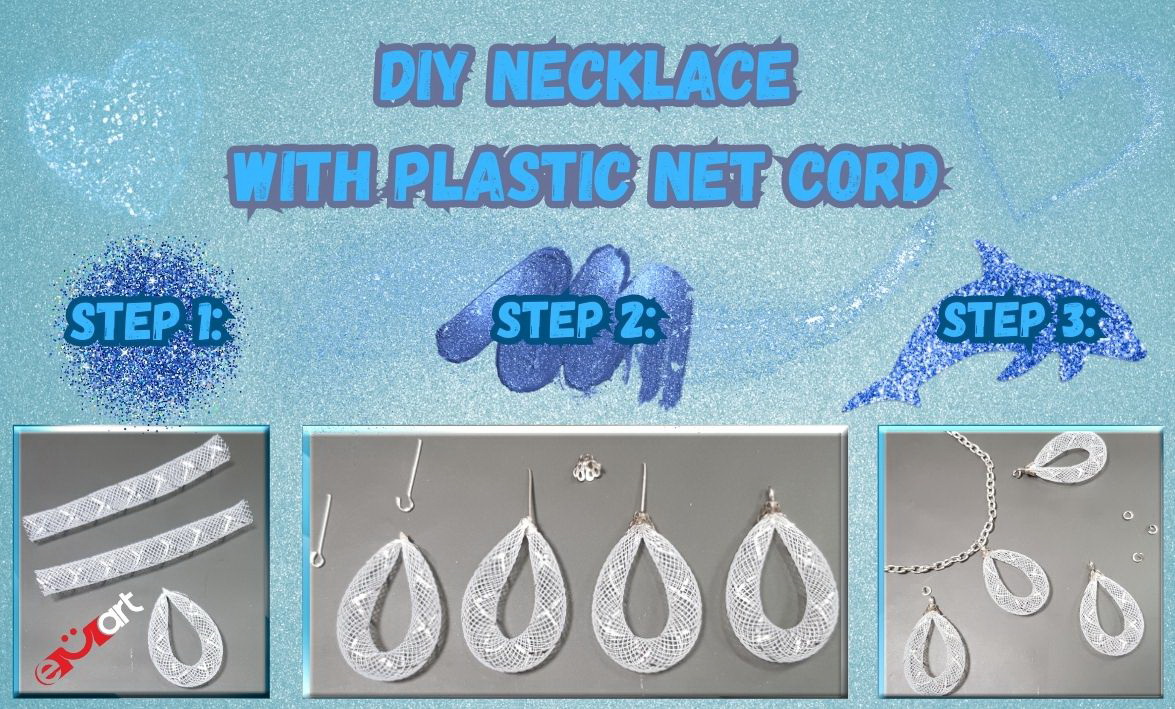
Crafting Stunning Necklase in 3 Easy Steps
Step 1:
Cut 19 pieces from the plastic net cord, each measuring 7 centimeters. Take one of the cut pieces, press the two ends together to form a drop shape. Use a lighter or candle to slightly melt the ends and press them together to stick.
Step 2:
Take one of the eye pins and open the ring slightly with pliers. Pass it under the folded part of the net cord and close the ring. Place the metal cap onto the connecting element and twist its top part into a loop shape.
Step 3:
Use a small jump ring to connect the chain and the finished “drop”. Repeat the same action with the remaining cord pieces. To finish, connect the two sided of the chain together, or use a jump ring to connect them. And now, the necklace is ready!
Making the Earrings and Bracelet
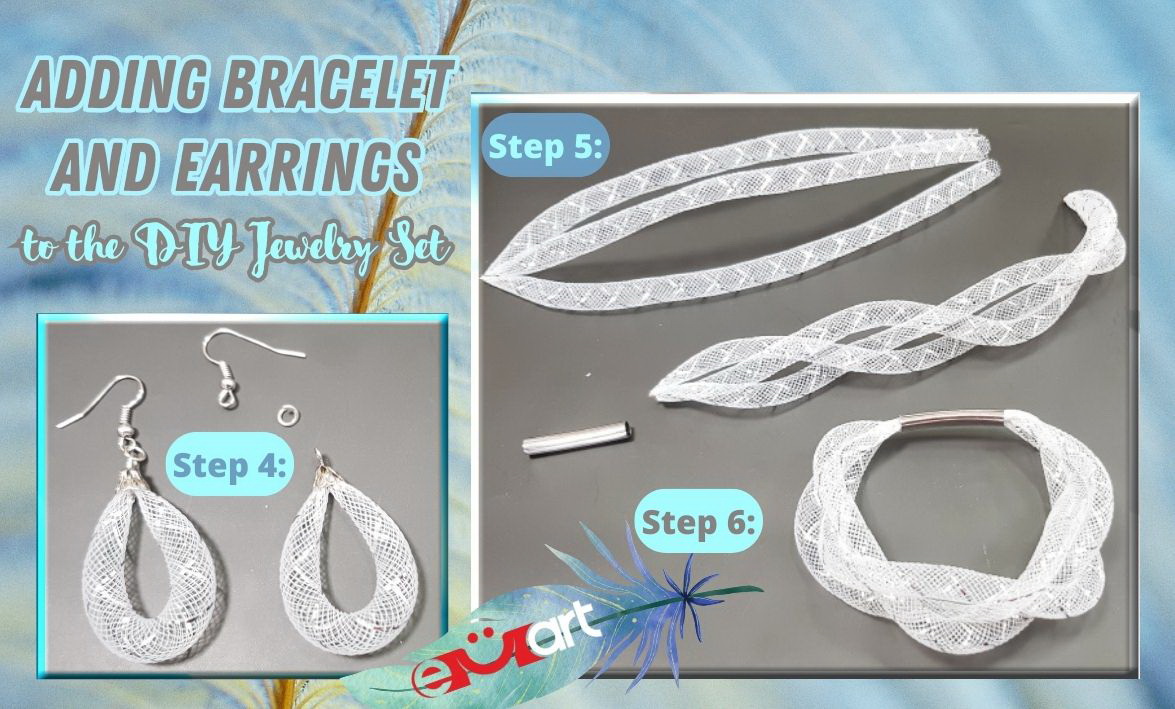
Step 4:
The earrings are made in the same way, but instead of connecting them to the chain, you attach them to the fish hooks.
Step 5:
For the bracelet, cut 3 equal pieces of about 20 cm from the cord. Gather the three ends and, again using a lighter or candle, slightly melt the ends and press them together to stick.
Step 6:
Weave a loose braid with them and glue the cords together at the both sides, (just don’t glue them together, not yet). Take a tube, put silicone hot glue in both holes and insert the cord ends into it. Wait for the glue to dry before trying on the bracelet.
Congratulations on crafting your very own stunning jewelry set! Now you can proudly showcase your creativity and enjoy wearing or gifting these unique pieces.
A Few Additional Tips:
- If you want to add more sparkle, you can put some beads inside the cords tube before sticking it together.
- If you prefer to make a necklace that isn’t so long, use less chain, but don’t forget to add the right jewelry clasps.
-
The handmade jewelry sets are always great gifts for any occasion or holiday, for women and teenage girls alike!
 Keep walking
Rate the article 5.00/5 from 1 grades. |
|
| You have already voted for the article | |
Recommended articles
 THE PATH TO IDENTIFYING NATURAL STONES
 WHO SHOULD WEAR GREEN AMETHYST?
 MALACHITE AND INNER PEACE
 TOP CREATIVE DIY PROJECTS FOR YOUR FAMILY HOME
Labels/Tags
 0 Comments

| 0 |

| 0 |

| 0 |

|

| 0 |

|
 Subscribe ♥
SEARCH

|

|
Categories
 New
New


Recent Posts
IN THE WORLD OF QUILLING ART
THE MAGIC OF CREATIVE KITS
A HANDMADE BRACELET IS THE PERFECT GIFT FOR A FRIEND
WHAT SHOULD WE KNOW ABOUT JASPER PENDANTS?
3 TOP IDEAS FOR TEMPORARY WALL DECOR AT AN AFFORDABLE PRICE
WOODEN ELEMENTS A TIMELESS TREND FOR YOUR HOME
AMAZING WEDDING DAY CARDS
Recent comments
Dawn Sullivan за IN THE WORLD OF QUILLING ART
Laura за THE ULTIMATE GUIDE TO CLEANSING AND CHARGING GARNET
JER за Discover and Master the Art of 3D Pen Drawings - A Step-by-Step Guide for 2D and 3D Objects and Sculptures
november birthstone за Discover the Power of Your Birthstones by Month, Zodiac Sign and Day of the Week
