


 0 Commentа
 Printing
 22.11.23
 06.11.23
Learning the Basics on How to Draw a Mandala
A Complete Step-by-Step Guide on How to Draw a Mandala In Three Different Ways for Beginners
Welcome to our step-by-step guide on how to draw a Mandala! Whether you’re a beginner artist or simply looking for a creative and calming activity, drawing mandalas can be a rewarding experience!
In this guide, we will take you through the process of creating your very own mandala, from the initial design to adding intricate details. You’ll discover that drawing a mandala is not just about putting pen to paper; it’s an immersive experience that taps into your creativity and brings a profound sense of serenity and focus.
Prepare to unleash your imagination as we explore the meditative nature of mandala drawing and how this ancient art form can provide a therapeutic escape from the hustle and bustle of everyday life. We will delve into the various techniques and tools you can use, whether it’s a compass, ruler, or simply your intuition, to construct mesmerizing patterns that embody balance and harmony.
But this journey doesn’t end with the lines on the page. We will also explore the captivating realm of colors and how they can breathe life into your mandala, allowing you to express yourself in vibrant hues or soothing pastels.
So, grab your favorite art supplies and embark on this artistic adventure. Prepare to unlock your inner artist and experience the profound joy and tranquility that comes with creating your very own mandala drawing!
1. The Calming and Meditative Art of Mandala Drawing
Drawing a mandala offers a calming and meditative experience that nurtures the mind, body, and spirit. Through its repetitive patterns and symmetrical shapes, mandala drawing promotes a sense of tranquility and relaxation.
This mindful practice helps to reduce stress, quiet the mind, and foster a state of balance and harmony. As you engage in this creative process, allow yourself to find solace, explore self-expression, and cultivate inner peace.
Let the therapeutic power of mandala drawing guide you on a transformative journey of calmness and serenity.
2. Preparation Makes Perfect: Materials and Guidelines for Flawless Mandala Drawing
2.1. Choosing your Approach: Free Mandala Drawing or Using Circular Grid Templates for Perfect Symmetry
We understand that everyone has their own creative style and preferences. That’s why we offer two distinct approaches to mandala drawing: free drawing and the guide-lined method.
Whether you thrive on the spontaneity of free expression or prefer the structure of guided lines, there’s an option that aligns with your artistic style. So take a moment to consider which method resonates with you, and let’s embark on your mandala journey together!
Tip: If this won’t be your first attempt and you already know exactly how you want to draw your Mandala, you can skip the detailed comparison of the options and proceed directly to the next point in the article.
-
Preparing Guidelines for Your Mandala Drawing
When it comes to creating the guidelines for your first mandala drawing, there are several methods to choose from. Depending on your preference and the tools you have available, you can explore different approaches:
-
Using a Compass, Protractor, and Ruler:
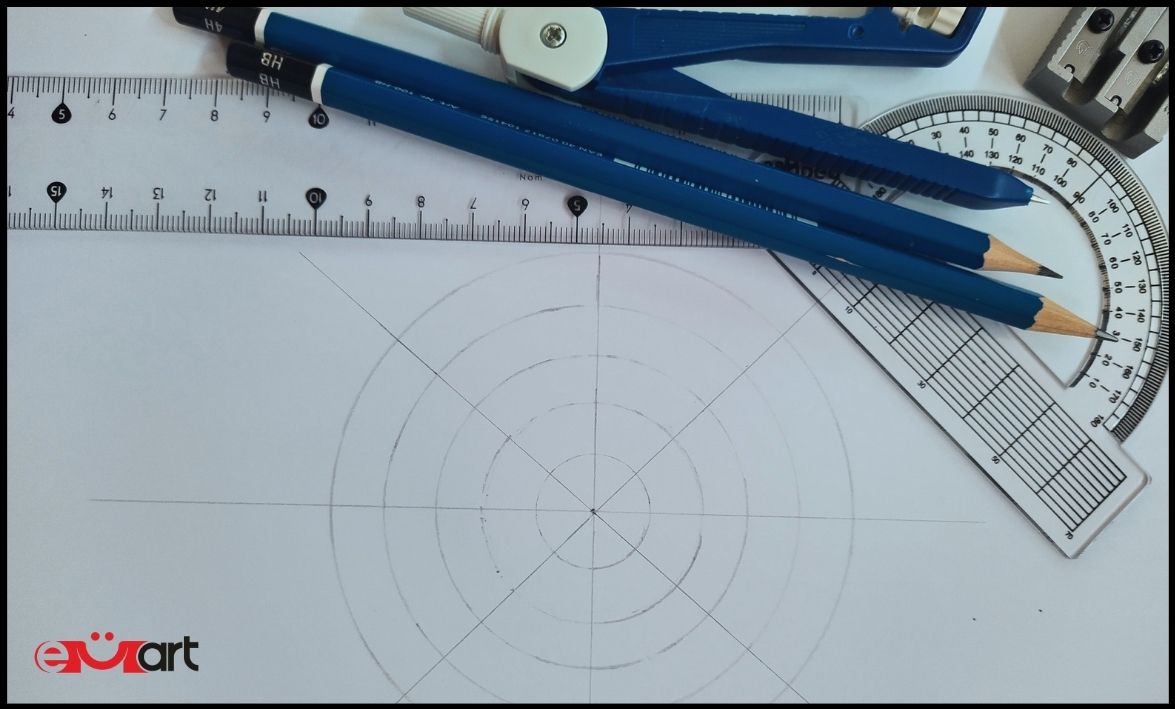
This method allows for precise measurements and angles. You can use a compass to draw concentric circles, a protractor to create specific angles, and a ruler to ensure straight lines and geometric shapes within your mandala.
-
Utilizing Circular Cups and Plates:
If you don’t have specialized drawing tools, don’t worry! Everyday items from your kitchen can serve as stencils. Circular cups or plates of different sizes can be traced to create concentric circles and form the foundation of your mandala.
-
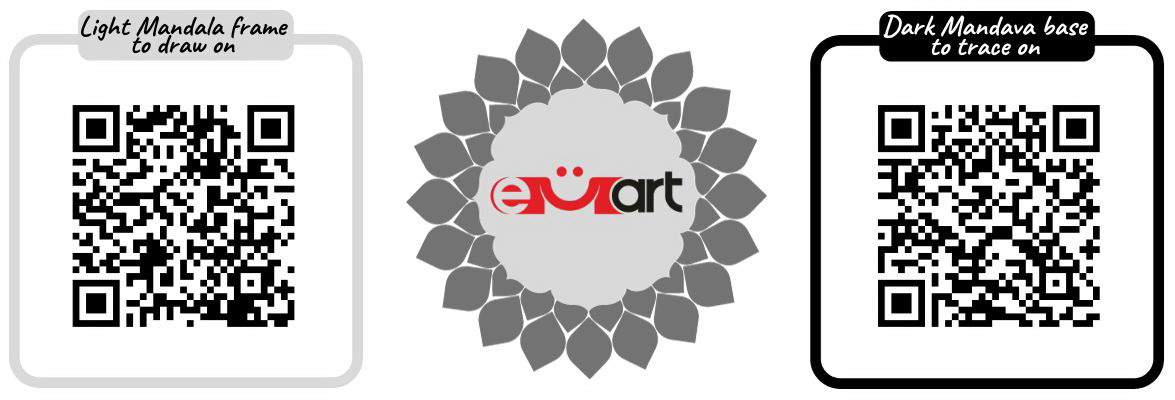
Downloading Our Free Mandala Grid Templates:
For those seeking a ready-made solution, we offer free downloadable circular grid templates for tracing or drawing a mandala on! These templates provide a symmetrical grid that acts as a guide for creating your mandala’s patterns, ensuring balance and proportion in your design.
You can download both types of Mandala drawing templates here by scanning the QR codes:
If you choose to utilize circular grid templates, they can certainly provide several benefits to your mandala drawing experience, particularly if you’re a beginner:
Structure and Guidance:
The circular grid provides a structured framework that helps maintain symmetry and balance in your mandala design.
Ease of Use:
The grid offers clear guidelines for creating intricate patterns, making it easier to plan and execute your mandala.
Precision:
With the grid, you can achieve precise measurements and angles for a polished and professional-looking mandala.
Beginner-Friendly:
The circular grid is especially beneficial for beginners as it simplifies the process and provides a solid foundation.
-
Embrace Creative Freedom: Free Drawing Mandala Mastery
This approach allows you to unleash your imagination and express yourself fully without constraints. With each stroke of your pen or pencil, you have the freedom to explore unique patterns, shapes, and designs that resonate with your artistic vision.
Free drawing mandalas offers a world of infinite possibilities, where spontaneity and self-expression intertwine. As you embark on this artistic adventure, let go of expectations and allow your intuition to guide your hand. Trust in the artistic choices that arise from within, and witness the magic that unfolds on the canvas of your mandala.
By embracing free drawing, you open the door to a meditative state where creativity flows effortlessly. Engage in a dance between your thoughts and the blank canvas, and let the mandala take shape organically. As you immerse yourself in this process, you’ll discover a sense of liberation and joy that comes from creating art that is truly unique to you.
Embrace the freedom to manifest your imagination and create a free drawing mandala that is a reflection of your innermost self. Let this sublime practice awaken your artistic spirit and bring forth a profound sense of fulfillment and accomplishment. Allow each stroke to be an expression of your creative essence, and watch as your mandala comes to life in captivating beauty.
Once you have mastered the basics of mandala drawing, exploring the practice of free-drawing mandalas offers additional benefits and opportunities for artistic growth:
Creative Freedom:
With free drawing, you have complete artistic freedom to explore and express your unique style and imagination.
Spontaneity:
This method allows for spontaneous decision-making and intuitive mark-making, which can lead to unexpected and exciting outcomes.
Personal Connection:
Free drawing mandalas offers a deeper personal connection as you create designs that are truly one-of-a-kind and reflect your individuality.
Fluidity and Flow:
The process of free drawing can be highly meditative, allowing you to immerse yourself in the present moment and experience a state of flow.
2.2. Essential Supplies for Mandala Drawing
Regardless of your chosen method for drawing a mandala, there are a few essential supplies that will always be needed:
- Paper or Sketchbook: Choose a suitable size and quality that works best for your preference. Thinner papers are fine for your first tries, but once you start creating masterpieces, you might prefer pearly craft paper or a sketch pad with higher GSM (meaning “grams per square meter”, also known as “g”).
- Pencils: Use different hardness levels (e.g., HB, 2B) for sketching and outlining.
- Eraser: Essential for making corrections or removing pencil marks.
- Neon Color Pens or Markers: Ideal for outlining and adding intricate details.
- Colouring Pencils or Pastel Pencils (optional): Use these to add color and vibrancy to your mandala designs.
Additional Supplies for Drawing Mandala with Pre-Drawn Guidelines:
- Compass: Used to draw precise circles and arcs.
- Ruler: Essential for creating straight lines and measuring distances.
- Protractor: Helps in accurately measuring and drawing angles.
Reminder: If you decide to use the free downloadable mandala template, you can skip using a compass, ruler, and protractor. These tools are not necessary when using a pre-made template, making the process even more accessible and convenient.
2.3. Exploring Shapes and Patterns for Drawing Breathtaking Mandalas
In the art of mandala drawing, understanding and utilizing basic shapes is key to creating stunning designs. These fundamental shapes serve as the building blocks that form the intricate patterns found within mandalas.
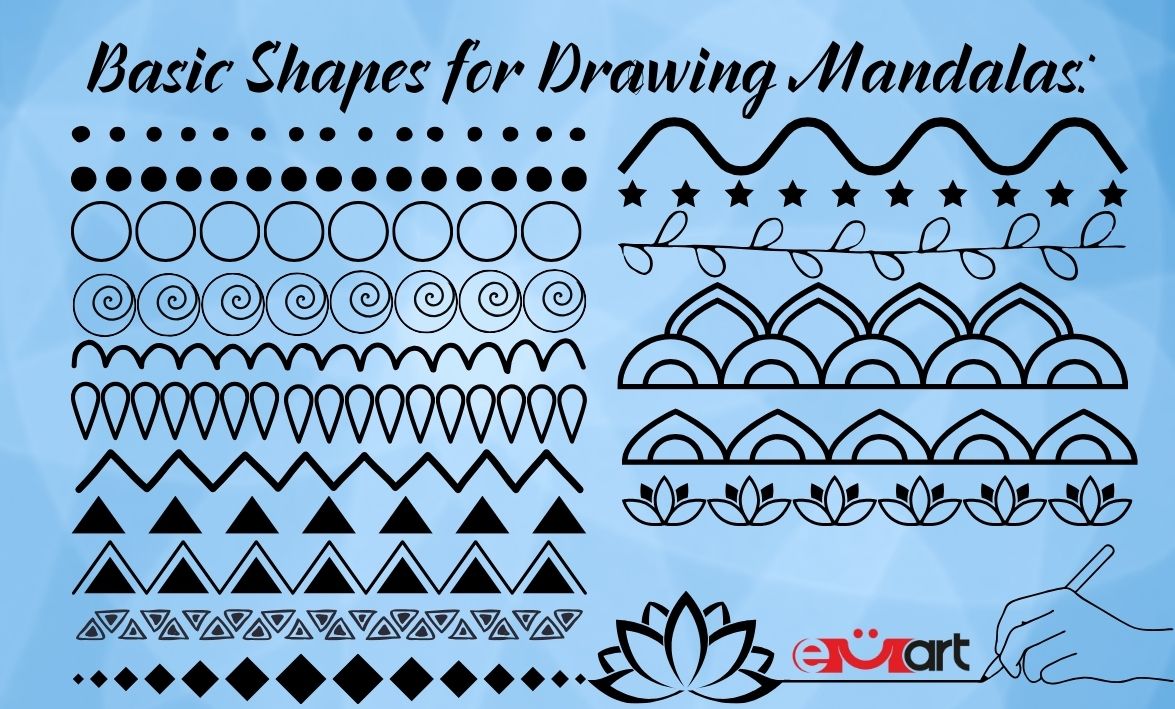
Referencing the picture of essential shapes we have prepared, you will find circles, triangles, squares, and spirals among the foundational elements. Circles symbolize unity and wholeness, while triangles represent stability and transformation. Squares bring grounding and a sense of structure, while spirals depict growth and expansion.
But the creative possibilities don’t stop there!
Beyond these basic shapes, there is a world of floral-inspired elements waiting to be explored. Flowers, leaves, vines, and other botanical motifs can add delicate elegance and natural beauty to your mandalas.
It’s important to note that many of these basic and floral shapes can be easily combined to create mesmerizing patterns and intricate details within your mandalas. Experiment with different combinations, repetitions, and variations to discover unique patterns that resonate with your artistic vision.
As you delve into the realm of mandala drawing, keep in mind that the combination of shapes is where the magic happens! Allow yourself to be inspired by the interplay between circles and petals, triangles and leaves, squares and vines. Embrace the harmony that arises when these elements come together in a symphony of creativity.
2.4. Choosing the Colors for your personal Mandala Drawings
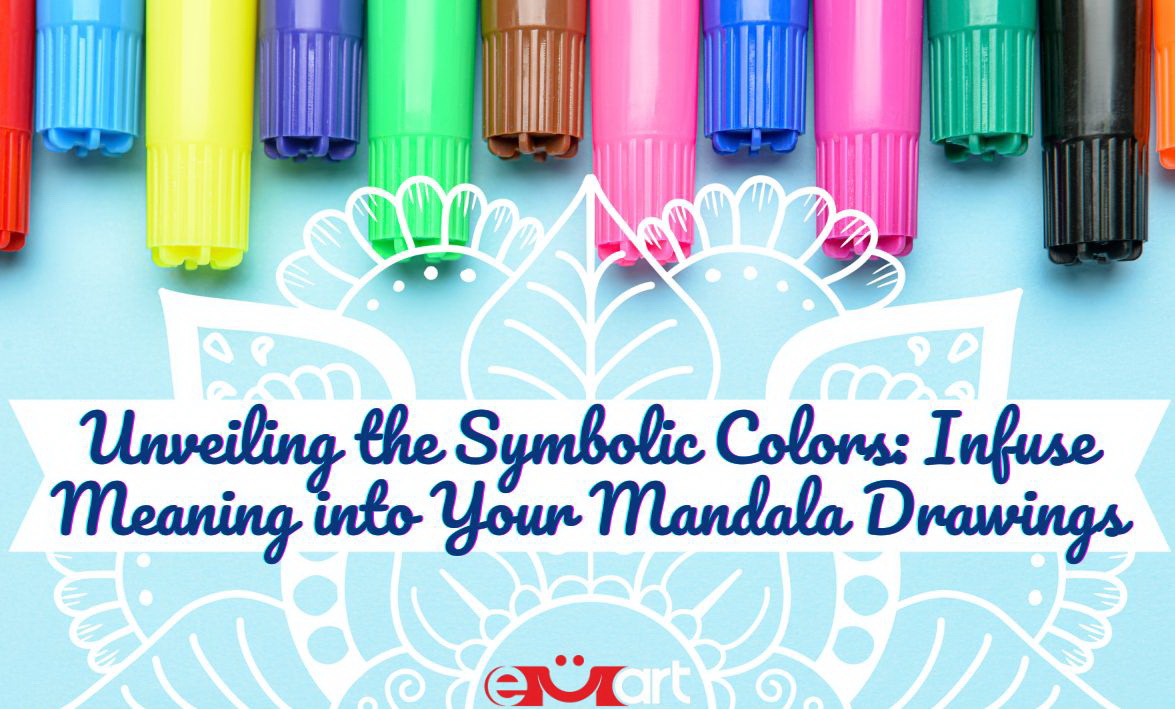
When coloring your personal mandala drawing, different colors can evoke various emotions and symbolize different meanings. Here are a few common associations with colors in mandala art:
Red: Red represents energy, passion, strength, and vitality. It can also symbolize courage and determination.
Orange: Orange is associated with enthusiasm, creativity, joy, and warmth. It can also represent a sense of balance and harmony.
Yellow: Yellow symbolizes positivity, optimism, happiness, and enlightenment. It can also signify intellect and clarity of thought.
Green: Green represents growth, healing, renewal, and nature. It can also symbolize balance, harmony, and abundance.
Blue: Blue is associated with calmness, tranquility, peace, and serenity. It can also represent intuition and spiritual awareness.
Purple: Purple embodies spirituality, wisdom, and inner strength. It can also symbolize transformation and the connection between the physical and spiritual realms.
Pink: Pink represents love, compassion, gentleness, and emotional healing. It can also symbolize nurturing and self-care.
White: White symbolizes purity, clarity, and spiritual awakening. It can also represent a blank canvas for new beginnings.
Black: Representing mystery, depth, strength, and protection.
Gold: Associated with abundance, prosperity, enlightenment, and divine energy.
As you might already know, these associations with colors can vary depending on cultural and personal interpretations. The meaning of colors in your mandala drawing can be unique to you and reflect your intentions, emotions, or personal symbolism. Trust your intuition and choose colors that resonate with you and enhance the overall message or feeling you want to convey through your mandala artwork.
3. Easy-to-Follow Mandala Drawing Tutorials
Get ready to explore two exciting variants of step-by-step tutorials on how to draw a mandala! We have you covered whether you prefer using a mandala template or the precision of a compass and ruler, or if you’re ready to unleash your creative spirit through free-drawing with no base at all.
Prepare to embark on a creative journey that suits your preferred style and discover the joy of bringing mandalas to life in your own unique way. Let’s dive into these two captivating tutorials and unlock the artist within you!
3.1. Drawing a Mandala with Guided Precision
Before we dive into the step-by-step process of drawing a well-structured mandala, we want to offer you some flexibility in your approach. For those who prefer using a compass, ruler, and protractor, we will provide additional steps as a start, to guide you through achieving precise geometric designs.
However, if you decide to use our free downloadable mandala template, you can simply print it out and skip those steps altogether and start from step 6. You have the option to draw directly over the lighter template or trace the dark template onto a separate sheet. This way, you can focus on the creative aspect of designing your mandala. So, let’s begin this artistic journey with guided precision and bring your mandala dreams to life!
Step 1: Gather Your Materials
Ensure you have a blank sheet of paper, a ruler, a compass, and a protractor. (Or chose suitabve cups and plates to trace with your pensil)
Step 2: Choose Your Mandala Size
Determine the desired size of your mandala and mark the center point on your paper.
Step 3: Draw the Outer Circle
Adjust the compass radius to achieve the desired size. Outline the desired circles for your mandala by rotating around the central point.
Tip: If you want equal or specific distances between individual circles, use a ruler to measure centimeters each time you adjust the compass.
Step 4: Divide the Circle
Using the protractor, mark equally spaced points along the circumference of the outer circle. These will serve as guidelines for dividing the mandala into sections.
Step 5: Create Guidelines
With the ruler, connect the marked points to the center point, dividing the mandala into equal sections. These guidelines will provide a structured framework for your mandala design.
Step 6: Start Designing
Begin adding patterns, shapes, and details within each section of the mandala. You can experiment with geometric patterns, symmetrical designs, or any other artistic elements that resonate with you.
Step 7: Repeat and Refine
As you progress your drawing, repeat and refine your design elements across the sections to maintain symmetry and balance. Let the patterns flow harmoniously throughout the mandala.
Step 8: Add Intricate Details
Continue adding intricate details to your design, using the ruler for straight lines and the compass for precise curves. This will enhance the intricacy and visual appeal of your mandala.
Step 9: Erase Guidelines
Once you’re satisfied with your mandala design, carefully erase the pencil guidelines to reveal the final artwork.
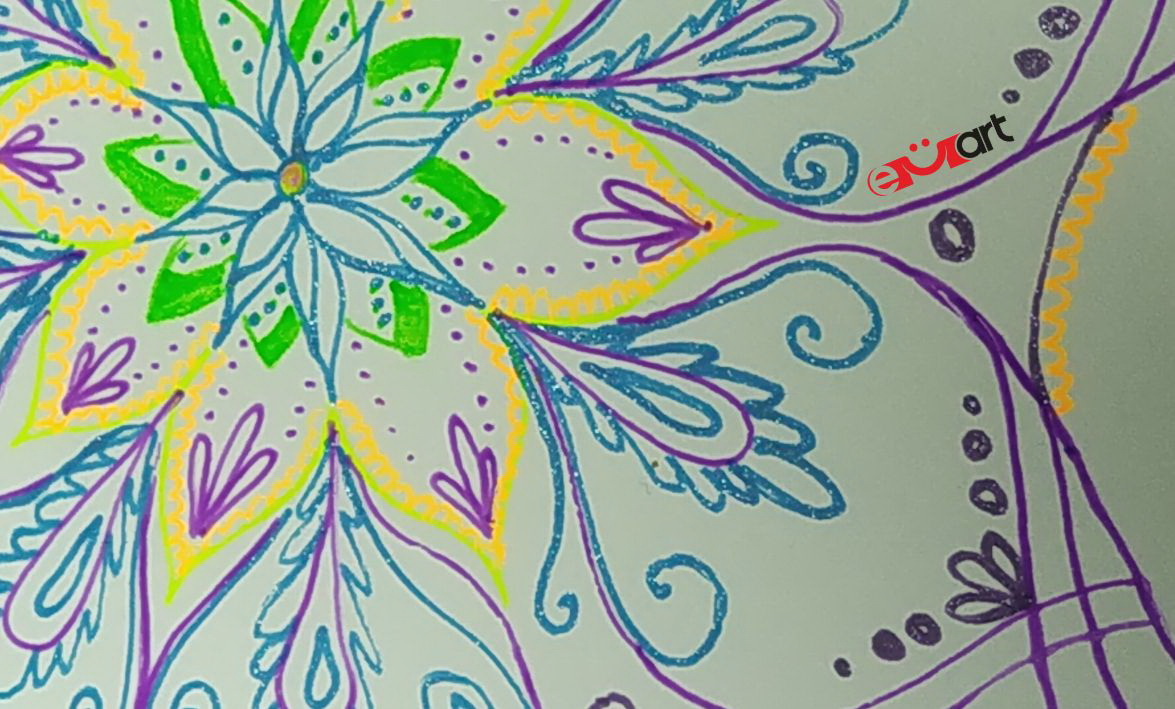
Step 10: Color your Mandala
Bring your mandala to life by filling in the details with your chosen colors. Select a color palette that resonates with your vision and begin coloring section by section.
Explore shading, blending, and gradients to add depth and dimension to your design.
Step 11: Display and Appreciate Your Artwork
Take a moment to admire your completed mandala! It’s now ready to be displayed or shared with others. Consider framing it, using it as digital artwork, or even gifting it to someone special.
Remember, if you have downloaded our well-structured mandala template, you can skip Steps 2 to 5 and proceed directly to Step 6, where you can start designing within each section of the template. This allows you to focus on adding your creative touch without the need for rulers and compasses. Enjoy the process of bringing your well-structured mandala to life!
3.2. Adventure Time: Free-Drawing a Mandala with No Base
Embark on an artistic adventure with free drawing mandalas! Unlike using guidelines, free drawing offers a boundless realm of abstract options, allowing your creativity to soar!
My first personal attempt to draw a Mandala freely, without any pre-drawn lines or circles.
However, have in mind that this approach can be more challenging for beginners (as you can see on the picture above). But fear not, as we will guide you through a step-by-step process that will help you navigate the intricacies of free drawing mandalas. Get ready to unlock your imagination and embrace the beautiful complexities of this expressive art form. Let’s dive in!
Step 1: Choose Your Starting Point
Use your pencil to lightly mark the center of your paper. This will serve as the focal point for your mandala.
Step 2: Start from the Center of your Mandala
Begin by drawing a basic shape at the center, such as a circle, square, or triangle. This will serve as a starting point for your mandala.
Step 3: Expand and Add Details
From the central shape, gradually expand outward, adding more shapes, lines, and patterns as you go. There is no right or wrong way to do this; let your intuition guide you.
Step 4: Embrace Symmetry or Go Freestyle
Decide whether you want to maintain symmetry by reflecting your design elements across the central axis, or if you prefer a more freestyle and asymmetrical approach. Both ways can result in beautiful mandalas!
Step 5: Explore Patterns and Lines
Experiment with various patterns, such as dots, lines, curves, petals, or geometric shapes. Combine different elements to create intricate and visually appealing designs.
Step 6: Add Intricate Details
Continue adding intricate details and embellishments to your mandala. This can include shading, hatching, or any other techniques that enhance the depth and texture of your artwork.
Step 7: Trust Your Intuition
Throughout the process, trust your artistic instincts and allow your mandala to evolve organically. There are no mistakes in free drawing; every stroke contributes to the unique beauty of your creation.
Step 8: Color and Enhance
If desired, add color to your mandala using water colored pencils, markers, or any other coloring materials of your choice. Select a color palette that resonates with your vision and bring vibrancy to your design.
Step 9: Enjoy Your Unique Mandala
Step back and admire your finished mandala. Celebrate the creativity and personal expression that went into its creation. Display it proudly or use it as a source of inspiration for future artistic endeavors!
4. My First Mandala Drawing: A Beginner’s Tale Shared
As a blogger and a huge fan of various art and craft forms, here, dear readers, I will allow myself to share with you the raw and unfiltered reality of my personal initial attempts to draw Mandalas.
As you can see from the photos of my first attempts, they are far from perfect. It was not easy for me to achieve the intricate shapes and motifs, and I definitely didn’t hesitate to use an eraser several times.
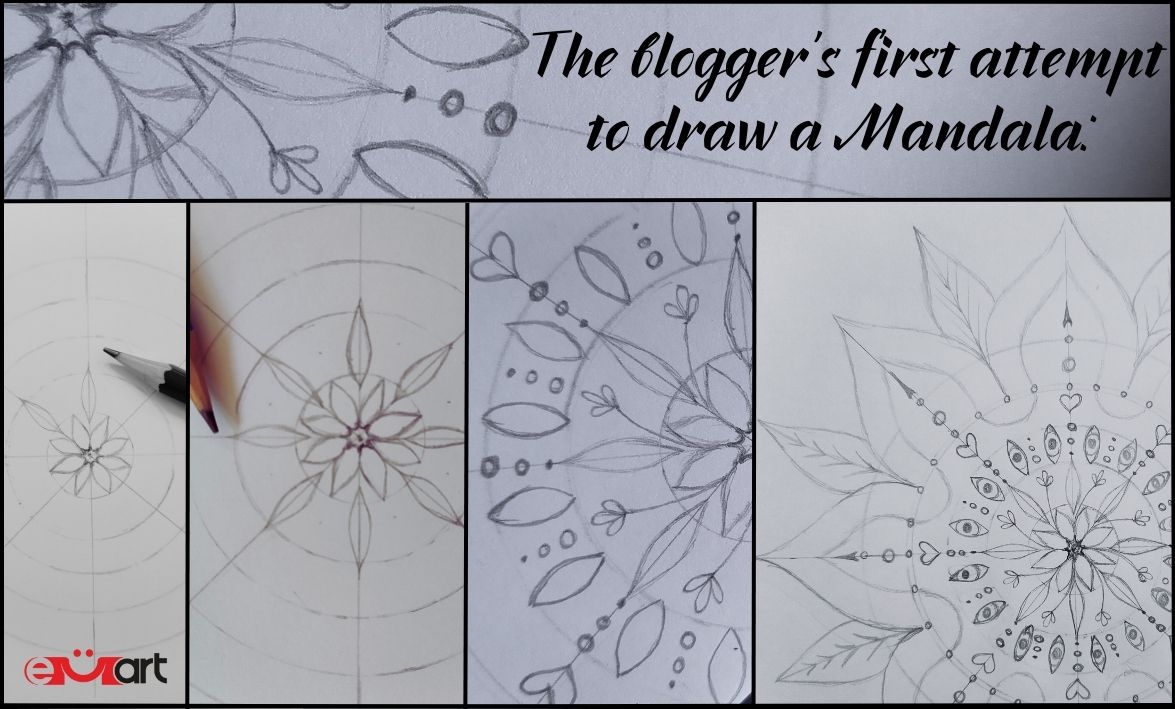
For my first attempt at drawing a Mandala, I preferred to come up with my own personal shapes to make the end result as unique as possible. I used a compass, ruler, and protractor with a pencil as a base to maintain symmetry as much as I could.
But here’s the valuable lesson I learned: mistakes are an integral part of the learning process. They are the stepping stones towards growth and improvement. As a beginner, it’s essential to embrace imperfection and accept that mistakes are simply the first steps on the path to learning!
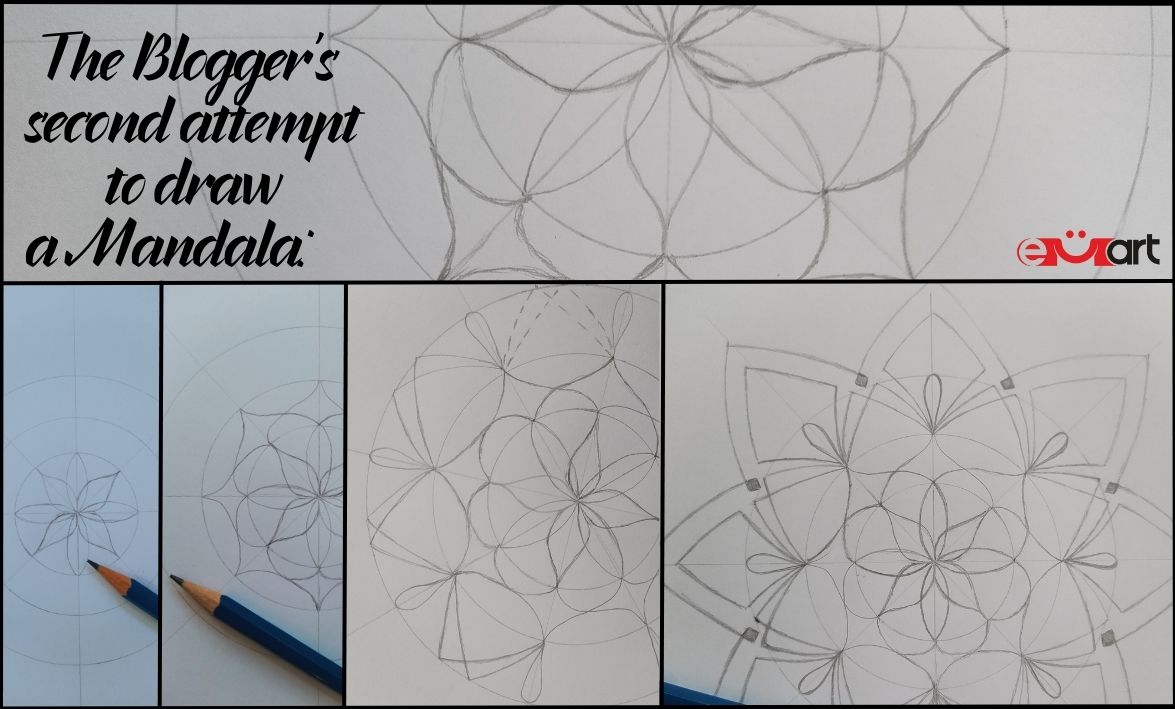
Here, I started by drawing the preliminary circles using the outlines of several cups and bowls of different sizes at home, and I added the lines by tracing with a pencil on the cover of a large book. Then, I chose to try drawing entirely geometric shapes this time.
I encourage you, dear reader, to be bold and fearless in your own artistic endeavors. Don’t be discouraged by imperfections or the need to use an eraser repeatedly. Instead, celebrate these moments as opportunities for growth and experimentation. Remember, every artist starts somewhere, and it’s through practice and perseverance that we refine our skills.
So, let go of the fear of making mistakes and dive into the world of mandala drawing with confidence. Embrace the beauty of imperfection and cherish every stroke, knowing that each one brings you closer to your artistic aspirations. Let your passion guide you as you embark on your own unique journey of self-expression and creativity.
May my humble beginnings serve as a reminder that greatness emerges from the willingness to make mistakes and learn from them. Embrace imperfection, dear reader, and watch as your artistic abilities flourish before your eyes!
| Daya (Daya) | Daya |
 I am a huge enthusiast of creating new handmade beauties, whether it is with beads, paper and pen, canvas and acrylic, or yarn. Every form of art or intricate crafting brings additional inspiration! If you are curious about what else we can make and craft with art and craft materials, stay tuned for updates in the blog and, of course, feel free to share your ideas!
| All articles on Daya |
Rate the article 5.00/5 from 2 grades. |
|
| You have already voted for the article | |
Recommended articles
 IN THE WORLD OF FANTASTIC JASPER
 MALACHITE THE STONE OF MONEY
 HOW TO MAKE BEAUTIFUL EARRINGS AT HOME
 Exploring Premium Materials for Designing and Crafting Unique Handmade Bags
Labels/Tags
 0 Comments

| 0 |

| 0 |

| 0 |

|

| 0 |

|
 Subscribe ♥
SEARCH

|

|
Categories
 New
New


Recent Posts
IN THE WORLD OF QUILLING ART
THE MAGIC OF CREATIVE KITS
A HANDMADE BRACELET IS THE PERFECT GIFT FOR A FRIEND
WHAT SHOULD WE KNOW ABOUT JASPER PENDANTS?
3 TOP IDEAS FOR TEMPORARY WALL DECOR AT AN AFFORDABLE PRICE
WOODEN ELEMENTS A TIMELESS TREND FOR YOUR HOME
AMAZING WEDDING DAY CARDS
Recent comments
Dawn Sullivan за IN THE WORLD OF QUILLING ART
Laura за THE ULTIMATE GUIDE TO CLEANSING AND CHARGING GARNET
JER за Discover and Master the Art of 3D Pen Drawings - A Step-by-Step Guide for 2D and 3D Objects and Sculptures
november birthstone за Discover the Power of Your Birthstones by Month, Zodiac Sign and Day of the Week
