


 0 Commentа
 Printing
 01.11.23
 09.12.20
Create Your Own DIY Christmas Tree Ornaments in a Transparent Plastic Ball
A Step-by-Step Guide for Unique Handmade Christmas Decorations
Unlock your creativity and elevate your holiday spirit with our detailed guide on crafting DIY Christmas tree ornaments using transparent plastic balls. From cutting out vibrant Christmas trees from soft felt sheets to adding snowy bases and textures, each step is meticulously explained to ensure your success!
Christmas, known as one of the brightest Christian holidays, fills every family with excitement as they prepare for this special occasion. We all strive to create a warm and cozy atmosphere in our homes that is befitting of this festive season. As each year passes, we find ourselves pondering how to surprise our loved ones and friends with extraordinary decorations and unique gifts. It is on this delightful occasion that we would like to share with you the beauty of a handmade Christmas ornament in a transparent plastic ball!
In this article, you will discover not only the idea and inspiration you seek but also step-by-step instructions on how to effortlessly create a stunning Christmas decoration in a transparent plastic ball using just a few elements! This decoration is not only perfect for adorning your Christmas tree but also serves as an exquisite gift for your loved ones.
-
Materials Needed for Crafting the Christmas Tree Ornament
Before we start crafting this marvelous Christmas tree ornament, here are all the materials you would need:
Materials needed:
- Transparent Plastic Ball
- Soft felt sheets in light green color
- Soft felt in dark green color
- Round Tile from Chipboard
- Wooden button
- House-Shaped Wooden Pendant
- Pinecones
- Artificial snow (we used this volumetric embossed paste from LORCA)
- Silicone granules
- Red wooden beads for decoration
- Red ribbon for bow
- Glitter
- Natural fir branches
Once you have gathered all the required materials, we can proceed to the step-by-step tutorial and embark on this delightful journey together! Prepare to unleash your creativity and bring the enchanting beauty of Christmas into your home!
-
Crafting Christmas Tree Ornaments Using Transparent Plastic Balls:
A Step-By-Step Guide
Let’s get to work! This delightful project is not only a great way to infuse your home with the enchanting spirit of Christmas but also promises a pleasant and enjoyable crafting experience.
Get ready to immerse yourself in the joy of crafting beautiful Christmas tree ornaments, adding a touch of magic to your holiday season. Now, let’s dive right into the step-by-step tutorial and bring your creative vision to life!
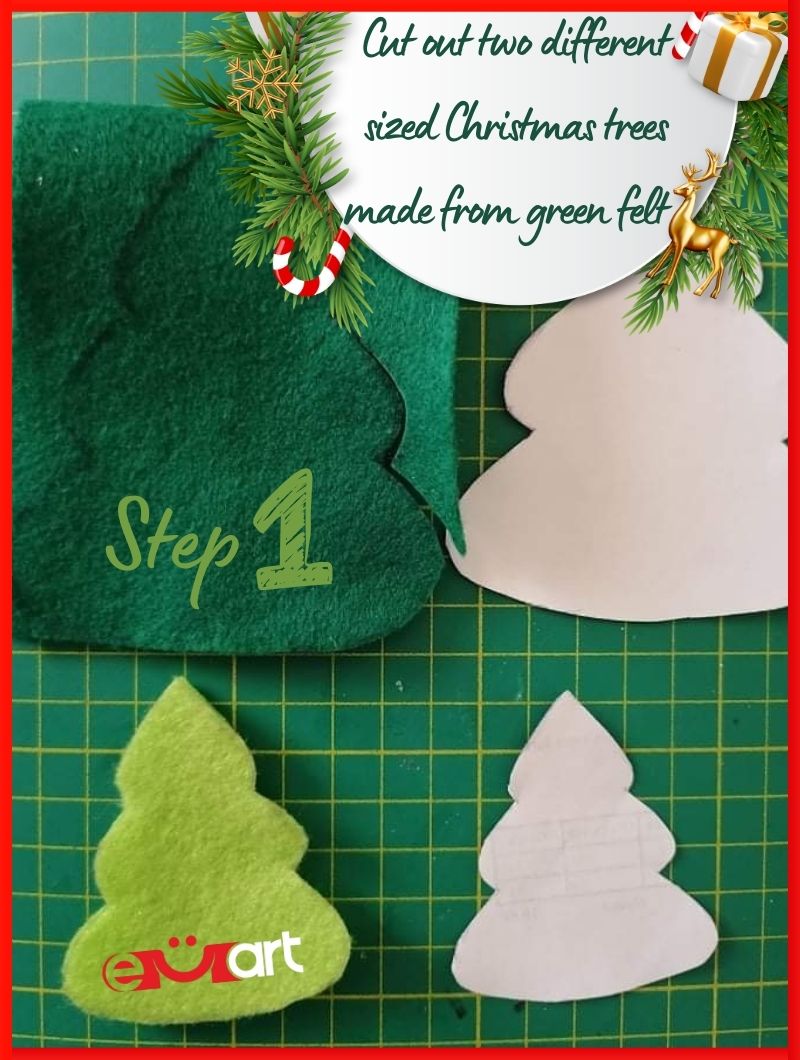
Step 1:
Let’s begin this festive craft by carefully cutting out two different sizes of Christmas trees from light and dark green-colored soft felt sheets. This will add a touch of holiday magic into our transparent plastic ball ornament!
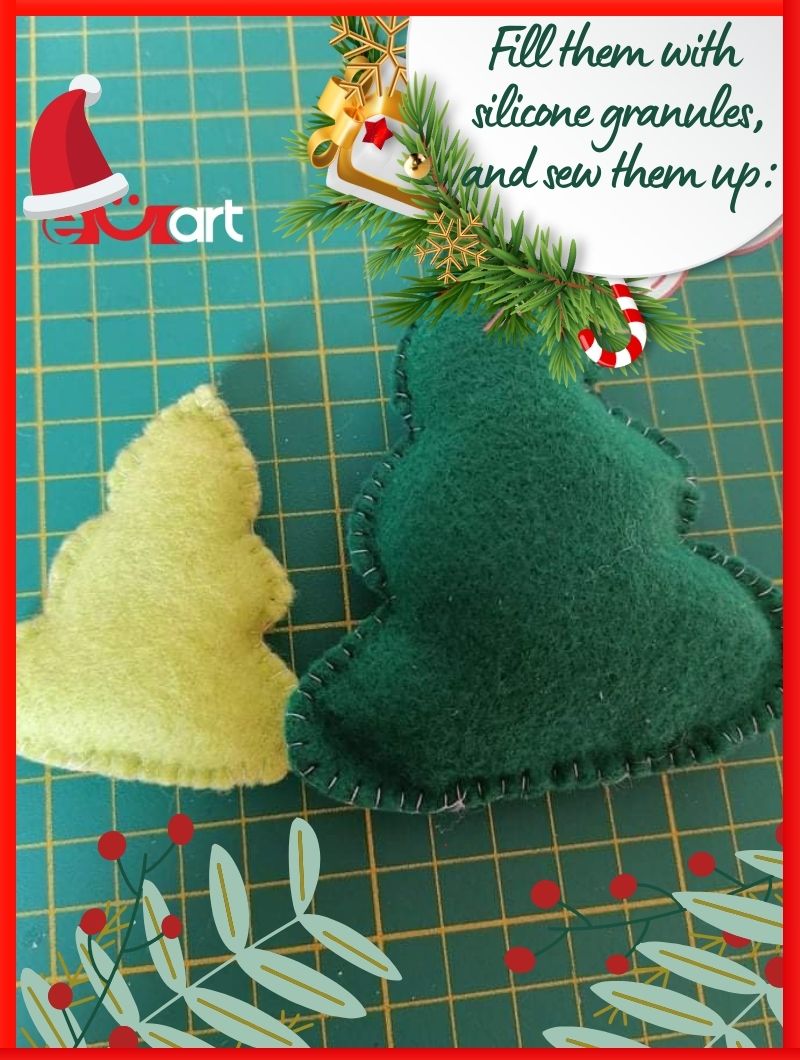
Step 2:
Using a needle and thread, we skillfully sew the Christmas trees together, making sure to leave a small opening on the bottom side. This opening will allow us to fill the trees with silicone granules, which will add a lovely weight and texture to the ornament.
![]()
Once filled, we sew the opening shut, securing the enchanting scene within. And behold! Our finished Christmas trees now bring the joyous spirit of the season to life!
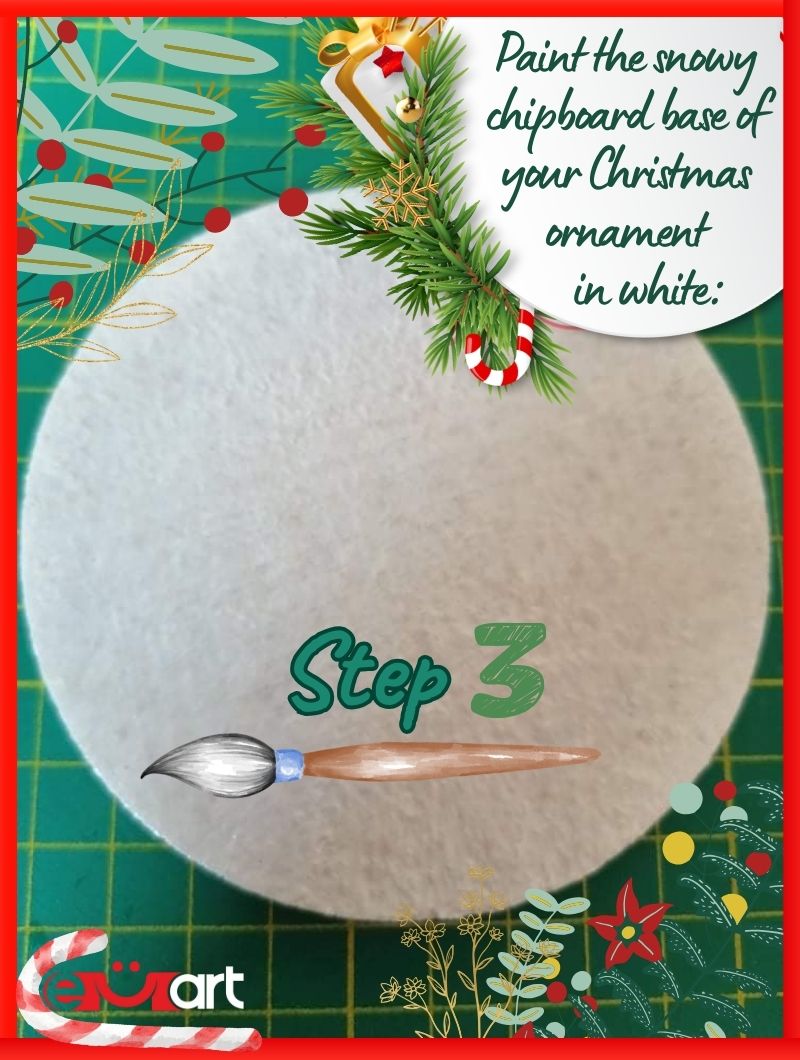
Step 3:
To add a snowy base to our ornament, we take a circular piece of round tile from chipboard and give it a fresh coat of white paint. This snowy canvas will provide the perfect base for our festive creation.
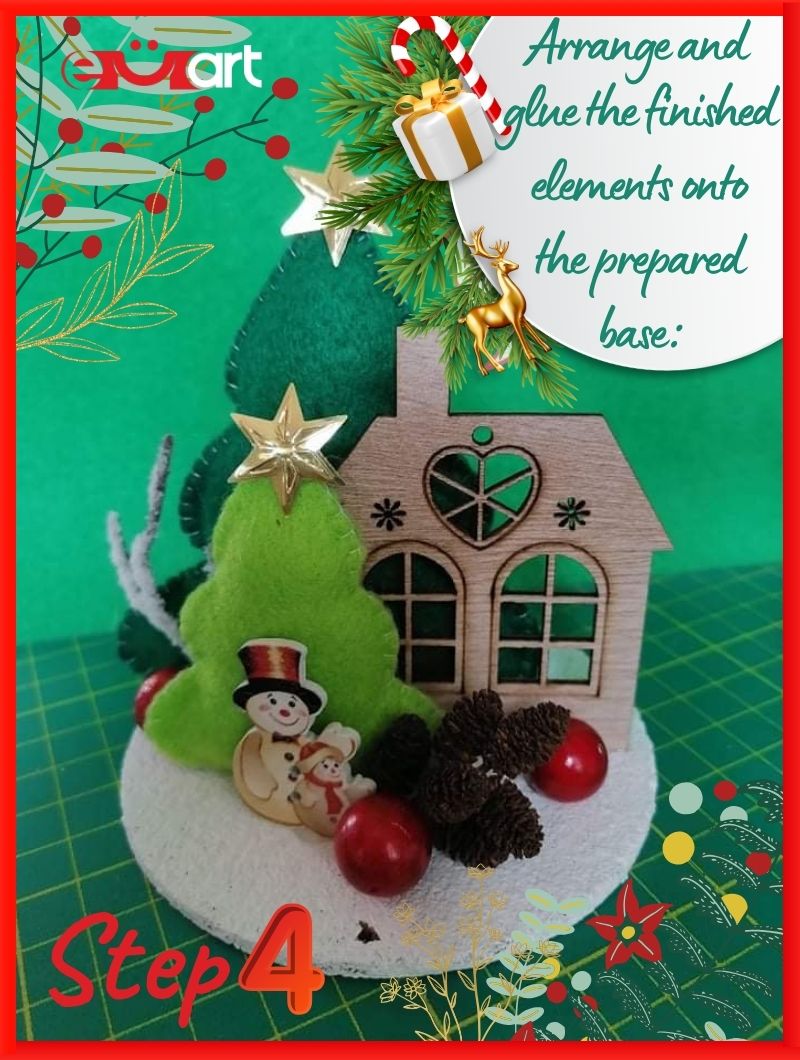
Step 4:
With careful precision, we glue the completed elements, including the Christmas trees, onto the snowy white base. This step allows us to artistically arrange the elements and bring our vision to reality.
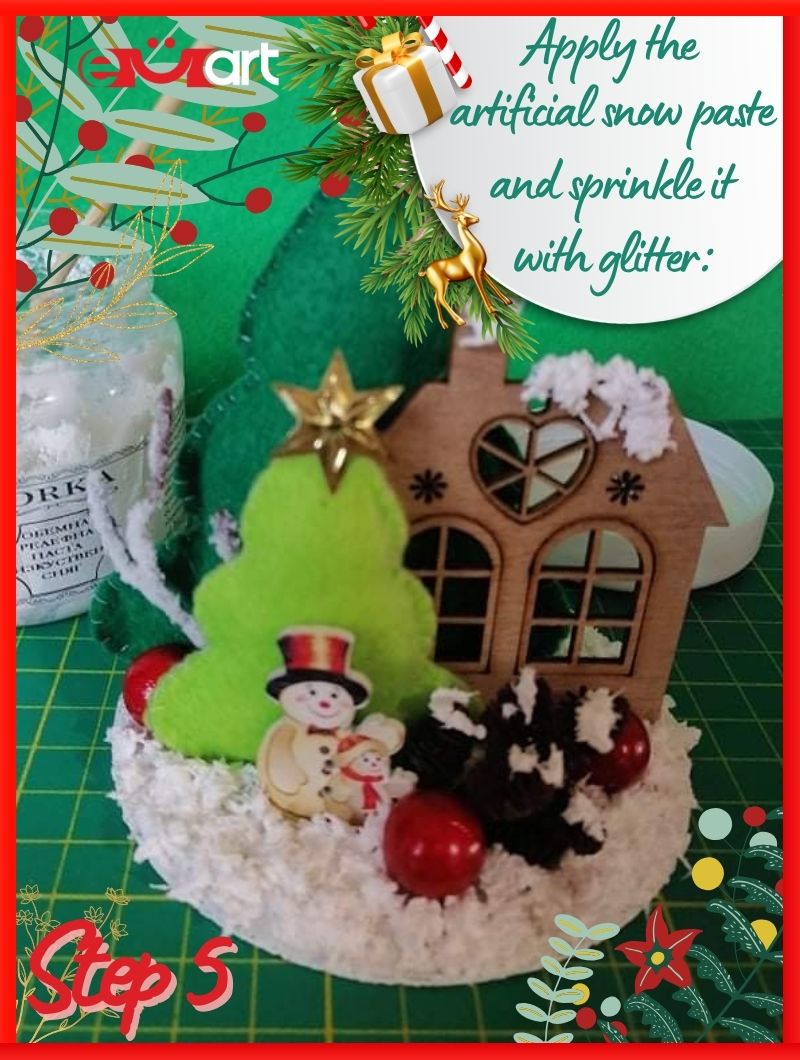
Step 5:
Now it’s time to add an extra touch of winter whimsy! Using a special artificial snow paste, we delicately apply a snowy texture to our ornament. To enhance its magical allure, we generously sprinkle glitter over the snow, creating a sparkling spectacle that captures the essence of the Christmas holiday season.
Step 6:
With our composition complete, we affix it to one side of the transparent plastic ball using strong adhesive. As we gently close the ball with its other side, our masterpiece is securely enclosed within:
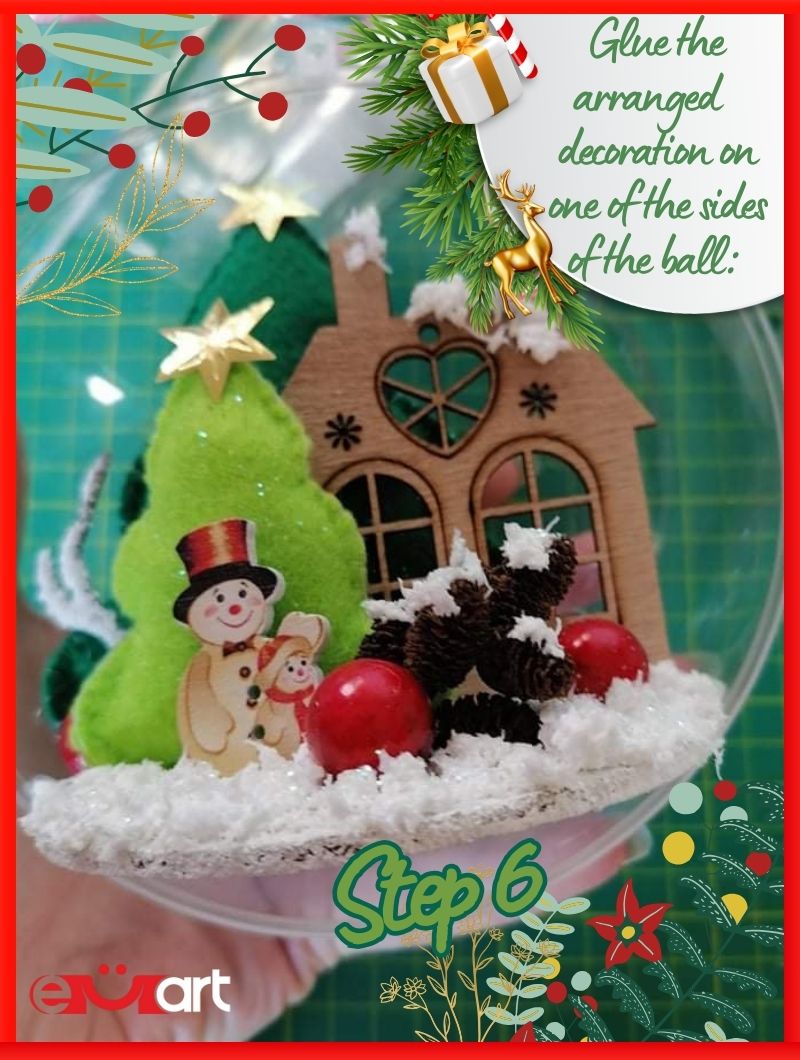
![]()
Step 7:
To add an elegant finishing touch, we can now adorn our ornament with a beautifully decorated red ribbon. This final addition adds an extra dash of festive charm, completing the enchanting transformation of our Christmas tree ornament!
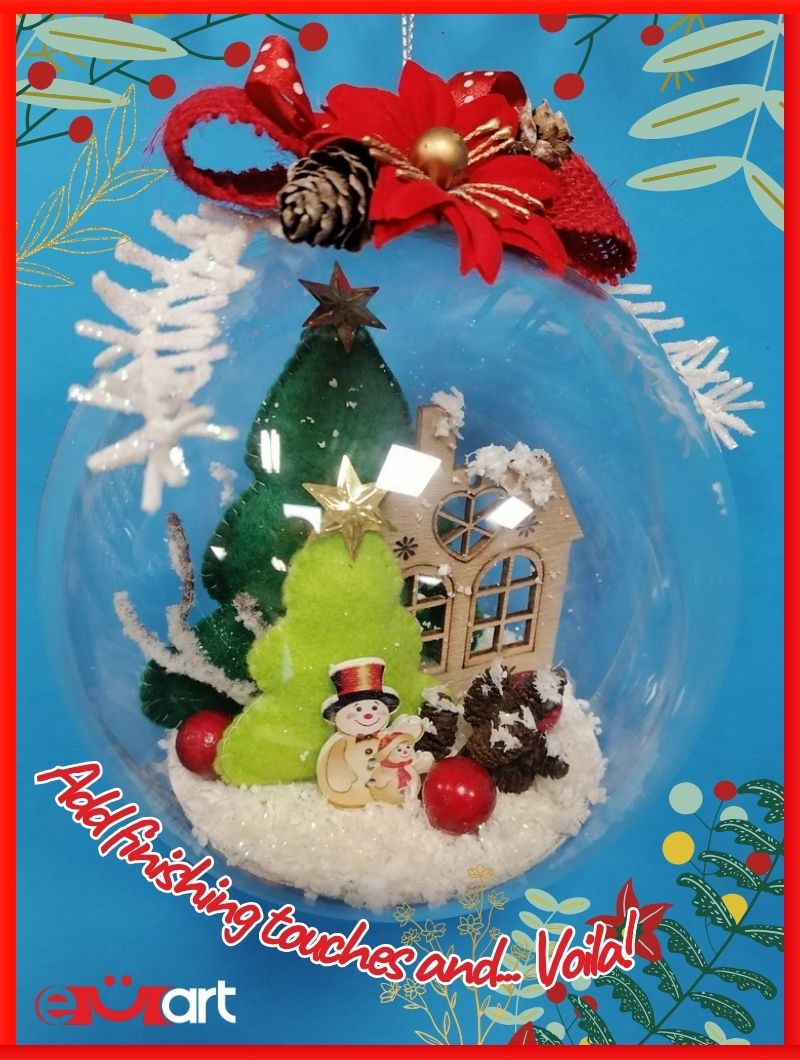
And there you have it! Our magnificent Christmas tree ornament, crafted with love and creativity, is now ready to grace any holiday tree or serve as a cherished gift for loved ones!
-
Unique Ideas for Personalized Christmas Decorations in a Transparent Ball
Not only can you replicate the given step-by-step ornament in a transparent ball, but you can also let your creativity soar and invent a variety of different Christmas decorations within the ball!
Here are a few tips to inspire you and make each Christmas tree ornament in a plastic ball unique and personalized, especially if you plan to use them as gifts:
- Using a Transparent Plastic Star:
Use a clear plastic star as the base instead of the circular ball. Fill it with glitter, tiny ornaments, or delicate snowflakes to create a captivating celestial scene within the ornament.
- Needle Felted Christmas Trees:
Instead of using soft felt sheets, try needle felting green wool to create miniature Christmas trees to arrange into the transparent ball. This technique adds a charming texture and a handmade touch to your ornaments.
Tip: Here in EM ART online store you can find a wide variety of wool for felting and the needed hobby tools for your felted Christmas decorations!
- Wooden Decorations:
Incorporate wooden decorations shaped as Santa Claus, deer, angels, snowflakes, or other festive symbols. These wooden elements can be painted, glittered, or left in their natural state for a rustic feel of your Christmas tree ornament.
- Customized Messages:
Add small handwritten notes or personalized messages inside the transparent ball. This adds an extra touch of thoughtfulness and makes the ornaments truly special when given as gifts.
- Miniature Figurines:
Include miniature Christmas figurines that hold sentimental value or represent the recipient’s interests or hobbies. This personal touch will make the Christmas decoration even more meaningful.
- Theme-based Ornaments:
Create a cohesive theme for your ornaments by using specific colors, motifs, or symbols. For example, you could have a snowflake-themed ornament with various sizes and designs of snowflakes inside the ball.
As you can see, when it comes to personalizing your Christmas tree ornaments in a transparent ball, there are endless possibilities! Let your imagination guide you and make each decoration a unique expression of love and creativity! All personal touches you choose to add can bring even more smiles and cherished memories to your festive celebrations.
We hope that with this step-by-step tutorial and the provided tips and ideas for crafting, you will be inspired to create unique and personalized Christmas tree ornaments in a transparent ball. Let your creativity shine as you embark on this joyful journey of DIY magic, spreading holiday cheer and making cherished memories along the way!
| Daya (Daya) | Daya |
 I am a huge enthusiast of creating new handmade beauties, whether it is with beads, paper and pen, canvas and acrylic, or yarn. Every form of art or intricate crafting brings additional inspiration! If you are curious about what else we can make and craft with art and craft materials, stay tuned for updates in the blog and, of course, feel free to share your ideas!
| All articles on Daya |
Rate the article 5.00/5 from 3 grades. |
|
| You have already voted for the article | |
Recommended articles
 DECORATIONS FOR VALENTINE DAY
 OUR BEST SUMMER DECORATION IDEAS
 CHRISTMAS GIFT IDEAS WITH SENTIMENTAL VALUE
 THE JOURNEY OF AQUAMARINE THROUGH THE AGES
 0 Comments

| 0 |

| 0 |

| 0 |

|

| 0 |

|
 Subscribe ♥
SEARCH

|

|
Categories
 New
New


Recent Posts
IN THE WORLD OF QUILLING ART
THE MAGIC OF CREATIVE KITS
A HANDMADE BRACELET IS THE PERFECT GIFT FOR A FRIEND
WHAT SHOULD WE KNOW ABOUT JASPER PENDANTS?
3 TOP IDEAS FOR TEMPORARY WALL DECOR AT AN AFFORDABLE PRICE
WOODEN ELEMENTS A TIMELESS TREND FOR YOUR HOME
AMAZING WEDDING DAY CARDS
Recent comments
Dawn Sullivan за IN THE WORLD OF QUILLING ART
Laura за THE ULTIMATE GUIDE TO CLEANSING AND CHARGING GARNET
JER за Discover and Master the Art of 3D Pen Drawings - A Step-by-Step Guide for 2D and 3D Objects and Sculptures
november birthstone за Discover the Power of Your Birthstones by Month, Zodiac Sign and Day of the Week
